Have you ever sliced into a fresh piece of ginger and thought, “Hmm, I wonder if I could grow this myself?” You totally can! Growing ginger at home is easier than you might think, and it doesn’t take a green thumb to get started.
It doesn’t matter if you have a backyard garden or just a sunny windowsill. You can still enjoy your own supply of fresh, aromatic ginger year-round.
In this guide, I’ll walk you through everything you need to know, from picking the right rhizome to caring for your plant and harvesting the spicy goodness. Let’s dig in and grow some ginger together!
Jump to Section [Hide]
- Understanding Ginger Basics
- Selecting the Right Ginger Rhizome
- Choosing Where to Grow Ginger
- Preparing Soil and Containers
- Planting Ginger Step-by-Step
- Ginger Plant Care Essentials
- Managing Pests and Diseases
- Encouraging Healthy Growth
- Harvesting Ginger
- Storing and Preserving Your Harvest
- Regrowing and Propagation Tips
- Troubleshooting Common Issues
Understanding Ginger Basics
Ginger, scientifically called Zingiber officinale, is a tropical herb. It produces underground rhizomes that are often mistaken for roots. These knobby rhizomes are packed with flavor and nutrients.
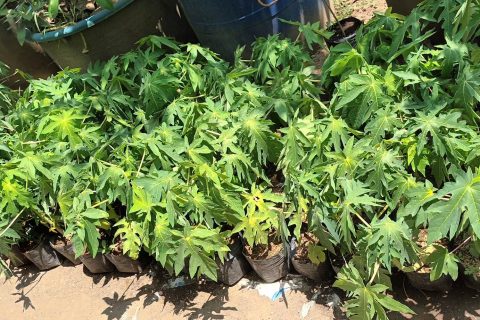
This plant grows up to 3–4 feet tall and about 1–2 feet wide. Its leaves resemble bamboo, while its pale yellow flowers have purple edges. As a perennial herb, it thrives in warm climates and adds beauty to gardens or homes.
Culinary, medicinal, and ornamental uses
You can use ginger in many ways. In the kitchen, it adds flavor to dishes such as soups and curries, as well as to beverages such as tea and ginger beer. Crystallized ginger makes a sweet treat or natural remedy for nausea relief, thanks to its gingerols.
Dried ginger is more pungent than fresh and works well in baking or as a powder for spicing up recipes.
It also provides health benefits. Its anti-inflammatory properties help soothe arthritis pain and reduce swelling. Some use it to ease nausea or upset stomachs, too. The leaves are handy for making tea, adding another layer of usefulness to your plant.
For decoration, its tall stalks with green foliage look great indoors or outside in gardens where greenery is needed!
Ideal climate and growing zones
Ginger thrives in warm, tropical climates. It grows best in USDA Zones 9–12, where temperatures stay above 55°F (12°C). Frost can kill ginger plants or damage rhizomes. In colder areas, grow it indoors or as an annual during the warmer months.
In Zones 8 and warmer, plant ginger outdoors after the last spring frost. For example, in Arizona’s low desert, March is a good time to start planting. Ginger needs about 10 months of warm weather for proper growth, making long growing seasons essential for success.
Selecting the Right Ginger Rhizome
Pick healthy, ready-to-grow ginger rhizomes. Check for firm pieces with small buds or “eyes” starting to sprout.
Choosing plump, firm rhizomes with visible eyes
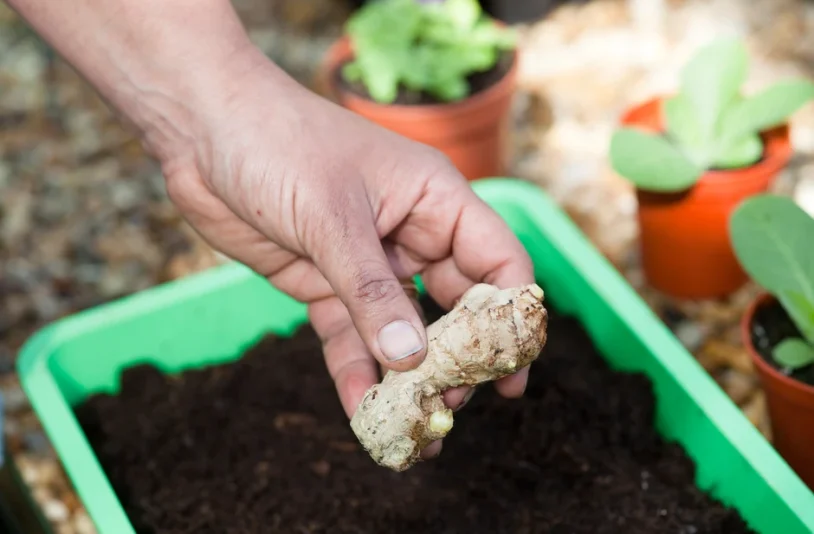
Select rhizomes that are plump and firm with no soft spots. Look for visible eyes or small buds, as these are the growing points. Each rhizome should be around 2–3 inches long with at least two or three nodules.
Avoid shriveled or dried-out pieces. Healthy rhizomes will feel slightly moist, not brittle. Large sections can be cut into smaller pieces before planting, but ensure each piece has a few growing eyes for the best results.
Organic vs store-bought rhizomes
Organic ginger rhizomes are a better choice for planting. They come free of chemicals and growth inhibitors, which helps them sprout faster. You can find these at specialty suppliers such as Fruition Seeds or at organic markets.
These rhizomes often produce healthier plants with stronger roots.
Store-bought ginger may work as well, but it requires extra care. Many store-bought rhizomes get treated with chemicals to stop sprouting during storage. Soak them in water overnight to remove any residue and encourage growth.
Look for firm, plump specimens with small buds or “eyes” visible on the surface before planting.
Preparing ginger for planting
Cut ginger roots into sections. Each piece should have at least one eye or bud. Use a clean knife to prevent the spread of disease. Allow the cut edges to dry for a day before planting to avoid rot.
Soak the rhizomes in warm water overnight. This helps hydrate them and encourages sprouting. For pre-sprouting, place the soaked roots in a draining tray with lightly moistened soil beneath and cover them with a plastic dome.
Use a heat mat set to 75-80°F to accelerate growth. Once you see small green shoots, they’re ready for planting!
Choosing Where to Grow Ginger
Pick a warm, humid spot with good drainage to help your ginger thrive. Learn how to find the perfect growing space!
Indoor vs. outdoor growing
Growing ginger indoors is most effective in cooler climates. Use containers with moist soil and place them near a sunny window. Keep the temperature warm, around 75°F, and maintain high humidity by misting the leaves.
Pre-sprout ginger indoors on heat mats for better results, planting it 2 inches deep.
Outdoor growing suits warm, frost-free climates. Ginger thrives as a perennial in these areas, allowing continuous harvests. Choose a shaded spot with rich, well-draining soil. Protect the plants from strong winds and heavy rain.
Transplant indoor ginger outdoors after the last frost for a head start.
Ideal temperature range and humidity
Keep ginger in temperatures above 60°F (16°C). The ideal range is around 75°F (24°C) for healthy growth. Anything below 55°F (12°C) can stress the plant and slow its development.
Heat helps ginger thrive, especially during sprouting indoors.
Humidity is also key. Ginger loves moist air to mimic tropical conditions. Use a humidifier or mist the plants regularly if your environment feels dry. This ensures strong, vibrant growth for both indoor and outdoor setups.
Choosing the best spot
Pick a location with warm, filtered sunlight if growing ginger indoors. Aim for at least 5 hours of light daily. When choosing outdoor areas, select partial-shade or full-sun locations that avoid intense midday heat.
In hot climates, plant where shade can protect the ginger during the hottest part of the day.
Ensure the spot has consistent humidity and temperatures between 68°F and 86°F. Avoid windy or cold areas, as ginger prefers warm, moist conditions. Using a hoop house or hothouse can help maintain ideal conditions in cooler regions.
Preparing Soil and Containers
Good soil is essential for healthy ginger plants. Use spacious containers and enrich the soil with compost or organic matter for better growth.
Soil requirements
Ginger needs well-draining soil rich in organic matter. A mix of equal parts topsoil, compost, and coarse sand works best. Add earthworm castings or organic fertilizers to boost fertility.
The soil should stay moist but never waterlogged. Mulch with straw or compost to retain moisture and gradually add nutrients. Aim for a pH range of 5.5 to 6.5 for healthy growth.
Ideal pH level
Ginger thrives in soil that is rich, full of organic matter, and well-draining. The pH level should be slightly acidic to neutral. Aim for a pH around 6.0 to 7.5 for healthy growth.
Test your soil before planting to ensure it meets these conditions. You can buy affordable test kits or use services at nearby plant nurseries. If the soil is too acidic, add lime powder to balance it.
For alkaline soils, add compost or peat moss to naturally lower pH. Using a potting mix blended with coconut coir and organic compost works great for container gardening, too!
Best containers
Choose a container that is at least 12 inches deep and wide. Ensure it has adequate drainage holes to prevent soggy soil. A large, wide pot works well for ginger plants, especially if you plan to grow them indoors.
Avoid small or shallow containers as they limit root growth. Use sturdy plastic pots or clay pots with proper drainage. These allow water to escape and keep the rhizomes healthy. For best results, pick a container that can hold loose potting soil mixed with compost or organic matter.
Adding compost or organic matter
Add compost or organic matter to enrich the soil. This improves drainage, increases nutrient availability, and keeps ginger plants healthy. Use well-decomposed compost or earthworm castings for the best results.
Ginger thrives in nutrient-rich soil, so make this a regular practice.
Feed your plants monthly during growth with organic liquid fertilizer. Apply compost at least once a month. These steps provide your ginger with steady nutrition, especially when the leaves are proliferating.
Healthy soil yields larger harvests and more robust plants.
Planting Ginger Step-by-Step
Cut the ginger rhizome into small pieces, plant them in rich soil, and water gently. This is where your ginger-growing journey begins!
Cutting rhizomes into chunks
- Choose ginger rhizomes that are firm and plump. Look for ones with visible “eyes,” or small bumps, as these will sprout into new shoots. Use a clean knife to cut the rhizome into pieces about 2–3 inches long. Each piece should have at least two to three eyes.
- Let the cut pieces dry for a day before planting. This step helps seal the cuts and reduces the risk of rot. Ginger chunks can now be grown indoors or outdoors with proper spacing between them.
- Place them about five inches apart in your pot or garden bed, keeping the buds facing up for best results.
Planting depth
- Plant ginger rhizomes 2 inches deep in moist, well-draining soil. Pre-sprouting works best when the rhizomes are covered with 1–2 inches of soil to promote early growth.
- Keep each piece spaced at least 6 to 8 inches apart. This gives the roots room to spread and grow healthy ginger plants. Compact or shallow planting may stunt growth, so stick to these depths for a successful harvest.
Proper spacing
- Space your ginger rhizomes 6–8 inches apart in the ground. This allows enough room for growth and prevents overcrowding. For square-foot gardening, plant up to 4 rhizomes per square foot. For outdoor trench planting, increase spacing to 8–12 inches to improve air circulation.
- Crowded rhizomes can lead to smaller harvests or disease issues. If using containers, choose a wide pot and maintain proper spacing inside it.
- Keep the soil loose around each rhizome to promote healthy root growth.
Initial watering tips
- Water the soil thoroughly after planting the ginger rhizome. This helps settle the soil and ensures good root contact. Always avoid letting water pool around your plant.
- Keep the soil moist but never soggy. Overwatering can cause rotting. Light misting or watering every few days is effective, especially when using a well-draining potting mix.
- Adjust based on household humidity or rainfall if growing outdoors.
Ginger Plant Care Essentials
Caring for ginger plants is simple with the right approach. Focus on consistent watering, adequate sunlight, and proper nutrition to help them thrive.
Watering routine
Water ginger regularly during its active growing phase. Keep the soil moist but never let it become soggy. Check the soil regularly by inserting your finger about 1 inch deep. Water only if it feels dry at that level.
Container-grown ginger dries out faster than ground-grown ginger. You may need to water it more often, especially in hot weather. As temperatures cool, reduce watering to avoid overwatering.
Moist, well-draining soil is key for healthy ginger plants.
Sunlight
Ginger grows well in part shade or full sun. It produces the exact yield in both conditions, providing flexibility. Place it outdoors where sunlight filters through other plants or trees for soft light.
Indoors, aim for at least 5 hours of filtered sunlight daily. Pick a spot near a bright window, but avoid direct, harsh rays to prevent leaf burn. Using grow lights can help if natural light is limited in your space.
Fertilizing
Apply organic fertilizers, such as liquid seaweed or fish emulsion, if your plants show poor growth. These boost nutrients and support ginger’s growth. Apply compost or earthworm castings to the soil monthly to maintain soil health.
Fertilize your plants three times during the growing period for optimal growth and development. Do this once when shoots first appear, again mid-season, and once more as they mature. This schedule supports steady growth and larger rhizomes at harvest.
Mulching
Spread 2 inches of straw or compost around your ginger plants after the sprouts grow a few inches tall. This layer keeps the soil moist and stops weeds from growing.
Mulch also protects the roots, especially in hot weather. Use organic mulches, such as straw or shredded leaves, for the best results. Keep the mulch slightly away from the stems to prevent rot.
Managing Pests and Diseases
Pests and diseases can slow down your ginger’s growth if left unchecked. Monitor the plants closely and act promptly to protect them from harm.
Common pests
Bacterial wilt and rhizome rot are two significant threats to ginger plants. Bacterial wilt blocks water flow in the plant, resulting in yellowing and drooping leaves. Rhizome rot, caused by Pythium species, makes rhizomes soft and mushy.
Inspect your ginger plants regularly for early signs of these issues. Avoid overwatering, as damp soil encourages these problems. Use well-draining soil and add compost to improve its structure.
If you notice infected plants, remove them immediately to stop the spread. Organic treatments, such as neem oil, can serve as a natural defense against pests and diseases.
Fungal issues
Fungal problems can harm ginger plants, especially in wet conditions. Rhizome rot, caused by Pythium species, is a common issue. It occurs when the soil remains waterlogged and poorly drained.
Soft, mushy rhizomes are one clear sign of this disease.
To prevent fungal infections, use well-drained soil with proper air circulation. Avoid overwatering your ginger plants and allow the topsoil to dry between waterings. Adding organic matter or compost can also improve drainage and keep roots healthy.
If you notice infected rhizomes, remove them immediately to stop the spread of rot.
Natural remedies and prevention
Hand-pull weeds around ginger plants to protect the rhizomes from damage. Always inspect your soil for pests, such as nematodes or aphids. Use neem oil as a natural insect deterrent without harming your plants.
Keep the area well-ventilated and avoid overwatering to prevent fungal issues, such as root rot. Add compost or organic matter to improve soil drainage. If you spot mold, sprinkle cinnamon powder on the affected areas; it naturally works against fungi.
Encouraging Healthy Growth
Keep your ginger plants thriving by providing proper care and attention. Minor adjustments can go a long way in boosting growth and ensuring strong, hearty rhizomes!
Pruning or thinning
Cut away yellow or dead leaves as soon as you spot them. This allows the ginger plant to focus its energy on healthy growth. Removing flowers is also advisable, as it encourages stronger rhizome development.
Thin out overcrowded plants by splitting or re-potting them if needed. Ginger plants can grow up to 4 feet tall, so give each one enough room to thrive. Proper thinning helps maintain airflow and reduces the chance of pests or diseases.
Removing flowers
Flowers take energy from the ginger plant. Cut them off as soon as they appear. This helps the plant focus on rhizome growth rather than seed production.
Use clean pruning shears to snip flowers near the base. Dispose of them to avoid pests. This small task boosts rhizome size and health.
Re-potting or splitting
Repot ginger annually for healthy growth. Gently lift the rhizome from its container or soil. Shake off any loose dirt, then check for overcrowding or damaged sections. Cut larger rhizomes into chunks, ensuring each piece has at least one “eye” or bud.
Split plants if you want to expand your patch. Place a fresh chunk into new containers with nutrient-rich soil and good drainage. Keep it moist but not soggy after planting. Container-grown ginger is easy to manage in this way and can continue producing for extended periods by regular cutting and replanting.
Harvesting Ginger
Harvest ginger when the plant’s leaves turn yellow. It’s a rewarding process you won’t want to miss!
Maturity time
Ginger takes about 10 months to mature fully. This long growing season ensures you get large, healthy rhizomes. After 3 to 4 months, you can harvest small pieces if needed, but the best results come with patience.
Leaves turning yellow and dying back are signs your ginger is ready. These changes occur toward the end of its growth cycle. To maximize growth, wait for this natural process before digging up the rhizomes.
Signs it’s ready
Leaves will turn yellow and start to die back. This is a clear sign your ginger is ready to harvest. In warmer zones, wait until the leaves have completely died before digging them up.
In cooler climates, harvest before frost sets in. Check the soil for firm rhizomes with thick skin once you notice these changes. Cutting or damaging them can reduce shelf life, so handle them carefully during harvesting.
How to harvest
Gently dig up the entire ginger plant using a garden fork. Loosen the soil around it first to make it easier to pull. Be careful not to damage any rhizomes during this step.
If you only need a portion, expose the base of the plant and cut off one finger-like rhizome piece. After cutting, cover the exposed area with soil again. Ginger usually matures after 8-10 months, but can be harvested earlier for milder flavors.
Handling tips
After harvesting, rinse the ginger well. Trim off the shoots and any large roots. Let the ginger dry completely before storing it to prevent mold.
Store unpeeled ginger in a reusable bag in your refrigerator. It can stay fresh for about one month.
Storing and Preserving Your Harvest
Keep your ginger fresh by curing it properly after harvest. Learn simple storage techniques to enjoy it for months.
Curing
After harvesting ginger, let it cure for a few days. Place the rhizomes in a dry, shaded spot with good airflow. This process toughens the skin and reduces moisture.
Curing helps protect your ginger during storage. Once cured, store fresh rhizomes in a paper bag inside your fridge crisper. Avoid plastic bags, as they trap moisture and accelerate spoilage.
Storage methods
Keep unpeeled ginger in a reusable bag in your fridge. It stays fresh for about one month. Always check it to make sure it hasn’t dried out or spoiled.
For more extended storage, freeze it. Place whole or peeled ginger in a reusable bag, and it will last up to six months. Grate or slice it directly from the freezer. If unpeeled, frozen ginger can remain usable for up to a year, making it ideal for cooking with or adding to teas and spices.
Using ginger leaves and stems
Ginger leaves are great for tea. Boil fresh leaves in water to make a soothing drink. Their mild, spicy flavor adds depth and warmth.
Use the leaves as a garnish or flavoring in dishes such as soups or curries. They add aroma without overpowering other ingredients. Ginger stems can be chopped and used in recipes like stir-fries for an extra zesty kick.
Regrowing and Propagation Tips
Keep a few healthy rhizomes, plant them at the right time, and watch your ginger patch grow bigger each year!
Saving rhizomes
Save sections of ginger rhizome with at least one visible bud for planting. Each of these “fingers” can grow into a whole new plant, producing a palm-sized “hand” in 8–10 months.
Store your rhizomes in a superb, dry location until you are ready to replant. Avoid moist or moldy storage spots. For longer preservation, consider freezing ginger pieces in airtight containers or bags.
Best time to replant
Begin replanting ginger in early spring. In cooler climates, start indoors by March to avoid frost damage. Keep the rhizomes warm and moist until sprouts appear.
Wait until outdoor temperatures stay above 50°F at night. Transplant outside around two weeks after the last frost. Sprouts should be about 2 inches tall for best results.
Expanding your ginger patch
Save a few healthy rhizome sections from your harvest. Look for pieces with multiple visible eyes and ensure they are firm. Each section can grow into a new plant, making expansion easy.
Plant these rhizomes in fresh soil enriched with compost or other organic matter. Space them properly, leaving at least 6 inches between pieces to allow for growth. With care, one harvest can yield up to 100 times the original amount over time!
Troubleshooting Common Issues
Yellow leaves or stunted growth can indicate potential issues. Discover how to resolve these issues and keep your ginger plant thriving!
Yellowing leaves
Yellowing leaves can point to overwatering or poor drainage. Check your soil for excess moisture. Ginger plants need well-draining soil, so add compost or sand if necessary. If grown in containers, make sure the pot has proper drainage holes.
Cold temperatures below 50°F (10°C) may also cause leaves to turn yellow and die off. This is normal as the plant enters dormancy or signals the onset of harvest. Move ginger indoors during colder months to keep it healthy and thriving.
Diagnosing problems
Poor growth signals trouble. Check your soil and plant care routine right away. Ginger plants often suffer from overwatering or poor drainage, leading to rhizome rot, a problem caused by Pythium species.
If your soil remains soggy, take action to improve drainage or reduce watering.
Yellowing leaves may indicate nutrient deficiencies or pest problems. Feed your ginger with organic fertilizer, such as liquid seaweed or fish emulsion, if needed. Inspect leaves for signs of mites or fungal spots, then treat with natural remedies, such as neem oil or homemade sprays, to prevent further damage.
Fixes for overwatering and drainage
Overwatering can cause rot in ginger plants. Use containers with drainage holes to allow excess water to drain. Check the soil before watering; it should feel slightly dry. Avoid keeping the soil soggy for long periods.
If drainage is poor, improve it by mixing in sand or perlite. A soilless medium can also work well. Add compost to boost nutrients while keeping the soil light. Keep your ginger plants in a spot where excess water won’t pool.
In Summary
Growing ginger is fun and rewarding. With the proper care, you can enjoy fresh, flavorful rhizomes at home. Keep your soil rich, water consistently, and watch it thrive. Whether indoors or outdoors, ginger adds beauty and value to your space.
Start planting today for a tasty harvest!