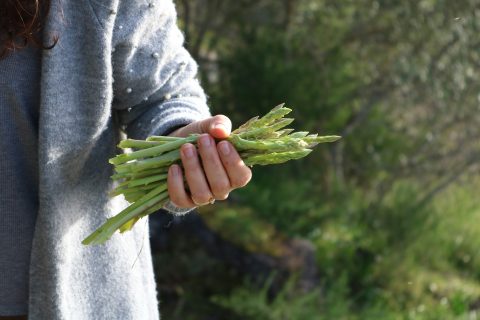
Microgreens are tiny, flavorful plants that are packed with a variety of vitamins and minerals, making them a nutritious and delicious addition to your daily meals. Not only do they enhance the taste of your dishes, but they also boost your nutrient intake.
This guide will teach you how to grow microgreens indoors with ease, even in limited spaces such as your kitchen countertop or a sunny windowsill. You’ll discover the best seeds to use, the ideal soil conditions, and simple care tips to ensure your microgreens thrive.
Continue reading to embark on your exciting journey of growing your own microgreens at home!
Jump to Section [Hide]
- Understanding Microgreens
- Getting Started: What You’ll Need
- Preparing Your Growing Area
- Step-by-Step Guide to Growing Microgreens
- Light, Water, and Airflow Essentials
- Harvesting Your Microgreens
- Common Mistakes and Troubleshooting Tips
- Pro Tips for Healthy, Flavorful Microgreens
- Reusing Trays and Mediums: What to Know
Understanding Microgreens
Microgreens are young plants packed with flavor and nutrients. They’re easy to grow and can add a fresh, healthy boost to your meals.
What are microgreens?
Microgreens are small plants rich in nutrients. You harvest them 7–21 days after sowing, just as their first leaves appear. They’re smaller than baby greens but bigger than sprouts.
These colorful seedlings offer rich flavors and vitamins, including Vitamin C.
They’re a single-use crop, meaning they don’t regrow after being cut. Unlike sprouts, microgreens have visible leaves and often offer a stronger taste and more nutrients. Examples of popular ones include broccoli microgreens, sunflower shoots, and alfalfa.
You can easily grow them indoors on your windowsill or in a hydroponic garden without using any soil.
Benefits of growing microgreens
Growing microgreens provides significant health benefits. They contain up to 40 times as many nutrients as mature vegetables. Rich in vitamins A, C, E, and K, they support immune function and overall well-being.
Broccoli sprouts are rich in sulforaphane, a compound that supports cancer prevention.
You can grow them indoors all year. This works well for winter gardening or small areas, such as a windowsill. In less space than a kitchen table, you can enjoy fresh greens weekly while reducing spending on groceries.
Including these nutrient-rich plants in your diet promotes both weight management and gut health.
Common types to grow at home
Radish and broccoli microgreens are perfect for beginners. Radish seeds germinate in 1-2 days, while broccoli seeds take about the same amount of time. Broccoli microgreens are rich in sulforaphane, which is excellent for health.
Arugula offers a spicy flavor and germinates in 5 days; you can harvest it within another week.
Sunflower microgreens need soil to sprout, and soaking the seeds (8–12 hours) helps. Pea shoots also love soaking before planting. For small trays (4×4 inches), use 1/4–1/2 cup of seeds with around 1/4-inch spacing between them.
These options proliferate on windowsills or under grow lights at home!
Getting Started: What You’ll Need
To grow microgreens, you need the right tools and materials. A simple setup can work wonders for beginners!
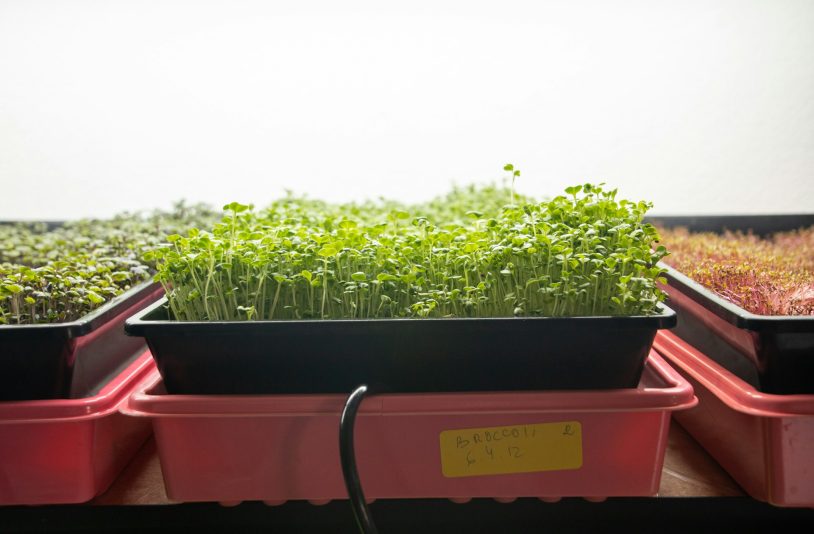
Best containers for microgreens
Plastic food containers work great for microgreens. You can also use clear plastic salad boxes or glass jars. These are inexpensive, readily available, and ideal for indoor gardening. A standard tray size for microgreens is 10″x20″.
This size fits most shelves and provides sufficient space for healthy growth.
Trays with holes help with drainage. Trays without holes are useful for bottom watering. Both types can be stacked or placed on shelves for easy use. If you have ample space, consider a metal baker’s rack.
It can hold multiple trays and supports higher yields. Rotate your trays every few days for even sunlight exposure.
Choosing a growing medium: soil, coconut coir, or hydroponic mats
Select a suitable growing medium based on your specific needs and the type of microgreens you wish to grow. Soil works great for most microgreens. Use potting soil or seedling mix that retains moisture without becoming waterlogged.
Avoid using fertilizers, as they can cause rot. Sunflower microgreens prefer soil for better germination.
Coconut coir is another option. It is a natural, fibrous material made from coconut husks. It retains water well and works for smaller greens, but some coir mixes may contain salt.
Check the packaging before buying. Hydroponic mats, made from hemp, jute, or similar fibers, are perfect for a clean setup. These mats retain water and nutrients, allowing you to grow microgreens without soil.
Avoid reusing old soil or mats to prevent mold or pathogen growth. Compost the spent soil and roots to recycle nutrients for future crops.
Selecting high-quality seeds
Select organic and non-GMO seeds for optimal results. These are safer, free from harmful chemicals, and promote sustainable gardening. Use 1/4 to 1/2 cup of seeds for a 4×4-inch spot, or follow specific guidelines, such as 10g of broccoli or 22g of radish per 10″x20″ tray.
Soak seeds before planting to boost germination rates. Small seeds require about 6–8 hours of soaking in water, while sunflower and pea seeds benefit from soaking for up to 12 hours. Seeds like broccoli sprout quickly in just 1 to 2 days, while arugula may take 5 days.
Always aim for even coverage, with about a quarter-inch spacing between seeds.
Optional tools: spray bottle, grow lights, humidity dome
A spray bottle is a must-have. It keeps seeds and soil moist without overwatering. Daily misting helps seeds germinate evenly. Bottom watering with a pitcher also works well, but misting prevents disturbing tiny seeds.
Grow lights are helpful if your microgreens don’t get enough sunlight. Full-spectrum lights with 460 nm blue and 660 nm red wavelengths are most effective. Use a light timer to maintain consistent cycles.
Humidity domes are ideal for the first few days, as they trap moisture and accelerate germination. Remove them once sprouts appear to prevent mold growth.
Preparing Your Growing Area
Set up a clean, well-lit area for your microgreens. A clutter-free, organized space helps seeds thrive.
Finding the right location
Select a sunny spot near a window that receives at least 6 hours of sunlight daily. If sunlight is limited, use grow lights or UV lights to help your microgreens thrive. A south-facing windowsill works well for most climates, especially in winter.
Avoid areas with poor airflow or high humidity, as these conditions can promote mold growth. Kitchens or rooms with good ventilation are ideal. Rotate trays every few days to ensure even light exposure and healthy development.
If you live in an apartment or city, your countertop or small shelf can also serve as a perfect home gardening setup.
Sanitizing trays and workspace
Clean trays with a mixture of hydrogen peroxide and vinegar, or with 5% acetic acid. These work well to kill germs and mold. Skip bleach, as it is harmful to plants, humans, and the environment.
Wipe your workspace with warm, soapy water before each use. This removes dirt or bacteria. Dry surfaces completely to prevent moisture from fostering the growth of fungus or mold on your supplies. Always start fresh for healthy microgreens!
Step-by-Step Guide to Growing Microgreens
Growing microgreens is rewarding and straightforward. Follow these steps to enjoy fresh, nutritious greens at home.
Step 1: Prepare your tray and growing medium
Use a clean tray with drainage holes to prevent water buildup. A 10″x20″ tray works well for most microgreens. Wash it with soap and hot water, then dry it thoroughly.
Fill the tray with a growing medium, such as seedling mix or organic potting soil. Avoid fertilizers as they can cause rot. Press the soil down gently to create an even surface, leaving about half an inch between the top edge and the soil.
For extra moisture control, sprinkle a thin layer of fine vermiculite on top if desired.
Step 2: Sow seeds evenly across the surface
Spread your seeds gently to achieve even distribution. For a 4×4-inch area, use 1/4 to 1/2 cup of seeds. Maintain about 1/4-inch spacing between small seeds, such as broccoli or radish. Larger seeds, such as peas or sunflowers, should be soaked for 8–12 hours beforehand to speed sprouting.
For a 10×20-inch tray, sow 10g of broccoli, 9g of kale, 22g of radish, or 350g of soaked peas.
Avoid overcrowding, as it can lead to mold. Sprinkle seeds uniformly over the surface of your chosen growing medium. This could be soil, coconut coir, or hydroponic mats. Once spread, softly press the seeds into the surface without burying them too deep.
Step 3: Mist with water and cover for germination
Lightly spray the seeds and soil surface with water using a spray bottle. Keep the soil moist, but avoid overwatering. Fine vermiculite helps retain moisture and enhances germination success.
Cover your tray with a humidity dome or plastic wrap to trap warmth and moisture. This creates an ideal environment for sprouted seeds to proliferate, often within 1–5 days, depending on the microgreen variety.
To improve airflow, open windows once or twice daily during this phase.
Step 4: Allow 2–4 days of darkness (blackout period)
Cover the trays with a lid or opaque material to block out light. This blackout period should last 2–4 days, depending on the type of seed and your environment.
Darkness helps seeds grow strong roots and ensures even sprouting. Check daily for fuzzy white hairs on roots; these are root hairs, not mold. Keep them in total darkness for at least 6 hours per day during this phase to support healthy growth.
Step 5: Move to light and continue daily misting
Place the tray in a bright spot with 6–10 hours of sunlight daily. Use a grow light if natural light isn’t enough, and ensure it’s full-spectrum with blue (460 nm) and red (660 nm) wavelengths for optimal growth.
Mist the microgreens each day to keep them moist, but avoid overwatering. Rotate the trays every few days to provide all plants with equal light exposure. This helps prevent uneven growth and keeps your greens healthier.
Step 6: Monitor growth and manage mold or overcrowding
Check your microgreens daily for any signs of mold. Mold appears as a white fuzz and spreads rapidly. Improve air circulation by opening windows or using a small fan. This keeps the area dry and reduces the risk of mold.
Use water from below whenever possible to avoid adding excessive moisture to the surface.
Spread seeds thinly during planting to prevent overcrowding, which can weaken plants and encourage disease. If you see clumps of sprouts, gently separate them or remove some to make space.
Always clean trays after each use with vinegar or ZeroTol, as old soil can harbor pathogens that can harm your crops. Remove any tray with persistent mold immediately to protect the nearby greens.
Light, Water, and Airflow Essentials
Healthy microgreens need the right mix of light, water, and fresh air. Manage these well, and your greens will grow strong and tasty!
Natural light vs grow lights
Microgreens need 6-10 hours of light each day. A sunny windowsill works well, but growth may slow to two weeks in colder areas during the winter months. Rotating trays every few days ensures even light exposure and prevents leggy growth.
Grow lights can replace or supplement natural light, especially indoors. Full-spectrum lights with 460 nm blue and 660 nm red wavelengths are ideal for growing microgreens. Light timers help maintain consistent exposure without daily monitoring.
Broccoli microgreens, for example, can be grown in five days with proper lighting under summer conditions.
Ideal watering schedule
Water microgreens daily using a spray bottle. Keep the soil moist, but avoid overwatering. During germination, mist seeds and the soil surface to maintain proper moisture. Using fine vermiculite on top can help retain water while preventing excess dampness.
Bottom watering is most effective at preventing mold growth. Check the weight of your tray to know if watering is needed. Use tools like pitchers or measuring cups for accuracy. Open windows once or twice a day for better airflow, which helps prevent rot and disease in your greens.
Importance of airflow
Good airflow keeps your microgreens healthy. Poor circulation leads to mold, which can ruin your crop. Open windows 1–2 times daily, or use a small fan near the trays to increase air circulation.
Fans also help strengthen the stems, making the greens sturdier.
Overcrowding limits airflow and increases risks of disease. Spread seeds evenly and avoid placing trays too close together. Rotate trays every few days for balanced exposure to light and fresh air.
Clean and disinfect trays regularly to prevent the spread of harmful pathogens in stagnant conditions.
Harvesting Your Microgreens
Harvest your microgreens when they’re vibrant and about 2–3 inches tall—snip them gently, and get ready to enjoy their fresh taste!
How to know when they’re ready
Microgreens are ready when they reach 2–4 inches in height. This typically occurs 7–21 days after sowing, depending on the variety. Broccoli might grow in just five days during summer but take up to ten days in colder months.
Look for the first true leaves, not just seed leaves, as a sign they’re mature.
Pick them at their freshest for the best flavor and nutrition. They don’t regrow after cutting, so harvest all you need now or store extras in the fridge for up to 12 days. Aim to cut at peak freshness to maximize their health benefits and taste!
Best techniques for harvesting
Use clean scissors to cut microgreens just above the soil line. Avoid disturbing the roots and soil to keep the harvest clean and intact. Harvest in the morning, when the greens are fresh and dry, and avoid watering immediately before cutting.
This helps prevent sogginess.
Cut only what you need to keep others fresh. Compost the leftover soil and roots after harvesting to recycle nutrients. Clean and disinfect trays immediately to prevent mold and bacteria from developing before your next crop.
Rinsing, drying, and storing your greens
Wash your microgreens gently with cold water to remove soil, debris, or any pests. Hold them under running water or swish them in a bowl of clean water. Avoid bruising the greens by handling them lightly.
Pat the greens dry using paper towels or a salad spinner. Ensure they are completely dry before storing. Place the dried microgreens loosely in an airtight container, such as a plastic tub or storage bag, to prevent crushing.
Keep the container in your fridge for up to 7 days. Storing wet microgreens can cause spoilage, so always check for moisture before sealing the lid.
Common Mistakes and Troubleshooting Tips
Growing microgreens can be tricky if you’re new to it. Discover how to resolve common issues and cultivate healthier, tastier greens.
Overwatering or underwatering
Too much water causes rot and mold. Keep the soil moist, not soggy. Bottom watering is more effective than pouring water on top. It prevents wet surfaces that encourage mold growth.
Daily watering is essential, but avoid allowing the soil to dry out completely. Use a spray bottle to apply a gentle mist during germination. Check the tray weight to know if it needs more water. Adding fine vermiculite helps retain moisture without overwatering your microgreens.
Poor germination
Poor germination happens if the seeds are old or expired. Always use high-quality, organic, non-GMO seeds for better results. Soak the seeds for 6–8 hours before planting to speed up sprouting.
For peas or sunflower sprouts, extend the soak to 8–12 hours.
Keep the growing medium moist during germination, but avoid overwatering to prevent root rot. Use a humidity dome or cover your tray early to retain moisture. Sprinkle the seeds evenly across the surface, leaving about 1/4 inch between seeds.
Follow a proper blackout period of 2–4 days to support strong, healthy growth.
Mold growth
Mold can ruin your microgreens. It thrives in overwatered, overcrowded conditions with poor airflow. Use a fan or open windows to improve air circulation. Bottom watering is more effective than top spraying—it keeps the surface dry and less appealing to mold.
Always clean your trays after each crop cycle. Use ZeroTol or 5% acetic acid vinegar for sanitizing, but skip bleach as it’s harmful to plants and people. Avoid reusing old soil, mats, or any medium that may carry pathogens.
If you see fuzzy white strands near roots during germination, don’t panic; these are root hairs, not mold. Remove trays with visible mold immediately to prevent further spread in your nursery setup.
Leggy microgreens
Leggy microgreens grow tall and weak due to low light. Provide them with 6–10 hours of sunlight daily, or use full-spectrum grow lights that emit blue (460 nm) and red (660 nm) wavelengths. Place the trays near windowsills, in greenhouses, or under quality lighting setups for steady growth.
Spread seeds evenly to avoid overcrowding. Overlapping seeds force plants to compete, leading to thin stems. Rotate the trays every few days to ensure even light exposure on all sides. Add fans nearby to strengthen stems, improve airflow, and reduce the risk of mold.
Pro Tips for Healthy, Flavorful Microgreens
Boost flavor by soaking organic seeds before planting, and use fans to keep them strong.
Soaking seeds
Soak seeds for 6 to 8 hours before planting. This speeds up the sprouting process and yields faster results. Large or hard-coated seeds, such as sunflower and pea seeds, typically require 8 to 12 hours of soaking.
Use a clean container filled with fresh water for best results.
After soaking, drain and rinse the seeds well. Spread them evenly on your growing medium for better germination. Avoid soaking small or delicate seeds, such as arugula, for too long, as this can damage them.
Soaking helps create even growth and healthier microgreens.
Using fans to strengthen growth
Place a small fan near your microgreens to improve airflow. Good airflow reduces mold, keeps leaves dry, and strengthens stems. Use the fan on low to prevent the growing medium from drying out too quickly.
Run the fan 1–2 hours daily during peak growth times. Keep it at a safe distance from trays to prevent water loss or soil cracking. Open windows with fans to improve air circulation around your greens.
Check the humidity regularly to ensure a proper balance for healthy plants.
Rotating trays for even exposure
Turning your trays daily helps microgreens grow evenly. It ensures each side receives the same amount of light from a grow lamp. This prevents seedlings from becoming leggy, a condition in which plants stretch toward a single light source.
Rotating also helps balance moisture throughout the growing medium. Without it, some parts may stay too wet while others dry out. Doing this simple step keeps your greens healthy and strong, improving their nutritional value and taste.
Reusing Trays and Mediums: What to Know
Reusing trays and growing mediums can save money and reduce waste. Clean them thoroughly to prevent pests, mold, and any remaining residue.
Can you reuse soil or mats?
You can’t reuse soil for microgreens. Used soil loses nutrients and may harbor pathogens, leading to poor growth or mold. Always start with fresh potting mix or organic gardening soil to ensure healthy plants.
Compost the spent soil and roots instead, which is more sustainable.
Mats or hydroponic pads, such as coconut coir mats, are more challenging to use. Reusing them is possible, but not ideal. Residue buildup and possible contamination can harm new sprouts. It’s better to use a new mat for each planting.
Always rinse planting trays with warm water and soap before reusing them to ensure they are clean and ready for use. This keeps your greens safe and healthy.
Proper cleaning and sterilization
Clean trays and containers before use to avoid contamination. Use food-safe trays with drainage holes to prevent excess moisture from accumulating. Wash them in warm, soapy water first, then rinse well with clean water.
Disinfect using a diluted bleach solution or a commercial cleaner. Mix one tablespoon of bleach with one gallon of water to create a safe cleaning solution. After applying the solution, rinse again thoroughly.
Always clean and sanitize tools, such as scissors and spray bottles, after each use. Establishing this routine helps keep your microgreens healthy and free of mold and bacteria.
In Summary
Growing microgreens is a fun, easy, and rewarding experience. You can enjoy fresh, healthy greens year-round with minimal effort. They fit perfectly in small spaces, even a windowsill. With their rich nutrients and quick growth, they’re a great addition to your healthy diet.
Start growing today, and bring a bit of green to your home!