Grapevines are resilient, attractive, and highly productive once they are established. With proper care, a single vine can yield fruit for decades!
In this guide, we will cover everything you need to know—from selecting the right grape varieties to planting, caring for, and harvesting them.
Let’s dig in and get those vines growing!
Jump to Section [Hide]
- Understanding Grape Types
- Step-by-Step Guide to Planting Grapes
- Container Growing: Grapes in Pots
- Watering and Mulching
- Fertilizing Grapevines
- Pruning and Training Grapes
- Managing Pests and Diseases
- Troubleshooting Common Grape Problems
- Winter Care and Long-Term Maintenance
- Harvesting Your Grapes
- Benefits of Growing Grapes at Home
Understanding Grape Types
Grapes come in many varieties, each with its unique uses and characteristics. Knowing their differences helps you pick the best ones for your garden or goals.
Table grapes vs. wine grapes
Table grapes are sweet, juicy, and often seedless. They are perfect for fresh eating or making raisins. Popular varieties include Thompson Seedless and Concord Grapes. These plants require winter protection in colder areas, such as northern regions.
Wine grapes have thicker skins and more seeds than other types of grapes. They also contain higher sugar and acidity levels for winemaking. Examples like Frontenac Gris and Marquette ripen well in cooler climates.
Wine grapevines require pruning to leave fewer buds, typically around 20–30 per vine, whereas table grapes require 40–60 buds for optimal yield.
Seeded vs. seedless varieties
Seedless grapes are great for eating fresh and need some care in colder areas. They often struggle in the northern United States without winter protection. Mars, Petite Jewel, and Somerset Seedless are good options for cold climates.
Somerset Seedless is the hardiest type, surviving harsh winters. Mars produces sweet blue Concord-like fruit, while Petite Jewel offers red grapes with a spicy taste, but can be tricky to grow.
Seeded varieties handle cold better than seedless ones. These types have stronger vines that thrive in harsh conditions. If you live in an area where temperatures drop significantly, seeded grapes may be the better choice for long-term success.
Both types need proper support systems and regular pruning to stay healthy and productive during their growing season.
Popular grape cultivars for different climates
Bluebell grapes thrive in colder climates, surviving zones 3 and 4. These blueberries ripen in mid-September and are ideal for making juice or jelly. Edelweiss suits similar zones, with yellow-green fruit ready by late August to early September.
It’s best for fresh eating.
Frontenac grows well in zones 4 and 3. This small blue grape is perfect for wine production, ripening between late September and early October. Concord grapes are hardy too, offering a classic choice for juice, jelly, pies, or wine.
They resist pests like phylloxera and handle chilly weather easily.
Step-by-Step Guide to Planting Grapes
Growing grapes starts with good preparation. Follow these steps to give your vines the best chance to thrive.
Step 1: Choose Your Grape Variety
Select a grape variety that suits your needs and climate. For cold areas, choose winter-hardy varieties such as Concord or Frontenac. These plants thrive in zones 3–4 and are resistant to freezing temperatures.
If you’re in zone 7a or warmer, European grapes like Cabernet Sauvignon or Pinot Noir thrive in the long, warm summers.
For fresh eating, Mars or Somerset Seedless are great seedless options for northern regions. Swenson Red and Edelweiss also work well for juice-making. French hybrids, such as Vidal Blanc, combine disease resistance with the ability to withstand colder weather.
Always match the grape type to your purpose: wines, arbors, fresh fruit, or juices.
Step 2: Pick the Right Spot
Choose a spot with full sun. Grapes need at least 6 hours of sunlight daily to ripen fully. Avoid low areas where frost collects, as this can harm vines during bud break.
Select a site with good air circulation to help prevent diseases such as powdery mildew or black rot. North-facing slopes work well in spring frost-prone regions, while south-facing slopes help grapes ripen earlier.
Avoid areas treated with herbicides such as dicamba or 2,4-D, as these can easily damage grapevines. Install a trellis system before planting for proper vine support and growth direction.
Step 3: Prepare the Soil
Test your soil before planting. Grapes thrive in well-drained soil with a pH around 6.5. Check for potassium and other nutrients during the test.
Add compost to improve the organic matter and loosen the soil for deep root growth. Clear out any weeds, as they compete with grapevines for warmth and nutrients. Make sure the soil is dry but workable, not soggy or waterlogged.
Avoid adding mulch near the base; grapes prefer warm, well-drained soil to grow strong roots.
Step 4: Soak Bare-Root Vines (If Applicable)
Soak bare-root grapevines in cool water for 3 to 4 hours, or leave them overnight before planting. This simple step rehydrates the roots, helping them establish better in the soil.
Keep them moist and out of direct sunlight until you’re ready to plant.
Trim off broken or super-long roots with clean shears. Remove all but the strongest cane from each vine. Ensure you buy disease-free vines from trusted nurseries for healthy growth.
Step 5: Dig the Planting Hole
Dig a hole at least 12 inches deep and wide. Make it 2–3 times as wide as the root system to help roots spread more easily. Avoid compacting the soil at the bottom, as this can block water drainage.
Before planting, trim any broken or long roots. Position the vine so its lowest bud sits 2–3 inches above ground level. Mix compost with native soil when backfilling to provide nutrients, but avoid leaving air pockets.
Step 6: Plant the Vine
Place the vine in the hole with its lowest bud just above the soil. Spread out the roots gently to avoid crowding. Cover them completely with soil, patting it down lightly to remove air pockets.
For potted grapevines, position the root ball at or slightly above ground level. Remove all but one strong cane for better growth. Space American hybrids 8 feet apart and European types 6 feet apart.
Step 7: Water Thoroughly
Give your grapevines a deep soak right after planting. Use approximately 5 gallons of water to cover a 3 x 3 ft area, as this equals approximately 1 inch of water. Keep the soil moist but not overly wet to help the roots establish.
Water young vines every week during their first year. Aim for 1/2 to 1 inch of water per week, depending on rainfall. For potted grapes, check daily for dryness and avoid wetting the leaves to prevent diseases like downy mildew.
Reduce watering in fall to prepare vines for winter dormancy.
Step 8: Mulch Around the Base (Optional)
Spread a thin layer of mulch around the vine if needed. Use materials such as straw, wood chips, or dry leaves to suppress weeds for the first few years. Keep the mulch at least 6 inches away from the base of your grapevine to prevent roots from staying too cool.
Avoid heavy mulches that hold water for too long, as this can harm vines. Warm soil helps grapes grow more effectively, particularly during budburst and fruiting. Mulching works best for table grapes but is less familiar with wine varieties.
If you weed regularly by hoeing, you may be able to skip mulching entirely.
Step 9: Install Support
Use a sturdy trellis system to support your grape vines. Select options such as arbors, posts, or fences based on your specific setup. Wired trellises are best suited for promoting air circulation and healthier fruit clusters.
Use galvanized wire sizes 9, 10, or 11 for durability.
Install the structure before planting or immediately after. Commercial trellises typically stand about 5–6 feet tall, with wires stretched between posts set 7–8 feet apart and buried at least 2 feet deep.
Secure the ends to keep everything in place as your vines grow stronger over time.
Step 10: Initial Pruning
Prune the vine to just 2–3 buds at the top after planting. This helps focus its energy on root and vine growth. During the first season, let only one or two main canes develop fully.
Tie the strongest cane to a stake or trellis for support. Afterward, trim off any weak growth around it. At the end of year one, cut back the top of that cane. This forces lateral branches to grow during the second season.
Avoid allowing fruit to form at this stage, so that roots and vines can become stronger for future harvests.
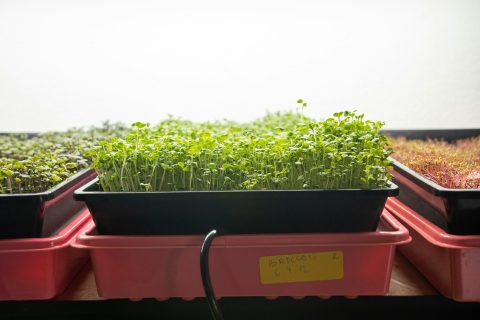
Container Growing: Grapes in Pots
Growing grapes in pots is perfect if you have limited space or want a mobile vineyard. Choose the right grape variety and pot to get started on your home garden adventure!
Best grape varieties for containers
Select winter-hardy and disease-resistant grape varieties for container gardening. Somerset Seedless is an excellent option for cold climates, offering sweet, seedless grapes. Mars produces juicy blue grapes similar to Concord, and they thrive in pots.
Swenson Red and Edelweiss also perform well in colder regions.
Petite Jewel produces red, fruity-flavored grapes with a hint of spice, but can be challenging to grow in containers. Seedless types need extra winter protection. Focus on reliable options like Vitis labrusca or its hybrids, which adapt well to compact spaces and potted environments.
Choosing the right pot size
Select a pot at least 12 inches deep and wide to provide grapevine roots with sufficient room. Their roots can grow up to 36 inches deep, so a deeper container promotes healthy growth. Use larger pots as the vine matures to avoid root-bound plants and the need for constant watering.
Ensure your pot has drainage holes to prevent waterlogging. Heavy containers work best, as they add stability when using trellis systems for support. Match the pot size with your grape variety’s mature size for ideal results.
Soil mix and drainage tips
Use a well-draining potting mix made for fruiting vines. Avoid heavy or dense soils that trap water, as this can lead to root rot. Adding compost improves soil quality and helps the soil remain loose.
Aim for a pH level between 5.5 and 7.0 for healthy growth.
Ensure water drains freely from the bottom holes of your container. Too much moisture can quickly harm grape roots, so avoid overwatering. Avoid using mulch in containers, as it can cool the soil excessively, especially during colder months.
Check the soil moisture regularly to maintain a balanced level without allowing the roots to dry out completely.
Trellis options
Vertical trellises work well for container grapes. They save space and help vines grow upward. Fan-shaped trellising systems are another great option. These spread the vine outward, allowing it to receive more sunlight.
Secure your trellis firmly in the pot to keep it from tipping over. Use materials like galvanized wire or wooden stakes, as they can support mature grapevines and heavy fruit clusters.
Prune regularly to prevent overcrowding and maintain manageable pot sizes for winter moving.
Watering and Mulching
Keep your vines hydrated and protected with proper watering and a mulch layer.
Watering schedule
Young grapevines need ½–1 inch of water each week during the first year. Water right after planting to settle the soil around the roots. Focus on watering the root zone only, not the leaves or vines.
Potted grapevines require daily checks, as they tend to dry out more quickly than those grown in the ground. Older vines typically manage well without much water but may need extra attention in sandy soil or during droughts. Reduce watering in the fall to help your plants harden for winter weather.
Signs of overwatering or underwatering
Overwatered grapevines often have yellow leaves and weak roots. Soil that stays soggy can cause root rot or fungal diseases. This harms the vine’s health and lowers fruit quality. Potted vines are more vulnerable, so check their soil often.
Underwatered plants may show dry, wilted leaves that drop easily. Cracked soil is another clear indication of insufficient water. If watering is not fixed, the plant’s vigor will decline, leading to poor fruit set or small grape clusters.
Adjust your watering schedule based on weather conditions and soil type to ensure healthy vines.
Mulching benefits
Mulching can help control weeds around your young vines. It prevents unwanted plants from competing for nutrients and water in the soil. Mulch also helps retain moisture, so you won’t need to water as often.
Avoid placing mulch directly at the vine’s base. Grape roots prefer warm soil, and too much mulch can keep the soil too cold for too long after winter. Use a light layer if needed for weed control but remove it by late spring to let the ground heat up faster.
Heavy organic mulches that retain moisture are not ideal, as they may harm grapevines over time.
Fertilizing Grapevines
Feed your vines to keep them healthy and productive. Select the ideal fertilizer for robust growth and superior fruit.
When and how to fertilize
Apply fertilizer in early spring before new growth starts. Use a balanced 10-10-10 fertilizer once a year, beginning in the second year. Avoid fertilizing at planting to prevent stressing young vines.
Spread compost around the root zone during the first two to three years for extra nutrients. Keep fertilizers away from the base of the vine to avoid burns. Excessive nitrogen can harm fruit quality; adjust applications based on soil tests for optimal results.
Organic vs. synthetic options
Compost works great for new grapevines. It adds nutrients slowly and improves soil health. Organic amendments, such as compost, also boost soil microbial activity. They help your vines grow strong over time.
Synthetic fertilizers, such as 10-10-10, provide quick results once vines are established. These options can deliver nutrients quickly and precisely, but don’t improve soil structure. Always keep both organic and synthetic fertilizers away from the base of your vines to prevent damage.
Skip manure-based mulches as they might cool the soil too much for proper vine growth.
Avoiding over-fertilization
Too much fertilizer can cause grapevines to grow too many leaves and fewer fruits. Excess nitrogen often leads to poor fruit set and weak-quality grapes.
Follow soil test results carefully before adding nutrients. If vines appear overly lush but don’t produce, reduce fertilizer. Over-fed vines are also more likely to attract pests and diseases, such as phomopsis cane or leaf spot.
Apply only what is necessary to maintain balanced growth for optimal yield and healthy plants.
Pruning and Training Grapes
Pruning shapes your grapevines, keeping them healthy and productive. Proper training guides growth and boosts fruit quality.
Importance of pruning
Pruning keeps grapevines healthy and productive. It removes 80–90% of new growth each year, ensuring vines don’t get too large. Grapes only grow on one-year-old wood, so cutting old or excess branches helps produce better fruit.
Heavy pruning improves fruit quality, whereas lighter cuts may yield more grapes of lower quality.
Good pruning also controls vine size and supports their shape on trellises or pergolas. This increases airflow and sun exposure, reducing the risks of diseases such as botrytis bunch rot or phomopsis cane and leaf spot.
Without proper care, vines become overgrown, resulting in smaller yields and lower-quality grapes over time.
Winter and summer pruning
Winter pruning is done on dormant plants between December and March, before bud break. Cut off old wood to shape the grapevine for new shoots. Significant cuts during dormancy prevent sap bleeding and keep vines healthy.
If winter cold damages branches, prune back to healthy wood. Remove weak canes, leaving only strong buds on fruiting canes or spurs.
Summer pruning focuses on managing growth while grapes are ripening. Trim vigorous shoots, suckers, and side branches to allow sunlight and air into the canopy. This improves fruit color and helps prevent diseases such as botrytis fruit rot.
Excessive shading blocks fruit ripening, so removing excess leaves helps grapes ripen faster!
Cane vs. spur pruning
Cane pruning removes most old wood, leaving a few long canes with 8 to 15 buds each. This method works well for table grapes and juice varieties, such as muscadine grapes. It helps new shoots thrive during the season.
Cane pruning is also ideal for vines trained on systems without permanent cordons.
Spur pruning involves removing short spurs with 1 or 2 buds along the central cordon of the vine. Wine grapes, such as Cabernet Franc or Chardonnay, often benefit from this approach. Spur pruning simplifies annual care and aligns well with established vineyards that utilize horizontal training systems.
Choose your method based on the grape variety and the training method used for your vines.
Managing suckers and side shoots
Rub off shoots on the lower trunk from April through June. This helps direct energy to healthy canes that will produce fruit. Suckers steal nutrients from fruiting wood, so remove them early and often.
Unwanted side shoots can be pinched back during the season. This helps maintain the canopy size and enhances air circulation. A weed-free area under the vines reduces sucker formation too, especially in young plants.
Regular care makes vines stronger and more resistant to diseases such as black spot and fungal issues.
Managing Pests and Diseases
Pests and diseases can quickly harm your grapevines. Keep an eye out for insects like Japanese beetles or fungal problems that spread in damp weather.
Common pests
Japanese beetles often attack grape leaves from late June to August. They leave behind “lacework” holes, damaging the plant’s ability to photosynthesize. Deer and raccoons can also become nuisances by feeding on your grapes.
Building a sturdy fence may deter them.
Grapevine flea beetles target buds and cause severe damage if over 4% of buds are affected. Spotted wing drosophila infest ripening fruit and should be reported to agriculture departments if detected.
Spotted lanternflies are invasive pests that require chemical controls, so report sightings immediately. Yellow jackets and Asian lady beetles also harm grapes near harvest time.
Common diseases
Powdery mildew leaves a white powder on vines, leaves, and fruit. It stunts growth and causes poor grape coloring. Black rot hits between bloom time and six weeks after. It turns berries light brown, adds black spots, and then mummifies them.
Downy mildew thrives in high humidity. Brown lesions appear as leaves curl or drop off completely. Botrytis bunch rot quickly spreads through ripening grapes during humid weather. Phomopsis creates oblong black marks on canes and fruits; anthracnose forms holes in berries and gives leaves brown spots called shot-hole lesions.
Sour rot ruins clusters close to harvest season by rotting grapes entirely!
Organic pest control
Maintain your grapevines’ health with organic pest control methods. Check for Japanese beetles twice a week and remove them by hand, dropping them into soapy water. Use dormant horticultural oil in early spring to protect against pests, such as mites.
Copper fungicide helps prevent diseases naturally.
Cover crops can attract beneficial insects that prey on harmful ones. Bird netting keeps birds from stealing your grapes without using chemicals. Mulch reduces weeds under the vines, but avoid overusing it to keep the soil warm enough for growth.
Physical barriers
Netting works great to protect ripening grapes from birds. Lightweight and simple to use, it keeps your fruit safe without harming wildlife.
Fencing helps block deer and raccoons from eating the vines. Install sturdy fences around your grape plants for peace of mind. Clean up fallen leaves, fruit, and debris in the fall to reduce pests hiding through winter.
Troubleshooting Common Grape Problems
Learn how to fix issues like poor fruiting, yellow leaves, or pests. Your grapes can thrive with the proper care!
Yellowing leaves
Yellowing leaves on grapevines often signal trouble. Nutrient deficiencies, such as low nitrogen or potassium levels, can cause this issue. To help your vines, test your soil pH. Aim for a level near 6.5 to ensure proper nutrient uptake.
Improper watering also stresses plants, resulting in yellowing leaves. Keep the soil moist but avoid overwatering.
Fungal infections thrive in humid conditions and may cause yellow spots or lesions on foliage. Powdery and Downy Mildew are common culprits in these cases. Ensure your vines get enough sunlight; insufficient light weakens them and triggers leaf discoloration.
Treat early signs of fungus with organic sprays or fungicides designed for viticulture use.
Poor fruit development
Poor pollination can cause small or sparse grape clusters. Extreme weather, like heavy rain or cold temperatures during bloom, often disrupts this process. Keep an eye out for early signs of flower and fruit issues to address them promptly.
Nutritional deficiencies in boron or zinc lead to weak growth and poor-quality grapes. Diseases such as powdery mildew and downy mildew also reduce fruit quality. Herbicide damage deforms leaves and flowers, harming development.
Inspect vines regularly, apply compost for added nutrients, and control pests early to maintain a healthy crop.
Fungal issues
Fungal problems, such as powdery mildew, downy mildew, black rot, and Botrytis bunch rot, often harm grapevines. High humidity and wet conditions provide these fungi with the ideal environment for growth.
Regular pruning improves air circulation, which in turn helps keep fungal diseases in check.
Cleaning up fallen leaves and debris is crucial in the fall. These can carry spores that spread disease. Use fungicides such as Mancozeb or sulfur for adequate control. Remove any infected vines promptly to prevent the spread of fungus to other plants.
Winter Care and Long-Term Maintenance
Protect your grapevines from freezing temperatures with mulch or straw. Regular pruning and sturdy trellises keep your plants healthy year after year.
Protecting roots in winter
Reduce watering in the fall to help your grapevines harden before winter. This prepares the plants for colder months and prevents damage from freezing. Check your vines regularly for signs of disease or damage, as healthy roots are better equipped to handle winter stress.
Avoid mulching directly around the base since it can lower soil temperatures and harm roots.
Plant grapes in sunny spots with well-drained soil to improve their cold tolerance. For extra protection, create slight mounds of soil over the root area during early winter. Remove these mounds once spring arrives, allowing new growth to sprout freely without obstruction.
Annual pruning
Prune grapevines every year in late winter or early spring, before the buds swell. Cut back 80-90% of new growth during this time to encourage vigorous vines and improve fruit quality.
Focus on keeping 1-2 healthy trunks with 2-4 cordons for balanced growth and better yields.
After the first year, concentrate on training 1-2 sturdy canes while removing weak shoots. Heavy pruning results in fewer, higher-quality grapes. If you prune lightly, your vine may produce more clusters, but they will be smaller and have lower flavor.
Trellis maintenance
Check your trellis regularly for damage or loose parts. Strong winds, heavy vines, or age can weaken the structure. Inspect the bracing on end posts to ensure they remain stable and supportive during growth.
Replace broken wires and tighten sagging ones to keep everything sturdy. This helps prevent vine injury and ensures even grape growth. A well-maintained trellis keeps vines healthy for years, improving fruit quality as well.
Harvesting Your Grapes
Pick your grapes when they taste sweet and smell fragrant. Handle them gently to prevent bruising or damage to the fruit.
When grapes are ready
Grapes typically ripen in September or October, depending on the variety and local weather conditions. You should taste them to check if they’re sweet enough, as color alone isn’t always a good indicator of ripeness.
Keep an eye out for pests and diseases while your grapes mature. A spotted lanternfly or fungal issue can damage your crop quickly if left unchecked. Regular monitoring helps you protect both quality and quantity before harvest.
Signs of ripeness
Color and flavor reveal a great deal about ripeness. Green grapes turn golden, while red ones deepen in shade. Tasting is the best way to check. Ripe grapes have a sweet taste with a balanced combination of sugar and acidity.
Check the skins too. They become thinner, softer, and more pliable as they ripen fully. Early-ripening types may be ready by late summer, while others may not be ready until September or October, depending on the variety and local climate.
Harvesting tips
Taste grapes to check ripeness, not just their color. Clip entire clusters with pruning shears to avoid damaging the vine. Remove any discolored or injured berries right away.
Cool your harvest quickly after picking. Store grapes in the refrigerator for up to two weeks. Cover them loosely to keep moisture in and maintain quality.
Benefits of Growing Grapes at Home
Growing grapes at home gives you fresh fruit, a beautiful garden, and endless uses like wine or juice—keep reading to learn more!
Fresh fruit, wine, and juice possibilities
Grapes offer endless possibilities. You can enjoy them fresh, straight from the vine. They make tasty snacks or pair well with cheeses and apples for a healthy treat. Homegrown grapes are rich in flavor and packed with nutrients, making them an excellent addition to your diet.
You can also turn your harvest into homemade wine or juice. Varieties like merlot or hybrid grape types work great for fermentation. Fresh-pressed juice is sweet, aromatic, and additive-free, unlike store-bought options.
With proper care, vines may ripen fruit as early as one year after planting!
Attractive landscape value
Grapevines add beauty to any garden with their lush, green leaves and colorful fruit clusters. Their climbing nature creates a natural canopy, perfect for arbors or trellises. The vines thrive best in full sun, making them ideal for sunny corners of your yard.
Different grape varieties bring visual diversity and unique charm to your space. Annual pruning helps shape plants and improve their appearance. Properly installed trellis systems support vine growth and boost the aesthetic appeal of your landscape design.
Long-term productivity
Healthy spacing between vines, around 6 to 7 feet, helps ensure adequate air circulation and steady growth over time. Installing trellises or arbors provides lasting structural support, keeping the vines well-supported as they mature.
Annual spring pruning is vital for improving fruit production and maintaining your vine’s health. Consistent watering during the first year helps establish a robust root system, which is crucial for achieving high yields in subsequent seasons.
Protecting roots from winter damage also boosts long-term grape growing success.
Final Tips
Growing grapes at home can be rewarding and fun. You get fresh fruit, a beautiful garden, and maybe even homemade wine. Start with the right grape variety, follow proper care steps, and watch your vines thrive.
With patience and effort, your backyard will transform into a lush vineyard full of possibilities!