Garlic is one of the easiest things you can grow at home—and it’s super handy to have in the kitchen. Just a few cloves can turn into a bunch of fresh, flavorful bulbs with a bit of time and care.
In this guide, you’ll learn how to plant, grow, and harvest garlic the easy way. Whether you have a garden or just a few pots, you can do it. Let’s dig in!
Jump to Section [Hide]
- Understanding Garlic Basics
- When to Plant Garlic
- Choosing the Right Garlic Variety
- Preparing the Planting Site
- Planting the Garlic
- Tips for Planting in Containers or Raised Beds
- Caring for Garlic as It Grows
- Garlic Pest and Disease Management
- Harvesting Garlic
- Curing and Storing Garlic
- Troubleshooting Common Garlic Growing Problems
Understanding Garlic Basics
Garlic is easy to grow and thrives in cool weather. Learn about the types, their traits, and choose the one that best fits your needs.
Garlic is a cool-season crop
Plant garlic in the fall before frost sets in. In USDA Zones 3–7, early October is the best time. Warmer areas can wait until mid-November. This timing lets cloves grow roots before winter.
Cool temperatures help garlic develop strong bulbs. Allium sativum thrives with this slow growth pattern during the cold season, ensuring a better harvest by summer.
Hardneck vs. Softneck garlic
Hardneck and softneck garlic differ in terms of taste, storage, and growing requirements. Hardneck garlic thrives in cooler areas (USDA zones 10 or lower) and produces scapes. These green shoots can be harvested for cooking before bulbs mature.
Varieties like music garlic are favored for their bold flavor, but do not last as long in storage.
Softneck garlic thrives in warmer climates (zones 10 or higher). It stores longer than hardnecks, making it great for those who want garlic year-round. Softnecks lack scapes but can be braided for easy drying and storage.
California early garlic is a popular choice for its mild flavor and high yield.
Culinary vs. storage preferences
Softneck garlic lasts longer in storage. It has tightly wrapped skins, making it ideal for long-term use. This type is suitable if you want garlic powder or minced garlic available year-round.
Hardneck varieties offer more flavor and grow edible scapes. These scapes are great for soups, stir-fries, or a fresh batch of garlic scape pesto. Hardneck doesn’t store as long, but it works well for cooking right after harvest.
Use softnecks to stockpile; enjoy hardnecks fresh in the kitchen!
When to Plant Garlic
Plant garlic at the right time to get big, healthy bulbs. Timing depends on your location and local weather conditions.
Best Planting Times by Region
In colder regions, such as Zones 3–7, plant garlic in early October. This gives it enough time to establish roots before the ground freezes. For warmer zones, aim to plant by mid-November to avoid extreme heat affecting growth.
Fall planting typically works best, as garlic is a cool-season crop. Spring planting is possible but may result in smaller bulbs or reduced yields due to shorter growing periods.
Check your local frost dates and adjust timing for better results!
Why Fall Planting Yields Better Results
Fall planting allows garlic to develop strong roots before winter. These roots help the plant survive cold and focus on bulb growth in spring. This early start results in larger, healthier bulbs by harvest time.
Planting before the ground freezes also lets the cloves settle into nutrient-rich soil. As temperatures drop, they stay protected underground, ready for a head start when warmth returns.
Fall-planted garlic often delivers better yields and stores longer than spring-planted varieties.
Planting in Spring: Pros and Cons
Spring planting offers benefits but also presents challenges. You can plant garlic in the spring if you missed the fall planting season, though the bulbs may not grow as large. Spring soil is often softer and easier to work with after winter snow melts.
The downsides include a shorter growing season, which limits clove development. Garlic prefers cooler weather early on to establish a deep root system before growth speeds up in warmer months. If you choose to plant in spring, prepare well by ensuring rich soil and consistent watering for better results.
Choosing the Right Garlic Variety
Picking the right garlic variety depends on your climate and needs. Discover how various types thrive and which ones best suit your garden!
Characteristics of Hardneck Garlic
Hardneck garlic has a strong flavor and grows well in cold climates. Varieties such as Chesnock, Majestic, and Red Russian are renowned for their exceptional taste and ability to withstand harsh winters.
The plants produce garlic scapes, which are curly green shoots. You should prune these scapes once they’re about 6 inches long. This helps the plant focus its energy on growing larger bulbs.
The cloves in hardneck garlic grow around a central stalk, forming one layer. This makes them easier to peel than softneck varieties. Hardneck types don’t store as long, but they deliver a better taste for cooking.
You’ll often find this type of garlic under the allium genus category at garden centers or nurseries specializing in cooler climate plants.
Characteristics of Softneck Garlic
Softneck garlic thrives in warmer climates, particularly in USDA Plant Hardiness Zones 10 and above. It produces more cloves per bulb than hardneck varieties, making it well-suited for storage.
Popular types include California Early, Silver Rose, and Silver White.
Its flexible stems enable braiding, adding a decorative touch to your kitchen. Softneck garlic lacks a central flower stalk and instead focuses its energy on larger bulbs. This variety is milder-flavored but lasts longer in storage than hardier options, such as hardneck garlic.
How to Select Based on Climate
Hardneck garlic grows best in cooler zones (zone 10 and below). It survives harsh winters and thrives in temperatures under 40°F. If you live in a cold area, select varieties such as Rocambole or Porcelain for strong growth.
Softneck garlic is suited for warmer climates (zones 10 and above). It prefers mild winters and offers a long storage life. In hot climates, choose varieties such as Artichoke or Silverskin for better results.
Match your choice to local weather for healthy, flavorful bulbs.
Preparing the Planting Site
Select a sunny area with rich, well-draining soil and prepare it for garlic by adding compost or organic fertilizer. Healthy preparation leads to better results.
Choosing a Sunny Spot
Garlic thrives in full sunlight. Select a spot that gets at least 6 to 8 hours of direct light daily. Avoid planting near tall plants or structures that cast shade, as garlic requires full sun for growth.
Select an area with good air circulation to keep leaves dry and prevent diseases such as downy mildew. A sunny, open space keeps your garlic healthy and strong throughout the growing season.
Ideal Soil Type and Drainage Needs
Use well-draining, nutrient-rich soil to grow healthy garlic plants. Clay soils hold too much water and can cause rot. Add compost or other organic matter, such as leaf mulch, to improve the texture of heavy soils.
Mixing vermiculite into your compost enhances drainage and promotes better growth of garlic bulbs.
Select a loamy soil with good aeration to support the root system. Ensure raised beds or containers have proper drainage holes if you plan to plant garlic cloves in them. Avoid areas where water pools after rain; standing water can quickly harm young garlic plants.
Test your topsoil’s pH, aiming for 6.0 to 7.0 for optimal growth, using simple gardening tools available at a nursery or garden center.
How to Improve Soil Fertility with Organic Matter
Add organic matter, such as compost, to your soil to improve its fertility. Aim for a 75% compost, 25% vermiculite mix. This blend can increase garlic yield by approximately 489 grams per crop. Use worm castings or 444 Superfood organic fertilizer, as they supply key macronutrients for growth.
Work with your compost pile regularly to keep it active and nutrient-rich. Spread aged organic mulch over the planting site before adding your potting soil or potting mix. This improves texture, retains moisture, and fosters long-term soil health while supporting alliums, such as garlic and onions.
Soil pH and Testing Tips
Garlic grows best in soil with a pH between 6.0 and 7.5. Test your garden’s pH using a home test kit or send a sample to your local extension office for analysis. These tools help you determine whether the soil is too acidic or too alkaline for garlic.
If the pH is too low, mix in agricultural lime to raise it. For high pH levels, add sulfur to lower them gradually. Always follow product instructions closely when adjusting soil acidity, as overdoing it can harm plants such as garlic (Allium sativum) and chives.
Planting the Garlic
Plant garlic by placing the cloves pointy side up, giving each enough space to thrive. Follow these steps to ensure a healthy harvest.
- Break apart the garlic bulb just before planting. Gently separate each clove, keeping the papery skin intact. This outer layer protects the clove during growth and prevents rot.
- Choose only the largest cloves for planting. Larger cloves produce larger bulbs, resulting in better yields. Avoid damaged or soft cloves as they may not sprout properly. Keep smaller ones for cooking instead of wasting space in your garden bed or container gardening setup.
- Pick the largest, firmest garlic cloves for planting. Healthy cloves produce larger bulbs, resulting in a better harvest. Small or shriveled ones give weak results and should be avoided.
- Large cloves can yield heads averaging 71 grams, while small cloves yield about 29.2 grams.
- Check each clove carefully before planting. Avoid those with mold, soft spots, or skin damage. Choose clean and smooth cloves with tight wrappers instead. These are less likely to rot or attract pests during growth in your garden beds or containers.
- Plant garlic cloves 4 inches deep. This depth protects them during the cold months and helps roots grow strong. Use a Hori Hori Knife to dig uniform holes for each clove.
- Space each clove 6 to 7 inches apart. Wider spacing, such as 7 inches, often yields larger bulbs at harvest time. Keep rows about a foot apart for good airflow and easier weeding. Orient cloves with the pointy side up before covering with soil.
- Place the garlic clove with its flat end down and pointed tip facing up. The roots grow from the flat side, while the stem emerges from the pointy end. Planting it upside down can stunt growth or delay sprouting.
- Set each clove about 2 inches deep into loosened soil. Position them straight to ensure proper bulb development. Always check for firm, healthy cloves before planting for better results.
Tips for Planting in Containers or Raised Beds
- Use a container with drainage holes. Garlic needs well-draining soil to avoid rot. Raised beds are ideal if your garden soil is too compact or too soggy.
- Fill the container or bed with loose, fertile soil mixed with organic matter, such as compost. Maintain a pH level between 6 and 7 for optimal growth. Plant each clove two to three inches deep, pointy side up, and space them four to six inches apart.
- This setup gives roots room while preventing overcrowding.
- Keep the area sunny, as garlic thrives in full sunlight. Water regularly, but avoid letting it stay soggy; moist, not wet, is best. Mulch helps conserve moisture and controls weeds as plants grow taller.
Caring for Garlic as It Grows
Keep your garlic thriving with proper watering, mulching, and a little extra care.
Watering Schedule and Techniques
Check the soil before watering. Dig about 2 inches down. If it feels wet, hold off on adding more water. If it’s dry, water deeply until you see pooling, then stop.
Spring temperatures call for more frequent watering. Use automatic irrigation every other day for approximately 25 minutes as temperatures warm. This keeps garlic hydrated without overwatering issues such as rot or mold.
Mulching for Moisture and Weed Control
Cover your garlic bed with 2–3 inches of leaf mulch right after planting. This keeps the soil moist, prevents weeds, and insulates the cloves during winter. In cold areas, this layer also protects against frost damage.
As spring arrives and green shoots pop up, remove the mulch carefully. Add it to your compost pile for reuse later. Mulch helps save water by reducing evaporation while cutting down on weeding time—a win for any gardener!
Fertilizing Tips (Before and During Growth)
Before planting, add one handful of worm castings and one tablespoon of 444 Superfood organic fertilizer into each hole. This gives the garlic a strong start by improving soil fertility.
Healthy cloves grow better in nutrient-rich soil.
In spring, feed the growing plants. Apply one tablespoon of 444 organic fertilizer per square foot to your garlic patch. Scratch it lightly into the top inch of soil using a rake or your hands.
Then spread about an inch of fresh compost over the area to maintain consistent nutrient levels and improve moisture retention. These steps help produce larger bulbs for harvesting later!
Removing Scapes on Hardneck Garlic
Garlic scapes grow on hardneck varieties in spring. These curly, green stems should be pruned when they reach approximately 6 inches in length. Cutting them early helps channel energy back to the bulbs, resulting in larger garlic heads at harvest.
Scapes are not just waste; they are edible and tasty. You can use them in stir-fries, pesto, or grilled dishes. Snip the scape clean where it meets the stalk for best results.
Garlic Pest and Disease Management
Pests and diseases can ruin your garlic crop if not handled quickly. Learn how to protect your plants and keep them healthy!
Common Garlic Pests and How to Control Them
Aphids often feed on garlic leaves, weakening the plant. Spray them off with water or use insecticidal soap. Use neem oil to keep them away naturally.
Cutworms also harm young plants by cutting stems at the soil level. Place cardboard collars around your garlic or hand-pick these pests at night. These steps help protect your crop from damage!
Fungal Diseases to Watch For
Fungi can cause serious problems for your garlic plants. White rot is a disease to watch for. It attacks the roots and leaves, causing them to turn yellow or wilt. This problem thrives in cooler soil temperatures, so proper crop rotation helps reduce its spread.
Another common issue is powdery mildew. You’ll notice a white or gray coating on leaves and stems if it appears. Keep your garden weed-free and ensure good airflow around plants to prevent it.
Avoid overwatering to prevent fungal growth in moist conditions. Healthy soil also reduces risks, so use organic fertilizer like compost regularly!
Crop Rotation and Other Preventive Measures
Rotate garlic with crops such as beans, peas, or lettuce to prevent soil-borne diseases. Avoid planting garlic in the same spot for at least three years. This reduces the risk of pests and diseases building up in the soil.
Keep your garden clean by removing infected plants early. Use organic fertilizer to strengthen the soil and boost plant health. Adding compost improves drainage and provides essential nutrients, helping garlic remain disease-free.
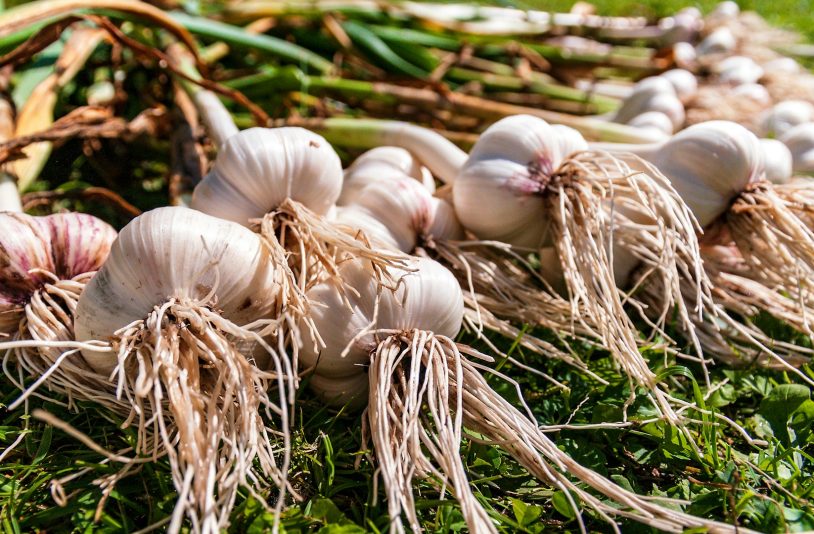
Harvesting Garlic
Check your garlic when the leaves turn yellow, then gently pull it from the ground—handle with care to avoid damage!
How to Know When Garlic is Ready to Harvest
Examine the leaves to look for signs. The bottom five leaves on the stem should be dead and dry by harvest time, while the top leaves will still be green. This means the bulbs are fully developed.
Monitor growth during spring, especially from March to June. Harvest too early, and the bulbs might not reach full size. Wait too long, and they could split or lose their tight wrappers, reducing storage life.
Harvesting Without Damaging the Bulbs
Use a Hori Hori knife for clean harvesting. Insert it 3 inches away from the garlic base. Pry gently while holding the stem to pull it free. This keeps the bulbs intact and prevents them from breaking.
Avoid pulling by hand as this can damage the stalk or bulb. Work carefully, especially in wet soil, which increases the risk of bruising. Once lifted, brush off excess dirt without scrubbing to protect the skin and ensure proper storage.
What to Do After Pulling from the Ground
Do not rinse your garlic after pulling it from the ground. Keep the dirt on the bulbs intact to prevent excess moisture, which can cause rot.
Let your garlic air dry for 10–14 days in a cool, shaded area with good airflow. Hanging the stems upside down works best for curing and protects the bulbs during drying. Do not trim or cut anything until thoroughly dried.
Curing and Storing Garlic
Curing garlic helps it last longer and retain its flavor. Store it in a dry, cool place to keep the bulbs fresh for months.
How to Cure Garlic for Long-Term Storage
Dry garlic in a well-ventilated space for 10–14 days. Hang the bulbs with stalks intact or spread them out on a rack. Avoid direct sunlight to prevent overheating and damage.
Once dried, trim roots and cut stems down to an inch above the bulb. Gently brush off dirt, but do not wash. Store cured bulbs in a cool, dark place at 60–65°F with low humidity to extend their shelf life.
Ideal Drying Conditions
Hang garlic in a well-ventilated area for optimal drying results. Use string or twine to tie small bundles of bulbs, leaving some air between them. Keep the area dry and out of direct sunlight.
Ensure temperatures remain between 75°F and 85°F and humidity is low. Good airflow prevents mold or rot from forming on your garlic bulbs. A garage, shed, or covered porch is often suitable for curing garlic properly before storage.
Trimming, Cleaning, and Storing Garlic
Trim the neck of each dried garlic bulb to about 1 inch above the top. Cut off any remaining roots close to the base. Gently brush off dirt without washing; moisture can lead to rot.
Store cured bulbs in a dark, cool spot with good airflow. Avoid plastic bags, as they trap moisture. Use breathable containers, such as mesh bags or baskets, to extend the shelf life. Properly cured garlic can last months under ideal conditions.
Storage Tips for Maximum Shelf Life
Store garlic in a cool, dark spot with good air circulation. Avoid putting it in plastic bags, as trapped moisture can cause mold or rot. Instead, use mesh bags or baskets to keep bulbs dry and fresh.
Maintain temperatures between 60°F and 65°F for optimal results. High humidity ruins quality, so aim for a drier environment. Keep cloves separate from shallots or onions, as their strong odors can blend over time.
Troubleshooting Common Garlic Growing Problems
Small bulbs, yellow leaves, or moldy cloves can ruin your garlic harvest—learn quick fixes and smart tips to keep your crop healthy!
Small Bulbs or No Bulb Formation
Planting small cloves results in small heads, averaging 29.2 grams. Use large, healthy cloves for better results; they typically weigh 71 grams. Crowding plants too close together also stunts their growth.
Keep spacing at least 7 inches off-center to allow bulbs room to grow correctly.
Garlic struggles in heavy or wet soil that lacks drainage. Poor soil nutrients also prevent good bulb formation. Enrich your planting bed with compost or organic fertilizer before planting.
Low nitrogen levels during growth can weaken plants and further reduce bulb size. Aim for nutrient-rich, well-draining soil to encourage full bulb development!
Yellowing or Wilting Leaves
Yellowing leaves can indicate overwatering, poor soil drainage, or nutrient deficiencies. Check whether the soil remains soggy after watering; garlic prefers well-drained soil. Use organic fertilizer to boost growth and prevent nutrient deficiencies.
A pH test kit helps ensure the soil remains in the ideal range of 6-7.
Wilting may also indicate fungal diseases, such as Fusarium rot. Rotate crops annually and avoid planting garlic where onions or leeks have been previously grown. Inspect your plants regularly for pests hiding near the base, as they can weaken stems and cause wilting.
Mold or Rot During Storage
Store garlic in a cool, dry place to avoid mold or rot. High humidity triggers the growth of fungus on the bulbs. Aim for 60-65°F with low moisture levels. Avoid storing garlic in plastic bags, as they trap moisture and cause decay.
Inspect your bulbs regularly during storage. Remove any soft or discolored cloves immediately to protect the rest. For a longer shelf life, try braiding softneck varieties or hanging them in mesh bags for airflow.
Proper curing before storage also reduces the risks of rot!
Final Tips
Growing garlic is simple and rewarding. With the proper care, you can harvest flavorful bulbs that last for months. Select healthy cloves, plant them in sunny spots, and provide ample room for growth.
Follow these steps, and soon you’ll enjoy fresh garlic straight from your garden!