Growing mushrooms at home might seem a little challenging at first, but it’s actually a fun and rewarding project that just about anyone can do.
It doesn’t matter if you’ve got a garden, a balcony, or just a small spot in your kitchen. Mushrooms don’t need much space to grow. With the proper setup, a bit of patience, and a love for fresh food, you’ll be growing your own mushrooms in no time.
In this guide, we’ll walk you through everything you need to know, from picking the right mushroom type to harvesting your very first crop. No fancy equipment required, just some basic supplies and a curious mind.
Ready to grow your own mushrooms? Let’s get started!
Jump to Section [Hide]
Understanding Mushroom Basics
Mushrooms are fascinating fungi with unique growth patterns. Understanding how they grow helps you cultivate them at home.
What Are Mushrooms?
Mushrooms are fungi, not plants or animals. They act as natural recyclers by breaking down dead organic matter, such as wood and leaves. Over 1.5 million species of fungi exist, but only about 20,000 produce mushrooms you can see.
They grow from mycelium, a white, thread-like structure found underground or in decaying material. Mushrooms exchange nutrients with plants through this network and store carbon in the soil.
They’re low-calorie, high-fiber foods rich in vitamin D and minerals like potassium and zinc. Many types, such as oyster and shiitake mushrooms, are also used worldwide for cooking and medicinal purposes.
Life Cycle of a Mushroom
Mushrooms start as tiny spores, which act like seeds. These spores need a growing medium, such as hardwood logs or composted substrates. After the spores germinate, they form mycelium, a white thread-like structure that spreads through the substrate over 5–10 days.
Shake jars with spawn at 70% colonization to help it spread evenly.
Once fully colonized in about two weeks, primordia (small bumps) will appear within 7–10 days under proper conditions. These develop into pins and, once mature, quickly grow into mushrooms, doubling in size daily.
You can harvest them once they reach full size using clean hands or tools to avoid contamination during mushroom cultivation.
Common Types for Beginners
Start with white button mushrooms. They are the easiest for beginners. These thrive in dark, humid places and prefer warm temperatures. Agaricus bisporus is its scientific name. You can grow these in containers or compost heaps.
Try oyster mushrooms next. Pleurotus ostreatus grows rapidly and requires adequate light and high humidity. Gray or pink varieties are suitable for beginners. Finally, consider lion’s mane mushrooms like Hericium erinaceus if you want something unique.
These plants require a consistent temperature of 77°F (25°C) and high humidity to thrive both indoors and outdoors, on logs or sawdust blocks.
Choosing the Right Mushroom Variety
Picking the right mushroom is key to your success. Start with beginner-friendly options that are easy to grow and rewarding!
Oyster Mushrooms
Oyster mushrooms are one of the easiest to grow. Gray and pink varieties need light and high humidity, making them perfect for beginners. Brown oysters are also simple, with a mild flavor that works well in cooking or drying for storage.
You can try kits like the North Spore Pink Oyster Mushroom Spray & Grow Kit ($30 on Amazon) or the Back to the Roots Organic Oyster Mushroom Grow Kit ($20). These kits simplify indoor mushroom growing and work great if you’re short on time or tools.
Use consistent misting to maintain moisture levels during growth.
Shiitake Mushrooms
Shiitake mushrooms are prized for their smoky flavor and meat-like texture. They support your immune system, too. These mushrooms grow best on hardwood logs, such as oak or maple. Select logs that are approximately 10-15 cm in diameter and 45-60 cm in length.
Pre-inoculated log kits, such as the Back to the Roots Organic Shiitake Mushroom Kit ($40) or the North Spore Shiitake Mushroom Outdoor Log Grow Kit ($35), simplify the growing process. Kits allow you to harvest in about 10 days, while home-prepared logs may take up to 10 months.
Once established, a single log can produce mushrooms for several years!
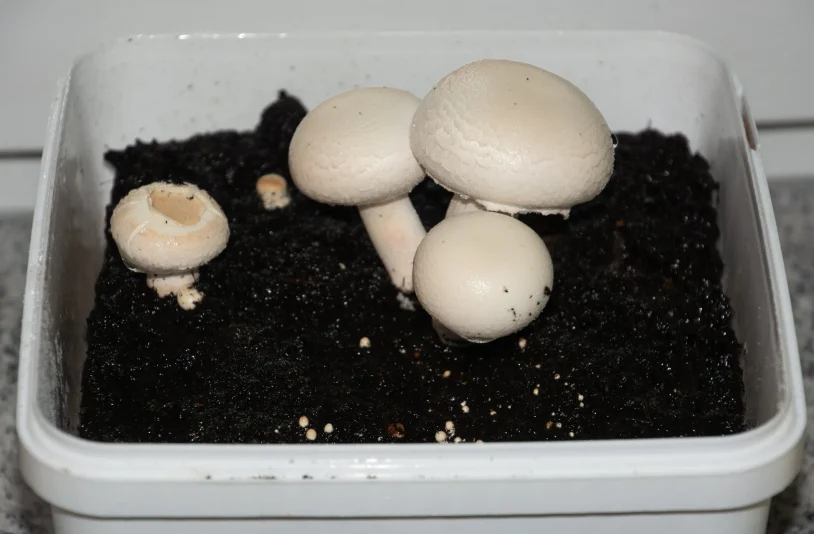
White Button Mushrooms
White button mushrooms are beginner-friendly and easy to grow. They thrive in dark, humid, and warm places. Use materials like compost, manure, coffee grounds, or straw as a base for their spawn.
These mild-flavored mushrooms are the most common type found in kitchens worldwide.
Harvest them by cutting at the base with a sharp knife before they overripe. Store them in a paper bag or an open container in the fridge for freshness. Avoid placing them inside the fridge drawer to prevent spoilage.
White buttons are both economical and versatile vegetables that can be used in a variety of dishes.
Gathering Your Supplies
You’ll need the right tools and materials to start growing mushrooms. let’s get everything ready for success!
Substrate Materials (Straw, Sawdust, Coffee Grounds)
Straw, sawdust, and coffee grounds are excellent substrates for growing mushrooms. Straw works well for oyster mushrooms. Soak it overnight in water before mixing it with mushroom spawn.
Coffee grounds are rich in nutrients and readily available from cafes or at home. Use fresh ones to avoid mold issues.
Sawdust is perfect for shiitake or lion’s mane types. It should come from untreated wood, such as oak or beech. Mix sawdust with bran or supplements to enhance the nutritional value. Keep all materials clean and moist, but not soaking wet, for optimal mycelial growth.
Mushroom Spawn (Mycelium)
Mushroom spawn is like the seed for growing mushrooms, but it contains live mycelium. This mycelium spreads into your substrate and starts the mushroom-growing process. You can purchase seeds from suppliers such as Suttons or Thompson & Morgan.
It’s often sold as dowels for inserting into logs or wooden blocks, which works well for outdoor mushroom cultivation.
Mix the spawn into a prepared substrate at a depth of 5–8 cm to ensure even growth and development. Cover this layer with damp newspaper to keep it moist while the mycelium colonizes. Spawn pairs well with substrates such as straw, sawdust, and coffee grounds.
Use clean tools to prevent fungal contamination or bacterial contamination during spawning.
Containers (Buckets, Jars, Grow Bags)
Use 1-quart wide-mouth jars for the inoculation stage. These jars are simple to clean and allow good airflow. Two bags of popcorn can fill at least seven jars, making them a cost-effective option.
If using buckets, get a sturdy 5-gallon bucket with a lid and line it with grow bags for easy cleanup.
For larger setups, try monotubs or totes. A 66 to 70-quart plastic tub works well for four or five jars of substrate. To maintain sterility during inoculation, use a still-air box made from a clear storage bin with hand-sized holes.
This prevents contamination when handling your mushroom spawn or tools, such as syringes filled with spores.
Water Source and Spray Bottle
A clean water source is crucial for growing mushrooms. Use spring or filtered water to avoid chemicals such as chlorine found in tap water. For soaking the substrate, such as straw or popcorn, ensure you have enough fresh water ready.
Mist your mushroom setup 3–4 times daily using a spray bottle filled with non-chlorinated water. This maintains humidity levels above 92%, which mushrooms require for growth. During fresh air exchanges, allow humidity to drop slightly to 80–85%.
A simple spray bottle works great for maintaining moisture around your fruiting area.
Optional Tools (Thermometer, Hygrometer)
A thermometer helps you track the temperature of your substrate. For example, use a cooking thermometer to ensure the temperature stays below 80°F before adding the colonized popcorn. This prevents killing the mycelium and keeps growth on track.
A hygrometer measures humidity levels. Mushrooms need specific moisture conditions to thrive. Use one for monotubs or logs to maintain proper humidity for fruiting bodies. Keeping these tools on hand boosts success in mushroom production!
Preparing the Substrate
Prepare your substrate by selecting the right base, thoroughly cleaning it, and preparing it for mushroom growth. This step sets the stage for success.
- Choose the correct substrate based on your mushroom type. Oyster mushrooms grow best on straw, while shiitake thrives on hardwood logs. For white button mushrooms, use manure or compost mixed with organic matter, such as wheat straw.
- If you’re a beginner, try popcorn as a simple substrate. Coir bricks and vermiculite also work well when prepping monotubs for other varieties. Match the substrate to your mushrooms to help them grow successfully.
- Heat water to a boil. Use 4 quarts for methods like monotub preparation. Pour the boiling water over 1 coir brick and 2 quarts of vermiculite in a 5-gallon bucket. Seal it tightly, let it sit for about 30 minutes, then stir well and reseal.
- Wait another 3–4 hours before moving forward.
- Before using straw for growing oyster mushrooms, soak it overnight in clean water. Dump out excess liquid after soaking. This kills harmful bacteria while preserving nutrients for your mushroom spores or spawn, enabling them to thrive later.
- After boiling your substrate, let it cool to 80°F or lower. This is critical for healthy mycelial growth and helps prevent contamination. Use a thermometer if needed to check the temperature.
- Drain the popcorn substrates in a strainer without rinsing. Let them air dry for 15-20 minutes. Doing this ensures excess water is removed while keeping moisture levels just right for mushrooms such as oyster and shiitake.
Inoculating the Substrate
Mix the mushroom spawn evenly to give it a good start. Place the mixture in your chosen container to keep things clean and tidy for healthy growth.
- Spread the colonized popcorn spawn evenly into your prepared substrate. Place both in a clean trash bag, then knead it gently to ensure a full mix. This provides that the mushroom mycelium comes into contact with most of the substrate to support proper growth.
- For beds or boxes, blend the spawn into layers about 5–8 cm deep. Cover with a damp newspaper to create a moist environment that helps colonization. If using logs, drill holes spaced 15 cm apart in rows 8 cm apart and insert dowel spawns securely.
- Fill your container or grow bag with layers of substrate and mushroom spawn. For oyster mushrooms, use soaked straw as the substrate. Pack it tightly to avoid air pockets. Start with a 2-inch layer of straw, then evenly sprinkle the spawn on top.
- Repeat this layering process until the container is two-thirds full. Press each layer gently to ensure contact between the spawn and substrate. After finishing, seal the container or bag properly to maintain humidity and prevent contamination.
- Cover jars with heavy-duty foil during sterilization to protect against contamination. Add one large hole in the lid for gas exchange and a smaller hole for spore injection. After inoculation, seal the spore syringe hole with scotch tape.
- For monotubs, cover holes with micropore tape until colonization is complete. Switch to polyfill after the mycelium growth has filled the substrate. This setup ensures proper air exchange while keeping contaminants out.
Incubation Stage
Place your containers in a warm, dark spot to encourage growth. Monitor temperature and moisture levels for optimal results.
- Keep the containers in a closet or box. Cover them with a clean towel to block light. Maintain the area’s temperature between 70°F and 75°F for most mushrooms. Oyster mushroom bags require slightly cooler conditions, ranging from 68°F to 77°F (20°C to 25°C).
- This stage typically lasts 7–10 days but can take up to six weeks, depending on the type.
- Humidity matters too. Make sure the space isn’t too dry. Use a small humidifier as needed, or lightly mist the space with water daily. Check on your containers every few days for signs of mycelium growth, which appears as white, fuzzy threads spreading across the substrate.
- Maintain a temperature of around 73°F during the colonization stage. A range of 70–86°F is also suitable, but maintaining a temperature near 73°F is best. For lion’s mane mushrooms, aim for 25°C (77°F) while incubating.
- Use a thermometer to check the temperature of your setup.
- Humidity matters most during fruiting. Maintain levels above 92% to encourage healthy mushroom growth. A hygrometer helps you track this efficiently. Mist water regularly or create a humid environment using a fruiting chamber lined with damp moss or towels.
- Check the jars or containers daily for white, thread-like mycelium. Growth usually starts within 5–10 days. Avoid opening them to prevent contamination. Focus on steady progress without gray, green, or black patches, which indicate mold.
- Once you observe approximately 70% substrate colonization, gently shake the jars. This helps spread the mycelium evenly throughout. Wait until complete colonization and add an extra five days before moving to the next stage for stronger results.
Fruiting Stage
This is the stage where your mushrooms burst into life—light, fresh air, and misting create the perfect setup for them to grow!
- Expose your mushrooms to natural light once the substrate is fully colonized. Move the tub or bags to a well-lit area but out of direct sunlight. For oyster mushroom bags, cut small slits along the sides to improve airflow and allow the pins to emerge.
- Fresh air exchange prevents the buildup of carbon dioxide, which can slow growth. Open the holes in the monotubs and fill them with loose polyfill to ensure proper ventilation. Ensure good air circulation while maintaining high humidity by misting with a spray bottle.
- Maintain humidity above 92% for optimal mushroom growth. Use a spray bottle to mist your setup 3–4 times daily, especially with box kits. Cover the kit with plastic to prevent moisture from escaping.
- Use a fan timer to promote fresh air exchange, but avoid allowing the humidity to drop below 80–85% during this process. This balance maintains the mushrooms’ health while allowing for proper airflow.
- Mist the mushroom pins lightly every day. Use a spray bottle and avoid soaking the mycelium with direct water. This maintains high humidity, helping mushrooms grow well.
- Ensure good air circulation by using fans on timers or by opening holes stuffed with polyfill. Poor airflow can lead to fungal issues or stunted growth. Maintain a balanced environment to optimize fruiting.
- You can use different containers as fruiting chambers. Monotubs, still-air boxes, plastic totes, or grow bags are suitable for storage. Each option helps maintain high humidity and allows fresh air to circulate.
- Drilling holes in a bucket is another method for creating a chamber. Mushrooms will grow through the holes when conditions are right. Maintain a humid environment by misting regularly and ensuring proper airflow for optimal growth.
Harvesting Your Mushrooms
Your mushrooms are ready—you need to know when to pick them. Use gentle hands and proper techniques to keep your crop fresh and healthy!
How to Identify When Mushrooms Are Ready
Watch for small, white bumps called primordia forming 7 to 10 days after fruiting conditions begin. These grow into pins, then mushrooms. Check daily, as they can reach edible size quickly.
Harvest mushrooms when their caps open and the edges begin to flatten. Avoid letting them over-ripen or turn slimy. For logs, expect growth in weeks if made at home or in days with kits.
Proper Harvesting Techniques
Cut button mushrooms at the base with a sharp knife. This prevents mycelial damage and keeps the substrate intact for future flushes. Avoid pulling them out by hand, as it can disturb surrounding growth.
For oyster mushrooms or lion’s mane, twist and pull gently from the cluster. Harvest clusters rather than individual mushrooms where possible. This reduces harm to nearby fungi and encourages healthy regrowth.
Avoiding Overripe or Spoiled Growth
Pick mushrooms early, as soon as the caps start to curl. If you wait too long, the caps may flatten or release spores, and the mushrooms will spoil. Overripe mushrooms lose flavor and texture quickly.
Check your mushrooms daily during their fruiting stage. Gently press on them; firm ones are ready to harvest. Avoid leaving them in a humid environment for extended periods, as this can accelerate decay or mold growth.
Use clean hands or tools when harvesting to keep your fungi fresh and safe to eat.
Reusing or Recycling the Substrate
Get extra mushroom harvests or turn the used substrate into rich compost for your garden—both options are easy and eco-friendly!
Getting Additional Flushes
After your first harvest, wait 2 to 3 weeks for another flush. Keep the substrate moist and provide light and fresh air during this time. Each new harvest will likely weigh about half as much as the previous one.
Under ideal conditions, your substrate may produce up to 4 or 5 flushes before exhaustion. If you’re using a mushroom grow kit, dry it out after harvesting. Then soak it in water for 24 hours to restart the process.
Repeat this until no more mushrooms appear.
Composting Used Substrate
Used mushroom substrate is excellent for composting. It is rich in organic matter, which improves soil health. After harvesting your mushrooms, mix the used substrate with yard waste, food scraps, or leaves.
This helps balance carbon and nitrogen in your compost pile.
Turn the pile weekly to introduce oxygen and accelerate decomposition. Over time, it will break down into nutrient-rich compost. You can use this to improve garden soil or grow vegetables like cucumbers.
Recycling used substrate reduces waste and promotes healthy plant growth!
Troubleshooting and Tips
Watch for mold, keep tools clean, and adjust humidity to avoid common mistakes—small changes can lead to better results!
Common Issues and How to Fix Them
Green mold is a serious problem. If you see it in your jars, throw them away without opening. This prevents contamination from spreading to your other supplies or grow areas. Always sterilize tools and hands with hand sanitizer to reduce risks.
If mycelium has not grown after 10 days, don’t panic yet. Wait up to 14 days before making changes. Ensure jars are cool before inoculating, as heat can instantly kill spores.
Check the substrate moisture level; too dry or too wet will prevent productive growth.
Preventing Mold or Contamination
Sanitize all tools, surfaces, and your hands before starting. Use gloves if possible. Wipe down work areas with alcohol to kill bacteria. Sterilize the syringe needle using a lighter before each jar.
This step reduces the risk of contaminant spread.
Immediately after use, cover inoculation holes with Scotch Tape. Keep your workspace clean and dry to limit mold growth. Avoid touching mushrooms or substrate directly with bare hands during handling stages.
A pressure cooker effectively sterilizes substrates, especially those based on grains or sawdust.
Best Practices for Higher Yields
Shake spore syringes for a full minute before inoculating. This ensures an even distribution of spores, resulting in improved growth. Mix the mushroom spawn evenly into the substrate to promote colonization across all layers.
Keep humidity above 92% during the fruiting stage. Use a spray bottle to mist regularly without over-soaking. Redistribute mycelium at 70% colonization for more consistent results.
Monitor temperature and light closely for healthy mushrooms, such as enoki or shiitake varieties.
Advanced Growing Techniques (Optional)
Take your growing skills to the next level with new methods and tools. Experiment with indoor setups or outdoor environments to expand your harvest.
Growing Mushrooms Indoors vs Outdoors
Growing mushrooms indoors gives you complete control over temperature, light, and humidity. You can use spaces like garages, sheds, basements, or even a closet. This setup is ideal for beginners who want consistent results with types such as oyster or white button mushrooms.
Indoors makes it easier to prevent pests and contamination.
Outdoor cultivation works best under trees or shrubs where shade protects the fungi. It relies on ambient temperature and humidity but may vary based on your local climate. Using mushroom logs outdoors suits shiitake varieties well.
However, outdoor growing faces challenges such as weather changes and pests that can harm the crop.
Using Mushroom Grow Kits
Mushroom grow kits make growing easy, even for beginners. Some popular choices include the Back to the Roots Organic Oyster Mushroom Grow Kit ($20 on Amazon) and North Spore Pink Oyster Mushroom Spray & Grow Kit ($30 on Amazon).
These kits often yield fresh mushrooms in just 10 days for shiitake and around one to two weeks for oyster varieties. They come with pre-prepared blocks or bags, making setup simple.
You can also reuse kit blocks. After harvesting, dry the block completely, then soak it in water for 24 hours to restart growth. This allows you to get multiple flushes of mushrooms before composting the substrate as organic matter.
Kits are perfect if you’re short on time or want a hassle-free way to grow edible fungi, such as cremini mushrooms or baby bellas, indoors.
Scaling Up for Small Business
Scaling up means more containers and bigger substrate batches. Start by using larger tubs, such as 66- or 70-quart plastic ones, to grow mushrooms in bulk. These can hold about 4–5 jars of spawn, helping you boost your yield fast.
Suppliers such as Suttons and Thompson & Morgan offer a wide range of spawn and substrate materials for this purpose.
Focus on efficiency while maintaining quality. Monotub setups are popular because they make managing humidity and air easier in bigger grows. Use properly pasteurized organic matter, such as straw or sawdust compost, to promote healthy fungal growth and prevent contamination.
More mushrooms mean potential profits for small-scale business ideas!
In Summary
Growing mushrooms at home is fun and rewarding. With the right tools, knowledge, and steps, anyone can do it. Start small with easy varieties like oyster or white button mushrooms.
Learn as you go, and improve your technique over time. Soon, you’ll enjoy fresh, delicious mushrooms straight from your own setup!


