It’s hard to cook or clean when everything feels jumbled. A disorganized kitchen not only slows you down and wastes your time but can also make cooking a stressful experience that you’d rather avoid!
Creating designated zones for food preparation, storage, and cleaning can greatly enhance the efficiency of your kitchen and make it a more inspiring space.
This guide will show you how to organize kitchen areas step by step. From decluttering to using cabinet door storage, we’ll cover it all. Get ready to transform your space!
Jump to Section [Hide]
Step 1: Start With a Clean Slate
Clear your kitchen. Remove everything from drawers, shelves, and cabinets. Wipe down surfaces to prepare for a fresh setup.
Empty all cabinets, drawers, and shelves
Remove everything from your cabinets, drawers, and shelves. This step clears the way for a fresh start. Remove dishes, cookware, and bakeware like cake pans or cookie sheets, and put everything down to the spoons and silverware.
Don’t forget small appliances such as your microwave or toaster oven.
Check every space thoroughly. Move aside pots and pans stored in deep corners. Empty food storage areas and grab items from overstuffed shelves or hidden cubbies in the pantry. Lay it all out so you can see what you’re working with.
Clean and deodorize surfaces
Empty all surfaces first. Wipe them with warm, soapy water to remove dirt. Use a disinfectant spray to kill germs. Focus on areas like kitchen cabinets and counters where food is often touched.
To remove odors, mix baking soda and vinegar into a paste. Scrub gently over the surface, then rinse clean. Lemon juice also works well for stubborn smells, just rub it directly onto the spot! Avoid strong chemical cleaners near cooking zones or flatware storage.
Keep everything fresh and safe for meals ahead!
Step 2: Declutter and Categorize
Clear out what you don’t use or need. Group items by purpose. This makes things easy to find and use.
Remove unused and expired items
Start by pulling everything out of your cabinets and fridge. Check the labels on food items like pasta or spices, and toss anything that is expired.
Sort through cooking utensils, cutting boards, and crockery. Get rid of broken tools or duplicates you don’t use. Donate cookers and dishes that are still in good shape but are no longer needed.
Categorize items based on their use
Separate items based on how you use them daily. Group cooking essentials like pots, pans, and spices near the stove. Place chopping boards and knives in the food prep area.
Divide daily-use items from those used less often. Keep measuring cups or baking sheets near where they’ll be used most. Set aside dishwashing supplies near the sink for easy cleaning access.
Group similar items together
To stay organized, keep all similar items in one place. Store baking tools like measuring cups, whisks, and rolling pins together. Group spices by type or use sweet ones like cinnamon with nutmeg, savory ones like garlic powder with chili flakes.
Place frequently used items near prep areas, such as utensils near the stove or cutting boards. Use bins or organizers for snacks, pasta, or canned goods. Label everything clearly for easy maintenance…
It saves time!
Separate daily-use items from occasional-use items
Place items you use daily, like your coffee maker or toaster, on the countertop. This will save time and effort during busy mornings. Avoid hiding these in cabinets; they need to stay handy.
Store things like turkey roasters or holiday wine racks on higher shelves or less-used spaces. These don’t need prime spots since you rarely use them. This keeps your kitchen work triangle clear for cooking and cleaning tasks.
Donate or recycle items you no longer need
Sort through your kitchen items carefully. Pull out tools, dishes, or gadgets you rarely use. If they’re still in good shape, donate them to local shelters or charities. Old plastic containers and worn utensils can be recycled instead of sitting in landfills.
Check expiration dates on food products, too. If possible, compost expired produce. Unopened and non-expired foods can support food banks nearby. Clearing these items helps create space while helping others or the environment!
Step 3: Deep Clean and Prepare Your Space
Scrub every corner of your kitchen until it shines. Freshen up the space with a pleasant-smelling cleaner for an inviting vibe!
Deep clean cabinets, drawers, and surfaces
Remove everything from your cabinets and drawers. Wipe all surfaces using detergent to remove dirt. Follow up with a disinfectant to kill germs. Don’t skip sticky spots, focus on jar lids, shelf corners, and the tops of cabinets.
Dry all areas well before putting items back. Pay attention to hidden spaces like drawer edges and under-cabinet handles. This keeps your kitchen fresh while limiting bacteria build-up.
Deodorize the kitchen area
Sprinkle baking soda on surfaces and let it sit for 15 minutes. Wipe it off to remove smells. Mix lemon juice with water to clean counters, leaving a fresh scent.
Use vinegar to tackle sticky areas, like cabinet tops or jars. If odors linger, place a bowl of vinegar in the dishwasher overnight. These simple steps will keep your kitchen smelling fresh!
Step 4: Create Functional Kitchen Zones
Divide your kitchen into areas based on tasks. This setup makes cooking and cleaning faster and easier.
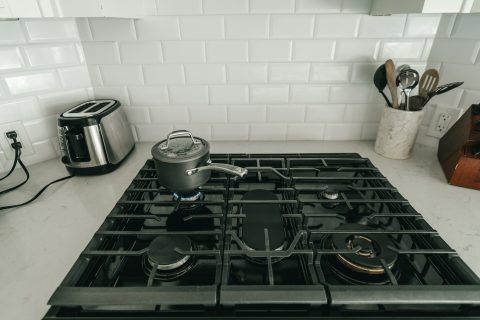
Cooking zone for pots, pans, and utensils
Keep pots, pans, and utensils close to the stove. This saves time while cooking. Use hooks or rods to hang pots and free up cabinet space. Store lids on door-mounted racks for easy access.
Arrange your most-used tools within arm’s reach of where you cook. Group similar items together, spatulas with spatulas, spoons with spoons, for quick grabs. Avoid cluttering the area with rarely used items.
Food preparation zone for cutting boards and knives
Store cutting boards close to your prep area. This makes cooking much easier and faster. Use vertical storage to save more space in cabinets or on counters. It keeps boards neat and easy to grab.
Place knives nearby for convenience, but always safely. For better organization, use a magnetic strip, drawer divider, or knife block. Keep daily-use knives within reach while saving specialty ones for less accessible spots.
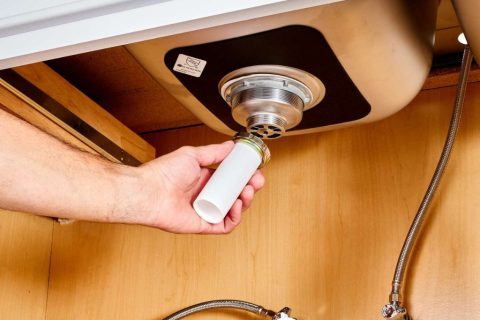
Cleaning zone for sponges, detergents, and trash bags
Set up a cleaning zone under the kitchen sink. Use tension rods to hang spray bottles and keep them off the surface. Add small baskets or bins to hold sponges, detergents, and trash bags in one place.
Use baking soda and water to clean spills or stains in this area. Remove odors by placing a small dish of vinegar nearby for a few hours. Keep items grouped for easy reach when needed.
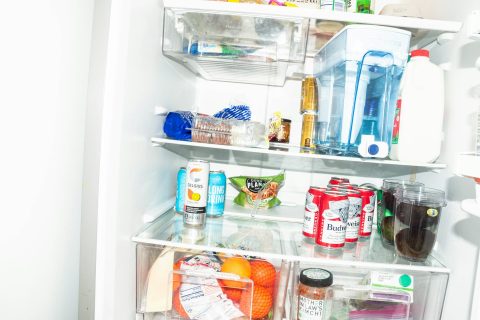
Dedicated food storage area
Set aside a spot just for food storage. Store pantry goods like sugar, flour, and pasta in clear containers, labeling each container for quick access.
Group similar items with bins. For example, put canned goods in one bin and snacks in another. Keep everyday staples at eye level to save time while cooking or baking.
Step 5: Maximize Storage Space
Make every inch count. Use clever tools like shelf risers, hooks, and pull-out racks to keep things neat and easy to reach.
Use vertical storage solutions
Stand cutting boards and baking sheets upright. Store them in vertical racks or dividers to save space. Place these inside cabinets or on shelves for easy access.
Stack less-used appliances above cabinets. Use this space for seasonal dishes as well. Keep counters clear by going up instead of out. Vertical storage makes your kitchen look neat and organized!
Add shelf risers to cabinets
Double your cabinet space with shelf risers. These handy tools create a second layer, letting you store items on top and below. Use bamboo stackable organizers for an eco-friendly option that blends well with most kitchens.
Sort smaller plates, bowls, or mugs onto the raised levels to make everything easy to reach. Shelf risers work great in compact kitchen layouts, using vertical storage without taking up more room.
Install pull-out racks or drawers
Pull-out racks make your kitchen more organized. They let you see items like spices at a glance. A pull-out spice rack is perfect for quick access while cooking. Use pull-out shelves for deep cabinets to reach things easily without digging around.
These drawers also help save space in small kitchens. Store pots, pans, or cleaning supplies neatly inside them. This keeps everything tidy and easy to grab when needed.
Step 6: Organize Cabinets and Drawers
Make your cabinets easy to use and clutter-free. Arrange tools and utensils where they are simple to grab.
Store baking pans vertically
Stand your baking pans on their sides to save space. Store them vertically instead of stacking them flat in cabinets. Place at least three dividers to create four slots for different sizes.
This separates items like sheet trays, muffin tins, and cutting boards.
Sorting this way also makes it easier to grab what you need. You won’t have to unstack heavy piles or dig through messy shelves. Look for rack inserts or adjustable organizers that fit your cabinet space perfectly!
Use inserts for utensils and tools
Use drawer inserts to sort utensils and tools quickly. They keep forks, spoons, knives, and other kitchen gadgets neat, so you won’t have to dig through cluttered drawers when cooking or cleaning.
Pick inserts that fit your drawers well. Look for adjustable ones if sizes vary. Organize by type, group similar items together for quicker access while you cook in your functional kitchen zones.
Label the cabinet and drawer contents
Label each cabinet and drawer with clear tags. Use simple words like “spices,” “snacks,” or “utensils” to keep it broad. This makes finding items fast and easy for you and others in your home.
Stick labels on the outside or inside of doors. For neatness, you can use pre-made stickers or a label maker. Labeled spaces save time, reduce stress, and help maintain order daily in your kitchen organization efforts!
Step 7: Optimize Pantry Organization
Arrange your pantry to make cooking easier and faster. Clear containers and bins can keep everything neat and visible, no more digging around!
Decant pantry goods into clear containers
Pour your pantry staples into clear containers. For food like sugar, flour, or pasta, use glass jars with rubber seals to keep it fresh. Label each container for easy identification.
This method improves visibility and saves space. You can spot items quickly during cooking or baking. Clear containers also help you avoid buying duplicates, saving time and money!
Utilize bins to group similar items
Place paper and plastic goods in bins. This keeps them neat and easy to grab. Group canned foods, snacks, or spices into separate bins, too. It helps you find things faster while cooking.
Bins also stop items from falling over or getting lost. Clear containers let you see what’s inside without digging through stacks. Choose stackable ones to save space in your cabinets!
Place frequently used items at eye level
Keep things you use daily, like spices, oils, or mugs, at eye level. This saves time when cooking and reduces stress while reaching for them. Use the FIFO method in your pantry to manage food better; older items are kept up front, and fresh ones are left behind.
Clear containers work great for sugar, rice, or pasta. They’re easy to see without opening, so you’ll grab what you need faster!
Additional reading: Pantry Hacks for a Perfectly Organized Pantry
Step 8: Utilize Kitchen Doors and Walls
Use hooks or racks on doors and walls to store pans, lids, or utensils; every inch counts!
Hang pot lids or utensils on cabinet doors
Potlids can be hung on cabinet doors with adhesive hooks. The hooks can be stuck inside the door to save space and make lids easy to find. This method works well for small kitchens or tight spaces.
Attach smaller utensils, like measuring spoons, to cabinet doors, too. Use extra hooks in utility closets to hang cleaning tools, like brushes or dustpans. This keeps your kitchen organized without taking up counter space!
Mount rods or hooks for pots and pans
Install rods to hang your pots and pans. This will save space in your cabinets for other items. You can also mount hooks on the rods to hold lids. Place them on walls or under shelves for easy access.
Use sturdy hooks that can handle weight. Hang mugs under shelves with small hooks to free up more space. Keep cooking tools nearby for convenience while you cook.
The Bottom Line
An organized kitchen isn’t just about making things look neat; it’s about creating a space that works for you. When everything has a place, cooking becomes more enjoyable, cleaning feels less like a chore, and you can quickly move around. It even adds a bit of joy to your daily routine.
Remember, organization is a journey, not a one-time task. Take your time, adjust as you go, and set up a system that works for you and your family. And don’t be afraid to tweak it as your needs change.
Start small, stay consistent, and soon enough, you’ll have an organized kitchen that is a joy to be in. A tidy kitchen is the heart of a happy home!