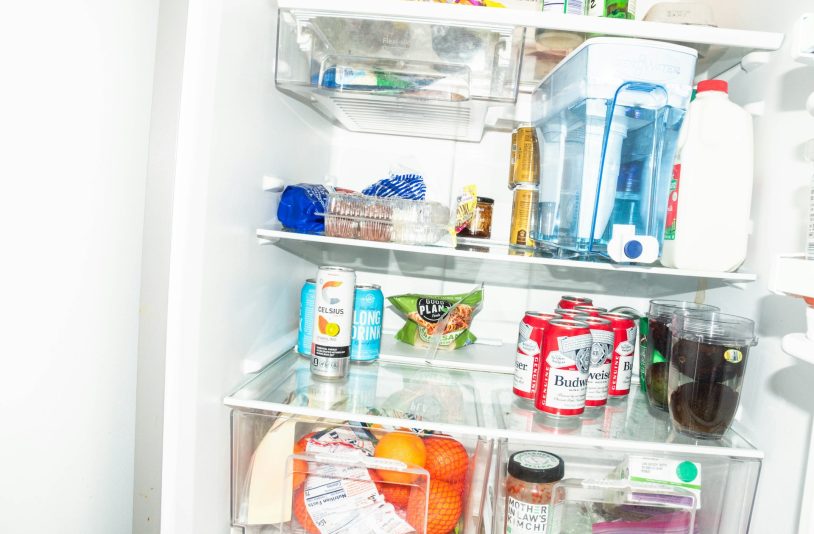
Is your fridge a mess? Do you struggle to find food items? A cluttered refrigerator can waste time and money. It also makes meal prep frustrating when you can’t see what you have.
Knowing how to organize fridge space is key. Each part of the fridge has a purpose, from crisper drawers for produce to door shelves for condiments. With simple steps and smart tools, you’ll save space, keep food fresh, and make life easier.
This guide will help transform your messy fridge into an organized one. Ready to get started? Keep reading!
Jump to Section [Hide]
Step 1: Prep Your Fridge for Organization
Start by making space for a fresh start, and clear everything out of the fridge. This step allows you to clean and get rid of expired items.
Empty the Fridge
Take everything out. Clear every shelf, drawer, and refrigerator door. Carefully set food aside on your counter or table.
Create an “eat first” section for foods near expiration dates. Toss anything spoiled or expired. Don’t skip this step! It saves space and prevents the spoilage of fresh items later.
Clean Thoroughly
Scrub the fridge with soap and warm water. Focus on shelves, drawers, and corners where dirt hides. Use baking soda to remove foul odors. It works like magic! Mix a little with water for stubborn stains.
Wipe everything dry before moving on. This stops mold or mildew from forming later. Experts suggest cleaning your fridge every three months for the best results. Keep it spotless to protect your food’s freshness!
Check Expiration Dates
Do not throw out items past their expiration dates. Instead, check jars, yogurt tubs, and condiments like Dijon mustard or ketchup for signs of spoilage.
Make an “expiring soon” section in your fridge. This spot should be used for items nearing their shelf life, such as sour cream or plain yogurt.
Step 2: Plan Your Fridge Layout
Start by setting zones for different types of food. To prevent contamination, place raw meat on the lowest shelf. Keep dairy products like milk and yogurt in colder spots, such as the back of the middle shelves.
Adjustable shelving makes space fit your needs and raises or lowers racks to hold tall bottles or larger containers.
Group items together for better access. Fresh herbs can sit in jars with water in a crisper drawer. Use clear bins to organize fruits, vegetables, and beverages like juices. Create an “eat first” section for foods nearing expiration so nothing goes to waste.
This setup keeps your refrigerator neat and easy to use!
Step 3: Sort and Categorize Your Food
Group your food by type and purpose, as it makes finding things faster and keeps your fridge neat.
Group Similar Items Together
Keep cultured dairy items like Greek yogurt, sour cream, and cottage cheese in one spot. Use a shelf to find these easily. Place condiments such as yellow mustard, pickles, and jams on the fridge door. They’re shelf-stable there.
Stack unpasteurized products or fermented foods like labneh and za’atar with similar goods. Store jars of hot sauce near each other for quick access. This makes your refrigerator zones neat and food easier to grab!
Separate Raw and Cooked Foods
Place raw meat, fish, and poultry on the bottom shelf. If your fridge has a separate meat and poultry drawer, use it. This keeps juices from dripping onto other foods.
Store cooked foods higher up to avoid cross-contamination. Use sealed plastic containers for added safety and better refrigerator organization.
Create a Snack Zone
Store snacks at children’s eye level. This makes it easy for them to grab a yogurt, cornichons, or any treat. Use clear bins with handles for better organization. Transparent storage helps everyone see what’s inside without digging.
Separate healthy options like fresh fruits or overnight oats from indulgent treats. Keep smoothie ingredients together in this zone, too! Make the space fun and accessible while keeping your fridge tidy and functional.
Step 4: Optimize Shelf and Drawer Arrangement
Organizing your fridge shelves and drawers can make finding food easier. Use each section smartly to keep everything fresh and safe.
Upper Shelves
Store milk here, not in the door. It stays colder on a shelf. Use this space for ready-to-eat foods like leftovers, yogurts, or cheeses. These items don’t need super-low temperatures to stay fresh.
To help herbs last longer, keep them in jars with water at this level. Packaged snacks and pickled products also fit well here. Avoid cramming too much to allow airflow across these shelves.
Middle Shelves
Place dairy items like milk or yogurt here. Keep uncovered produce on this level, too. Fresh herbs last longer when stored in water up to a week if exposed, and 2-3 weeks with a cover.
Use these shelves for leftovers you’ve labeled. This makes them easy to find and use before they spoil. Arrange cooked foods here instead of raw ones to avoid cross-contamination.
Lower Shelves
Store raw meat, poultry, and seafood on the lower shelves. Use a tray or clear bins to catch any drips and avoid cross-contamination. This is also a good spot for milk since it stays cold here.
Keep leftovers and heavy items like butter jars or bottles near the back. These shelves are sturdy enough to handle their weight without trouble. Group similar food items together to keep things organized!
Crisper Drawers
Crisper drawers help keep produce fresh. Use them to separate fruits and vegetables. Fruits release ethylene gas, which can cause veggies to spoil faster.
Set the humidity level based on what you store. Choose high humidity for leafy greens and other vegetables. Use low humidity for fruits like apples or berries to prevent ripening too quickly.
Door Storage
Use the fridge door for items that stay fresh longer. Store condiments, sauces, jams, and pickles here. These foods don’t spoil quickly because they contain preservatives.
Avoid putting milk or raw meat on the door shelves. The temperature is less stable there. Instead, keep drinks like juices or sodas for quick access. This frees up shelf space inside your fridge!
Step 5: Use Smart Storage Solutions
Smart tools can make your fridge more organized and easier to use. Try adding items that save space and keep food fresh longer.
Clear Bins
Use clear bins to keep your fridge neat. Transparent bins let you see what’s inside without opening them, saving time and preventing forgotten food from spoiling. Rubbermaid Commercial Containers work great for this.
Choose bins with handles for easy access. Organize snacks, produce, or raw meat storage by category to make finding items easy. Clear bins also help maintain kitchen organization while maximizing space in fridges and freezers!
Stackable Containers
Stackable containers save space and keep your fridge neat. They make it easier to see what’s inside without digging around. Clear options, like Rubbermaid Brilliance, work best for visibility.
These are great for storing produce, fresh herbs, or leftovers.
These containers also stop spills from spreading. Use them to stack snacks or meal preps neatly on shelves. Their design helps you organize food efficiently while reducing clutter in refrigerators.
Lazy Susans
Use Lazy Susans to make fridge storage easy. They spin, so you can reach items in the back without moving everything. These are great for jars, sauces, or snacks. Place one on your middle shelf for quick access.
Choose an OXO Good Grips Turntable for durability and smooth spinning. It works well in small spaces, too! A Lazy Susan helps keep foods organized and reduces clutter in your refrigerator while saving time during meal prep.
Fridge Mats
Fridge mats keep shelves clean and make spills easy to wipe. They protect your fridge from sticky messes caused by leaks or drips. Choose anti-slip mats that stay in place when you move items around.
These mats also help airflow, keeping produce fresh longer.
Pick washable mats for a quick clean-up. Use them to line crisper drawers where fruits and vegetables are stored. Some even come with built-in patterns to stop food from sliding around, which prevents damage to fragile items like fresh herbs!
Step 6: Label and Date Everything
Label bins and shelves, add dates to leftovers, and keep everything easy to find. These small steps can make a big difference!
Label Bins and Shelves
Use a label maker or stickers to mark bins and shelves. Write clear names like “Dairy,” “Fruits,” or “Leftovers.” This keeps things tidy and helps everyone find items fast.
Make labels big and easy to read. Use waterproof markers for long-lasting results, especially if spills happen.
Date Leftovers
Mark leftovers with clear dates. Use a label or tape to write the date you cooked the food. This helps you follow FIFO (first in, first out). For example, eat Tuesday’s pasta before Thursday’s chicken.
Stick to safe storage times. Most leftovers stay suitable for 3-4 days in the fridge. If unsure, check hgtv.com or discovery+ for tips on food safety. Proper labeling avoids waste and keeps your kitchen organized!
Step 7: Maximize Door Space Effectively
Use the fridge door for stable items like condiments, jams, and pickles. These don’t need the coldest spot in your fridge. Line them up neatly so you can grab them fast.
Avoid storing milk or eggs here. The temperature changes often when opening the door. Keep small bottles and jars on narrow shelves to save room. Use a clear bin if items get messy or are difficult to reach.
Maintain Your Fridge Organization
Keep your fridge neat with small habits each day. A little care now saves big messes later!
Weekly Check-Ins
Do a quick five-minute clean-out before shopping. Toss old food, wipe sticky spots, and rearrange items if needed. This keeps your fridge neat and ready for new groceries.
Create an “expiring soon” section in the front of a shelf or bin. Place foods close to their expiration date here. This will help you eat them first and reduce waste.
Keep an Inventory List
Use a dry-erase board or notepad to track your fridge’s inventory. Write down what you have and how much is left. This will help you avoid buying duplicates and save money.
Label your food with painter’s tape and a Sharpie. Add the name of the item and the date it was stored. This makes it easier to spot leftovers before they go bad. It also keeps meal prep stress-free for busy home cooks!
Clean Spills Immediately
Wipe spills as soon as they happen. Liquids can leak, causing odors or sticky shelves.
Use soap and water to clean the area. For harsh smells, sprinkle baking soda before wiping it off. Regularly cleaning messes keeps your fridge fresh and safe for food storage.
Bonus Tips for Efficient Fridge Use
Keep your fridge clutter-free to save energy and preserve food longer. Store fresh produce and herbs properly to maintain their crispness.
Don’t Overload the Fridge
Overloading the fridge blocks airflow. Cool air can’t reach all areas evenly, which may spoil food faster. Leave space between items to keep produce fresh and maintain proper storage conditions.
Create an “eat first” section for things close to expiring. This will help reduce waste and prevent clutter from building up. Use this zone for leftovers or products with shorter shelf lives, like dairy or fresh herbs.
Set the Right Temperature
Keep your fridge between 32°F and 40°F. This range keeps food fresh and prevents bacterial growth. Use 1 or 2 thermometers to check the temperature often.
Place thermometers in different spots, like the top shelf and crisper drawer. Cold air moves unevenly, so this helps you monitor better. Proper produce storage stays fresher longer at the right cold level!
Utilize First-In, First-Out (FIFO)
Use the FIFO method to keep food fresh. Place new items behind older ones on shelves or in bins. This ensures you use older foods first, reducing waste. Leftovers should have labels with dates so you know when they are safe to eat.
Say goodbye to expired meals hiding at the back! With FIFO, it’s easy to rotate and organize your fridge. Pair this with clear storage or snack zones for even better results.
The Bottom Line
Keeping your fridge organized doesn’t have to be a daunting task. With some planning and regular upkeep, you can turn your fridge into a tidy, functional space that makes meal prep easier and keeps your food fresher longer. Plus, who doesn’t love opening the fridge and instantly finding what they need?
Small changes can make a big difference!
So go ahead and give your fridge the makeover it deserves. You’ll save time, reduce waste, and maybe even discover that hidden snack you forgot. Happy organizing!


