Cleaning a bathroom can feel like a big job. Soap scum, water stains, and dirty grout make it more challenging.
Bathrooms need regular care to stay fresh and hygienic. Knowing how to clean a bathroom well saves time and keeps germs away. With the proper steps, it’s easier than you think.
This guide will show you simple ways to tackle every area, from sinks to floors. You’ll also learn tips for keeping your space neat every day.
Ready for a sparkling clean bathroom? Keep reading!
Jump to Section [Hide]
Gather Your Cleaning Supplies
Start by collecting everything you need. Having the right tools and cleaning products saves time and effort!
Cleaning cloths or microfiber sponges
Use microfiber cloths for bathroom cleaning. They trap dust, dirt, and grime easily. Keep at least five on hand for different surfaces. Use one just for mirrors and glass to avoid streaks.
Microfiber sponges work well with all-purpose cleaners on sinks or counters. They scrub gently without scratching surfaces. Wash them after use to keep them fresh and ready.
All-purpose cleaner and disinfectant
Spray an all-purpose cleaner on counters, sinks, and shelves. Wipe with a cloth or sponge to remove dirt and stains. For more challenging spots, let the cleaner sit for a minute.
Use disinfectant spray on high-touch areas like doorknobs, toilet seats, and light switches. Let it air dry to kill germs entirely. This keeps your bathroom safe and fresh!
Glass and mirror cleaner
For streak-free mirrors, use a glass cleaner or full-strength white vinegar. Spray lightly onto the surface, then wipe with a microfiber or cleaning cloth. A squeegee works well for larger mirrors and shower doors.
Mix dish soap, water, and vinegar in equal parts for an eco-friendly option. This cuts through grime without harsh chemicals. Keep your glass shiny by avoiding paper towels, which leave lint behind!
Toilet cleaner and brush
Choose a strong toilet cleaner that works against hard water stains and mildew. A tub and tile cleaner can also be used on the toilet bowl. For extra disinfecting power, use cleaning agents with hydrogen peroxide.
Scrub the toilet bowl with a firm brush, reaching under the rim. Clean behind the seat and around the edges where grime collects. Rinse your toilet brush after use, and keep it dry to avoid bacterial buildup.
Grout brush and scrubber
Use a grout brush to clean tight spaces between tiles. Its small bristles reach dirt, and grime others miss. For stubborn stains, apply bleach every 3-4 months. Scrub firmly in circular motions for the best results.
A scrubber helps with larger areas of tile or walls. Pair it with an all-purpose cleaner to remove soap scum fast. Combine these tools for shiny, fresh grout lines!
Mop, bucket, and vacuum
Grab a vacuum cleaner to pick up dust and debris. Pay attention to corners, vents, and under cabinets. A thorough sweep or vacuum makes mopping easier.
Fill your bucket with hot, soapy water mixed with bleach for deep cleaning. Use the mop to scrub the floor well. Focus on corners and areas behind the toilet for a spotless result.
Optional eco-friendly alternatives
Use baking soda and distilled white vinegar for most cleaning tasks. These are safe and natural. Mix them to remove stains, clean grout, or scrub toilets. Add a few drops of essential oils for a fresh smell.
Hydrogen peroxide is a disinfectant that fights germs without harsh chemicals. Use it on sinks, countertops, or the shower head. A microfiber cloth can replace disposable wipes, good for your wallet and the planet!
Step-by-Step Guide to Cleaning a Bathroom
Step 1: Prepare the Bathroom for Cleaning
Clear the space by moving items out of the way, making cleaning faster and easier.
Remove personal items from countertops and shelves
Take all toiletries, toothbrushes, and soap dispensers off the counters. Move everything from the shelves, like mouthwash bottles or small accessories. This gives you a clear space to clean every surface properly.
Keep personal items in a basket or box to avoid losing them. Clearing countertops makes it easier for your all-purpose cleaner to work effectively on germs and dirt.
Take out rugs, towels, and trash
Pull out all the rugs from your bathroom. Shake them outside to remove dust or dirt, then wash them if needed. Gather any used towels and toss them in the laundry. Fresh towels keep your space feeling clean and fresh.
Empty the trash can completely. Throw away everything, even tiny bits of paper or floss. A full bin attracts germs and smells terrible over time. Starting with a clear space makes cleaning easier later on!
Open windows or turn on the fan for ventilation
Crack open a window or switch on the fan before you start cleaning. Fresh air helps reduce chemical fumes and intense cleaner smells. Ventilation also keeps mildew from building up in damp spots like showers.
An exhaust fan works well if no windows are available. This simple step protects your breathing and makes the task more comfortable. It’s also suitable for hygiene and safety precautions while working with disinfectants or all-purpose cleaners.
Shake out or wash shower curtains and mats
Take down shower curtains and check for mold or stains. Wash them monthly using a gentle cycle with warm water. Rehang them to dry completely after washing.
Remove bath mats and shake them outside to remove dirt. Wash mats regularly to prevent mold buildup, especially in humid bathrooms. Keep them clean for a fresher space!
Step 2: Start with Dusting and Sweeping
Dust off high surfaces to prevent dust from falling onto clean areas later. Sweep or vacuum the floor to remove dirt and hair.
Dust light fixtures, vents, and corners
Use a duster or microfiber cloth to wipe light fixtures gently. Be careful not to break bulbs or damage covers. Dust vents and corners, too, as they often collect dirt. This step keeps the air cleaner and reduces allergens.
Remember areas high up where dust hides, like ceiling fans or the edges of shelves. A vacuum with a brush attachment helps reach tricky spots easily. Always work from top to bottom so that dust doesn’t fall onto the floors you’ll clean later!
Sweep or vacuum the floor
Start by sweeping to remove visible dust and debris. Use a broom with stiff bristles for corners and edges. This step helps prevent dirt from spreading during mopping.
For deeper cleaning, vacuum the entire floor. Focus on high-traffic areas like near sinks or the toilet. A vacuum picks up fine particles that brooms might miss and is great for tiled or textured floors!
Step 3: Clean Bathroom Surfaces
Wipe all surfaces to remove dirt, grime, and stains. Pay close attention to areas that get wet or touched often.
Wipe down countertops, shelves, and cabinets
Use an all-purpose cleaner to tackle countertops, shelves, and cabinets. Spray a small amount on a microfiber cloth or sponge for even coverage. Focus on corners and edges where grime hides.
Pay attention to cabinet handles. They are high-touch spots that need disinfecting. Wipe under items like soap dispensers for hidden dirt buildup. Don’t forget the backsplash area, it often collects splashes from cooking or personal care products!
Clean mirrors and glass surfaces
Spray glass cleaner or use full-strength vinegar on the mirrors and glass. Wipe with a microfiber cloth to remove streaks or smudges. Always work from top to bottom, letting gravity help.
Polish using a clean glass cleaning cloth for extra shine. This step gives your mirrors and surfaces a spotless look. Don’t forget smaller areas like shower doors or framed pictures!
Clean soap dispensers, toothbrush holders, and small accessories
Wipe soap dispensers and toothbrush holders with a cloth dampened in an all-purpose cleaner. Remove stuck-on soap scum and grime. Rinse thoroughly to avoid sticky residue.
Disinfect these items after cleaning to remove lingering germs. Use disinfectant wipes or sprays for quick results. Small accessories like trays or cups should also be washed regularly for hygiene!
Step 4: Deep Clean the Sink Area
Scrub the sink, tackle stubborn spots, and make fixtures sparkle. There’s more to uncover!
Scrub the sink basin, faucet, and handles
Use a non-scratching sponge or microfiber cloth. Spray all-purpose cleaner on the sink, faucet, and handles. Focus on hard-to-reach areas around the base of the faucet and handles.
Scrub gently to get rid of grime. Remove water spots with a clean, damp cloth.
Clean the drain area carefully to remove buildup. If necessary, use an old toothbrush to reach tight spaces or crevices. Rinse everything well with warm water until no cleaner remains.
Dry with a soft towel to leave surfaces shiny and spotless!
Remove water spots
Spray vinegar on the water spots and let it sit for a few minutes to break them down. Use a microfiber cloth to scrub gently and wipe away the stains. Repeat if needed for stubborn areas.
Polish the surface with a clean, dry microfiber cloth. This will leave it shiny and spot-free. Focus on faucets, showerheads, or glass that collects spots often.
Clear and clean the drain
Pour about half a cup of baking soda into the drain. Follow it with one cup of vinegar. Let it bubble for 10-15 minutes. This mix helps break down clogs and grime.
Flush the drain with boiling water to clear any remaining debris. If needed, use a brush or tool for extra cleaning power. Repeat monthly to prevent blockages and keep things flowing smoothly!
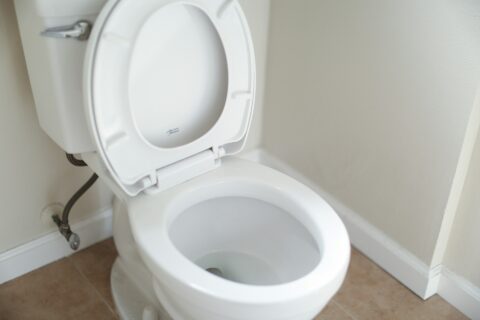
Step 5: Tackle the Toilet Thoroughly
Focus on cleaning every part of the toilet. Use a strong cleaner to scrub and disinfect well.
Scrub the bowl, including under the rim
Use a toilet cleaner. Apply it inside the bowl and under the rim. Let it sit for a few minutes to break down stains. Grab a toilet brush and scrub in circular motions. Pay extra attention to under the rim, it hides germs and grime.
To handle tough spots, use a pumice stone gently on stubborn stains. Be careful not to scratch the surface. Flush while scrubbing to rinse away dirt. Repeat if needed for a sparkling clean toilet bowl!
Disinfect the seat, lid, and exterior
Spray disinfectant on the toilet seat, lid, and exterior. Let it sit for a few minutes to kill germs. Wipe with a clean microfiber cloth or sponge.
Pay close attention to high-touch areas like the handle. Clean any spots where flushing toilet water may splash. Disinfecting the all-purpose cleaner works well for this step.
Clean behind the toilet
Use a mop or cleaning cloth to reach the spot behind the toilet. Spray an all-purpose cleaner, then wipe away dust and grime.
Make sure to disinfect this area, as it collects germs quickly. A microfiber sponge works well for tougher spots.
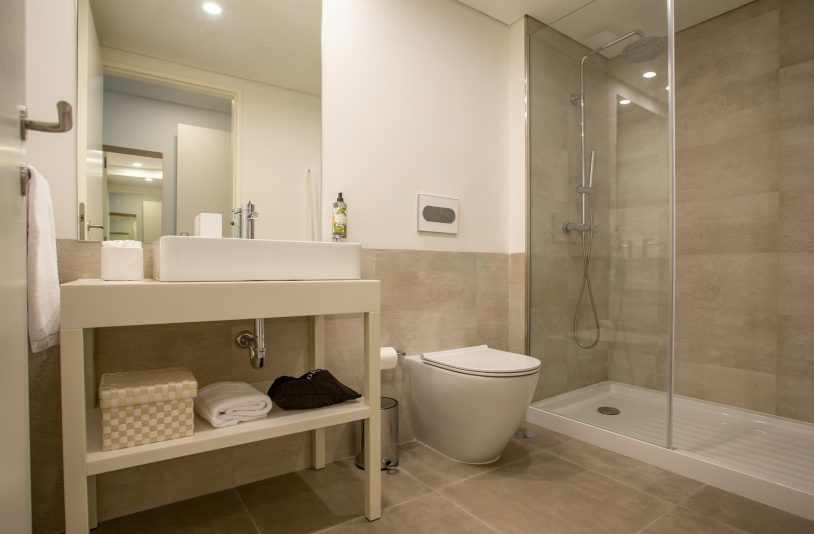
Step 6: Scrub the Shower and Bathtub
Use a scrubber or sponge to tackle soap scum and grime. Focus on grout lines, fixtures, and other tricky spots for a sparkling finish.
Remove soap scum from tiles, walls, and fixtures
Mix vinegar, warm water, and dish soap in a spray bottle. Spray the solution on tiles, walls, and fixtures coated with soap scum.
Let it sit for 30 minutes to break down the buildup. Scrub gently with a microfiber sponge or cloth until clean. Rinse well with warm water and dry surfaces to keep them streak-free!
Clean grout lines
Scrub grout with a brush and bleach every 3–4 months. This helps remove dirt, stains, and mildew. After scrubbing, rinse the area with warm water. Always dry the grout with a clean cloth to prevent moisture buildup.
Seal your bathroom grout every six months. Sealing keeps grime out and makes cleaning easier over time. Choose eco-friendly sealers if you prefer greener options. Keeping these lines clean improves both hygiene and appearance quickly!
Wash or replace shower curtains and clean doors
Wash plastic shower curtains every month. Use warm water and mild soap to remove dirt. Replace them if they look worn or stained. Spray vinegar on glass doors. Let it sit for 10 minutes, then wipe with a microfiber cloth.
Clean the edges of the shower door tracks, too. A grout brush works well for this spot. Check for mold or grime hiding in corners and scrub away any buildup using an all-purpose cleaner.
Step 7: Clean and Mop the Bathroom Floor
Sweep or vacuum the floor first, then mop it clean for a sparkling finish. Don’t skip tight spots!
Vacuum or sweep thoroughly
Use a broom or vacuum to clear all dust and dirt. Pay close attention to corners, edges, and under cabinets. Floors can hide small debris that mopping won’t catch.
Vacuuming removes fine particles for a cleaner finish. If sweeping, repeat the same spot twice to ensure nothing is missed. Don’t skip behind the toilet, dust loves hiding there!
Mop the floor
Mop the floor last to pick up all the dirt. Use hot, soapy water mixed with bleach for deep cleaning. This kills germs and leaves your bathroom fresh. Focus on corners and behind the toilet, where grime hides.
After mopping, rinse with clean water to remove any cleaner residue. Let the floor dry completely before stepping on it again. This keeps everything spotless and safe for everyone!
Clean corners and behind the toilet
Use a mop or cloth to clean the corners and behind the toilet. These spots collect dust, hair, and grime fast. Spray an all-purpose cleaner in these areas first. Let it sit for a few minutes to loosen dirt.
Wipe down everything with your microfiber cloth or sponge. Pay close attention to hard-to-reach places near pipes and walls. If needed, a grout brush helps scrub stubborn stains. Don’t skip this step, it keeps the bathroom fresh and spotless!
Step 8: Disinfect High-Touch Areas
Germs love spots you touch often, like switches and knobs. Clean these daily to keep the bathroom safer for everyone.
Wipe doorknobs, light switches, and handles
Spray disinfectant on a cleaning cloth or microfiber sponge. Wipe doorknobs, light switches, and handles to remove germs. Pay attention to areas touched often, like bathroom door knobs or shower handles.
If possible, disinfect these spots daily. Germs can spread fast in high-touch places, especially near raw meat prep or after showering. Use an all-purpose cleaner for extra shine and safety.
Clean towel racks and toilet paper holders
Wipe the towel racks and toilet paper holders with a cleaning cloth. Use an all-purpose cleaner or disinfectant to remove grime. Focus on spots where hands touch most often.
Remove dust from crevices or tight areas with a microfiber cloth. Check for rust or buildup, and clean these gently with warm water and mild soap if needed. Keep them dry to prevent new stains.
Step 9: Organize and Refresh
Put your items back neatly to keep everything tidy. Choose simple storage options to make the bathroom look fresh and welcoming.
Replace rugs, towels, and accessories
Swap out old rugs and towels for fresh ones. Worn-out items make the bathroom look untidy, even if it’s clean. Use soft, clean towels to refresh the space instantly.
Add new or clean accessories like soap dispensers or toothbrush holders. Choose matching designs for a more organized look. Minor updates can improve your bathroom’s appearance quickly!
Restock essential supplies
Fill the soap dispensers with liquid hand soap. Ensure there are enough all-purpose cleaners for future use.
After emptying the trash bag, replace it in the garbage bin. Place fresh towels, toilet paper rolls, and tissues where they belong.
Add finishing touches
Place all items back in their spots. Arrange your items neatly on shelves or countertops for better bathroom organization. Swap out old towels for fresh ones and add matching rugs to tie the space together.
Consider decorative touches like a small plant, candles, or stylish soap dispensers. Ensure everything looks clean and welcoming. Restock supplies such as toilet paper, hand soap, and tissues so nothing runs out unexpectedly.
Tips for Maintaining a Clean Bathroom
Keep your bathroom fresh with small daily habits. A few minutes each day can save you from lengthy, tiring cleanups later.
Daily habits
Wipe sinks, countertops, and faucets daily to prevent water spots and grime. For quick results, use a microfiber cloth with an all-purpose cleaner.
Squeeze your shower walls after every use. This helps prevent soap scum and hard water stains from building up on tiles or glass surfaces.
Weekly cleaning routines
Clean the toilet bowl and rim using a good toilet cleaner and brush every week. Disinfect the seat, lid, and exterior to keep germs away. Vacuum or sweep bathroom floors weekly. Mop them with warm water and an all-purpose cleaner for a fresh finish.
Switch out used towels every week to avoid bacteria build-up. Dust light fixtures, shelves, and corners while you’re at it. Wipe down high-touch areas like doorknobs, handles, or switches with disinfectant to prevent germs from spreading in your space!
Eco-friendly product suggestions
Distilled white vinegar can clean sinks, mirrors, and countertops. Mix it with water in a spray bottle for an all-purpose cleaner. Add a few drops of essential oils like lavender or lemon for a fresh scent.
Baking soda works great on stubborn stains. Sprinkle it in the tub or toilet bowl before scrubbing. Try microfiber cloths instead of disposable wipes. They’re reusable and eco-friendly.
Handling hard water stains and mold prevention
Fight hard water stains with vinegar. Soak a cloth in vinegar and wrap it around shower heads or faucets. Leave it for 30 minutes, then scrub gently. Vinegar easily breaks down the scale.
Run the exhaust fan during and after showers to prevent mold. Keep surfaces dry to stop growth. Clean tiles weekly using an all-purpose cleaner or eco-friendly options like baking soda paste.
The Bottom Line
Cleaning a bathroom doesn’t have to be complicated. You now know the steps from dusting to scrubbing and disinfecting. These tips are practical and easy to follow, making cleaning faster.
A clean bathroom keeps germs away and feels fresh for you and your family. Stick with daily habits and weekly routines to keep it spotless longer. Grab your supplies, put on gloves, and enjoy the results of a sparkling space!