Mint is one of those plants that’s almost too easy to grow—and once you start, you’ll wonder why you didn’t do it sooner! It smells fantastic, tastes even better, and adds a fresh pop to everything from drinks and desserts to homemade beauty products.
Mint doesn’t ask for much. A little sun, some water, and a bit of space (even just a pot on your windowsill) is enough to get started. Whether you’ve got a whole garden or just a few containers on the porch, mint is happy to grow pretty much anywhere.
Let’s walk through everything you need to know to grow your own mint at home—step by step!
Jump to Section [Hide]
- Understanding Mint Basics
- Choosing the Right Mint Variety
- Planning Your Mint Garden
- Preparing the Growing Area
- How to Plant Mint
- Growing Mint in Containers
- Growing Mint Indoors
- Mint Plant Care Tips
- Dealing with Common Mint Problems
- Harvesting Mint Properly
- Storing Mint for Later Use
- Propagating Mint for More Plants
- Creative Ways to Use Fresh Mint
Understanding Mint Basics
Mint is an easy-to-grow herb that thrives in many conditions. It spreads quickly, making it a hearty addition to gardens or containers.
Benefits of growing mint
Growing mint allows you to have fresh herbs at your fingertips. It adds flavor to teas, soups, and drinks, such as mojitos. You can also use it in savory dishes or for herbal remedies.
It’s packed with vitamins A and B6, as well as iron, calcium, and magnesium. Its aroma deters mice and is deer-resistant. Plus, the plant attracts pollinators like bees and hummingbirds to your garden!
Quick overview of its growth habits
Mint spreads fast through underground runners. It can take over gardens if not controlled. The plant grows up to 3 feet tall and thrives in moist soil. Mint is a perennial herb, meaning it comes back each year.
It tolerates cold as low as -20°F but may go dormant in extreme weather. Its shallow roots let it regrow quickly after pruning or harvesting mint leaves. This makes it easy to maintain and perfect for repeat harvests throughout the growing season.
Choosing the Right Mint Variety
Mint comes in many varieties, each with a distinct flavor and purpose. Pick one based on what you like or need, some are great for tea, others for cooking!
Peppermint
Peppermint (Mentha x piperita) is a hardy herb that thrives in USDA zones three and above. It can handle freezing temperatures as low as -20°F, making it ideal for cold regions. Its strong menthol flavor makes it a favorite for desserts, teas, and candies.
This perennial grows quickly and spreads through underground roots called rhizomes. To prevent overgrowth, plant peppermint in containers or raised beds. It prefers moist, well-drained soil in partial sun, but also tolerates light shade.
Spearmint
Spearmint is perfect for savory dishes and salads. It works beautifully in Middle Eastern favorites like tabouli. Pair it with lamb or summer vegetables to enhance their flavors. This mint variety thrives even in cold regions, making it an excellent choice for USDA zone 5 gardens.
Its leaves have a mild yet refreshing taste. You can plant spearmint near vegetables like carrots or zucchini as companion plants. The herb grows quickly and spreads rapidly, so contain its roots if necessary.
With proper care, you’ll enjoy fresh spearmint throughout the growing season!
Chocolate Mint
Chocolate mint stands out as a unique and tasty variety of mint. It has a rich, chocolatey aroma with hints of fresh mint. This makes it perfect for desserts, hot cocoa, or even fancy beverages like mojitos or mint tea.
Its leaves are dark green with slight reddish tones, adding beauty to any garden.
This herb thrives in moist, well-draining soil and partial sun, but also grows well in containers. Containing the roots is wise since they tend to spread quickly. Chocolate mint works great near shrubs like rosemary or marigolds for companion planting.
Harvest fresh leaves when needed, and enjoy their bold flavor in both culinary dishes and refreshing drinks!
Apple Mint
Apple mint, also known as pineapple mint, has a mild and sweet flavor. This variety works well in salads or beverages when you want a softer taste than spearmint or peppermint. Its fuzzy leaves and light green color add beauty to your garden, too.
Apple mint thrives in moist, well-draining soil. It prefers sunny spots but can tolerate light shade. Be sure to control its growth, as it spreads quickly, like other mints.
Other specialty varieties
Corsican mint is perfect as a ground cover. It spreads low, stays small, and works well between pavers for a fragrant touch. Pennyroyal repels pests like fleas and mosquitoes. This variety serves as both an ornamental and a functional plant.
Citrus mint and orange mint bring mild, refreshing flavors to drinks or dishes. These mints enjoy partial shade to avoid scorching in intense sun. Variegated types add visual appeal but require extra care to prevent sunburn.
Planning Your Mint Garden
Mint grows back every year, making it a low-maintenance choice for your garden. Select the best planting spot based on the amount of sun and available space.
Mint is a perennial
This herb returns year after year, growing from its sturdy roots. It thrives as a perennial, regrowing even after harsh winters or heavy pruning. You can cut it back at the start of each season to encourage fresh and vibrant growth.
To maintain its flavor and scent, replant every 3-4 years. This prevents the plant from becoming woody or losing strength over time. Its ability to regrow makes it an easy choice for gardeners seeking low-maintenance herbs that last long-term.
Climate and seasonal considerations
Mint grows well in temperatures between 60–80°F. It tolerates frost, with roots surviving down to USDA zone 5 or even zone 3, depending on the variety. In colder areas, mulch or insulated containers can protect it during winter.
If you have an unheated garage, mint plants can also survive there.
In hot climates, mint might go dormant during intense summer heat. Keep the soil moist to help it recover faster once the weather cools. For best results, plant mint where seasonal temperature changes align with its natural perennial growth cycle.
Garden vs. indoor vs. container options
Growing mint in containers is the easiest way to control its spread. Use a pot at least 8 inches wide and 10-12 inches deep. Containers work well both outdoors and indoors, allowing you to grow mint year-round with proper care.
Ensure good drainage by selecting pots with holes at the bottom.
In gardens, mint can become invasive if not properly managed. Raised beds or steel and concrete barriers keep it contained. Indoors, place your mint near a sunny window or use grow lights for extra support.
Variegated types do well in partial shade but thrive better with some sunlight each day.
Preparing the Growing Area
Choose a sunny spot with well-draining soil. Add composted materials to boost fertility and support healthy growth.
Choosing the right location
Select a spot with full sun for mint, although it can also tolerate partial shade. Variegated types need extra care to avoid scorching in direct sunlight. Make sure the area has rich, fertile soil with good drainage.
A damp location works well, but avoid overly soggy spots to prevent root rot.
For outdoor planting, space mint plants 18–24 inches apart to allow room for growth. If growing indoors or in containers, choose a bright windowsill or use grow lights for ample light.
Ensure air circulation around the plant to keep it healthy and thriving.
Preparing the soil
Loosen the topsoil in your garden area. Add aged compost or rich organic matter to improve it. This boosts nutrients and keeps the soil light, helping mint roots grow well.
Ensure the pH is between 6.0 and 7.0 for optimal results. If unsure, use a product like Miracle-Gro Performance Organics All Purpose In-Ground Soil to prepare a healthy base. Ensure the soil drains water quickly but remains moist enough, as mint prefers damp conditions without being overly wet.
Using containers or raised beds
Use a container at least 10 inches wide for one plant. For outdoor growing, select pots between 12 and 14 inches in diameter. Larger containers, such as 2-gallon pots, work well in hot areas to keep the roots cool.
Choose pots with good drainage to prevent root rot, and turn them weekly to control root spread.
Raised beds can also help contain mint’s strong roots. Steel or concrete edges are effective at keeping the plant from spreading into other areas of your garden. Fill the bed with rich, well-draining soil that also retains moisture.
This setup keeps mint healthy while preventing it from taking over nearby plants.
How to Plant Mint
Planting mint is simple—you can use seeds, stem cuttings, or young plants to get started; each method works well and has its advantages.
Growing from seeds
Start mint seeds indoors 8–10 weeks before the last frost date. Sow seeds 1/8 inch deep in moist potting soil, as they need water to germinate properly. Place the container in a warm spot with plenty of natural light or under grow lights.
Keep the soil consistently moist but not soggy until seedlings appear. This process typically takes 10 to 15 days. Once the danger of frost has passed, transplant seedlings outdoors into your garden or containers.
Be aware that mint grown from seed may not be true to type, so for specific varieties like peppermint or spearmint, cuttings are often a better option.
Growing from cuttings
Take a 6-inch stem cutting from a healthy mint plant. Spring is the best time since growth hasn’t peaked yet. Use clean scissors or pruning shears for a smooth cut. Remove leaves from the lower half of the stem to prevent rot.
Place the cutting in water or directly into moist potting soil. If using water, change it every few days to keep it fresh, and roots should appear in about one to two weeks. For soil planting, keep the area damp but not soggy.
Once rooted, transfer your new mint plant to its final growing spot for abundant fresh mint leaves!
Growing from transplants
Use Bonnie Plants mint transplants for a head start on your garden. Plant them with roots just below the soil surface, leaving 18–24 inches between each plant. This spacing helps prevent overcrowding and allows good airflow.
Choose early spring or fall to divide and transplant mature plants for easy propagation.
Select a sunny spot with well-drained soil, or plant in containers if space is limited. Transplants adapt quickly with proper care, growing into lush, healthy foliage. Keep the area moist but not waterlogged to support root growth in the first few weeks.
Watering newly planted mint
Keep the soil consistently moist after planting. Water whenever the top inch of soil feels dry to the touch. Newly planted mint needs about 1–2 inches of water each week during the growing season.
Avoid overwatering to prevent root rot or fungal issues. Use well-draining soil in containers or beds to minimize the risk of waterlogging. Add organic mulch around the base to help retain moisture and regulate temperature.
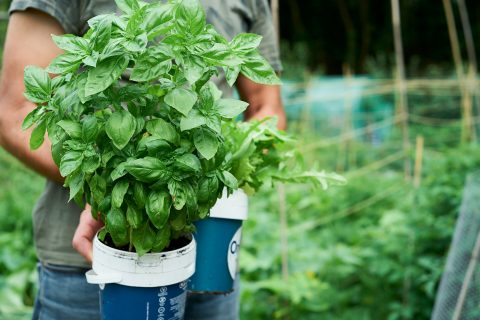
Growing Mint in Containers
Growing mint in containers is a simple and rewarding experience. It keeps the plant tidy and prevents its roots from spreading too much.
Best container size and depth
Use a pot at least 10 inches wide and deep if growing a single mint plant. For outdoor or year-round growth, choose containers 12–14 inches in diameter. This ensures enough room for roots to spread without overcrowding.
When mixing mint varieties, choose a container with a depth and width of at least 8 inches. Ensure the container is sturdy, as mint roots can proliferate. A deeper pot also reduces the need for frequent watering, as it holds moisture better.
Potting soil mix
Choose a premium potting mix for growing mint in containers. Miracle-Gro Performance Organics All Purpose Container Mix works well. The soil should be light, rich in organic matter, and drain easily to prevent soggy roots.
Add time-release fertilizer in spring for stronger growth. Follow the label instructions for the correct amount to use. This type of soil helps keep your mint healthy and promotes rapid growth, resulting in vibrant green leaves.
Ensuring drainage
Ensure your container has drainage holes. These prevent water from pooling, which causes root rot and fungal issues. Without proper drainage, mint roots can sit in excess moisture, which can lead to disease.
Turn the pot weekly to stop roots from escaping through the holes. Use well-draining soil, such as a light potting mix combined with sand or perlite. This keeps water flowing and protects your mint plant’s health.
Managing root spread
Mint roots grow aggressively. They can escape through drainage holes in pots if left unchecked. To control this, use containers with no cracks or holes large enough for roots to sneak out.
Choose a pot at least 12 inches deep and wide to give roots space without overcrowding. Divide and repot plants regularly, about once every year, to maintain healthy growth.
When planting mint in the ground, use barriers such as steel edging or concrete edging. Steel edges should extend 3–4 inches above and go 10–15 inches below the soil surface to stop root spread beneath the ground.
This keeps mint from invading nearby plants, such as basil leaves or even apple trees. Proper containment prevents weeds while giving your garden a cleaner look!
Growing Mint Indoors
Growing mint indoors is a simple and rewarding experience. With the right spot, your mint will thrive year-round!
Best indoor locations
Place your mint in a south-facing window for the best sunlight. Mint needs 6 to 8 hours of direct light each day to thrive indoors. If natural light is limited, use grow lights to maintain your mint’s health.
Maintain moderate humidity by placing a water tray near the plant or misting it occasionally. Good airflow is also key, so avoid closed spaces. A kitchen window is ideal because it often has both air movement and moisture from cooking or cleaning.
Using grow lights
Use grow lights to provide the mint with sufficient light indoors. Aim for 12–13 hours of total light daily. Fluorescent lights work well; two hours under these equal one hour of sunlight. Position the lights 6–12 inches above your mint plants for best results.
Rotate the plants every few days to ensure even growth and development. Ensure that the bulbs do not overheat, as excessive heat can damage the mint leaves. You can combine grow lights with natural sunlight, if possible, for extra-bright, healthy growth.
Maintaining humidity and airflow
Keep the humidity around your mint plants moderate. Too dry, and spider mites may appear. Too humid, and fungal issues might spread. Aim for balanced conditions to keep the plant healthy.
Ensure good airflow to prevent diseases. Avoid crowding pots or planting too close in gardens. Rotate indoor containers every few days for better air circulation. If growing indoors, use a small fan to circulate air around the plants gently.
This reduces risks like root rot or mold problems while helping your mint thrive indoors!
Mint Plant Care Tips
Caring for mint is simple if you follow a few key steps. Keep your plant happy with proper watering, trimming, and attention to its needs.
Watering schedule
Keep the soil moist, but avoid allowing it to become waterlogged. Water your mint when the top inch of soil feels dry to the touch. During active growth seasons, provide your plant with approximately 1–2 inches of water each week.
In warmer weather or outdoor conditions, you may need to water more often. For indoor plants, check humidity levels and adjust watering as needed. Always ensure proper drainage to prevent root rot.
Fertilizing mint
Feed your mint with water-soluble plant food every two weeks. This boosts leaf growth and maintains the plant’s health. Use organic fertilizers if you prefer a natural option.
Apply 1 teaspoon of 16-16-16 fertilizer per plant in early spring when new growth starts. Time-release fertilizers also work well during this time; follow the package directions closely to avoid over-fertilizing.
Pruning and pinching
Prune mint plants heavily at the start of each growing season. This clears away old growth and allows new shoots to thrive. Cut stems back by about one-third to encourage fresh, dense growth.
Harvest leaves regularly by pinching or cutting just above a leaf node. This method boosts bushiness and prevents spindly stems.
Cut your mint back two or three times per year before flowering starts. Flowers reduce the flavor quality of the leaves, so removing them early keeps your plant productive and tasty.
Use clean tools for pruning to prevent the spread of diseases like verticillium wilt.
Removing flowers
Pinch off flower spikes as soon as they appear. This keeps the plant focused on producing leaves, which have the best flavor and highest oil content. Letting mint bloom reduces its potency and makes the leaves less aromatic.
If you want pollinators, such as bees, around your garden, leave a few flowers. For cooking or tea garden needs, remove all blossoms promptly to maintain a strong flavor. Regular pruning also encourages new growth and prevents leggy stems from forming.
Dealing with Common Mint Problems
Mint can face issues like yellowing leaves or pests that harm its growth. Focus on identifying trouble early and addressing it promptly to maintain your plants’ health.
Yellow leaves
Yellow leaves often indicate excessive water, insufficient sunlight, or weak soil. Check if the soil drains well and is not compacted. If it feels soggy or stays wet for too long, reduce watering to avoid root stress.
Ensure your mint gets enough sunlight each day to stay healthy. Low light can cause fading leaves. Add a balanced fertilizer if the soil is nutrient-deficient. If yellowing persists despite the changes, inspect the roots for signs of rot or pests, such as cutworms, that might harm growth.
Root rot
Root rot occurs when mint is planted in soggy soil, often due to overwatering or poor drainage. The roots become waterlogged and start to decay, weakening the plant. Leaves may droop or turn brown as a sign of trouble.
Use pots with good drainage holes to stop this issue. Select well-draining soil, such as a container mix or sandy garden soil. If you notice root rot, act fast by removing the damaged plant and fixing the soil.
Improve drainage by using raised beds or lighter soils to promote healthier plants moving forward.
Common pests
Mint plants often face pests like aphids, spider mites, whiteflies, blackflies, snails, and slugs. These bugs feed on the leaves and stems. You may notice yellowing leaves or sticky residue left behind by these insects.
Wash your mint plants with water to remove pests early. Use insecticidal soap for stubborn infestations. This helps protect young mint from damage. Keep an eye on your plant for any signs of trouble so that you can stop problems quickly.
Fungal issues
Fungal diseases like powdery mildew, rust, leaf spot, anthracnose, and stem canker can harm your mint plants. These issues often appear in crowded spaces with poor airflow or after overhead watering.
Brown spots or white powdery patches on leaves are clear warning signs of fungal infections.
To prevent these problems, focus on proper care and maintenance. Use well-drained soil and avoid wetting the leaves during watering. Remove any affected parts immediately to stop the spread. Good air circulation helps too; space out your plants correctly, whether they’re in containers or gardens.
Keep a close eye on them during humid weather to catch any issues early and receive prompt treatment if needed.
Harvesting Mint Properly
Pick mint leaves early in the morning—they’ll taste fresher and be full of flavor!
When to harvest
Harvest mint leaves at any size, but aim for plants that are 3 to 4 inches tall. This ensures tender and flavorful leaves. For the best taste, trim stems just before the plant blooms.
You can take large harvests about three times per growing season. Cut back the stems close to the base and allow new growth to appear. Regular harvesting encourages regrowth, keeping your mint healthy and productive throughout the entire season.
How to harvest
Cut mint stems to within 1 inch of the soil for a big harvest. Use clean scissors or pruners to prevent harming the plant. This method encourages healthy regrowth and keeps your mint thriving.
For fresh use, snip leaves or small stems as needed. Pinch gently with your fingers or clip carefully to avoid tearing. Regular harvesting helps keep the mint bushy and prevents flowers from forming.
Encouraging regrowth
Regular harvesting keeps mint healthy and bushy. Snip stems often, cutting just above a leaf node to promote new shoots. Avoid taking more than one-third of the plant at once.
Cut plants back before flowers appear. This step redirects energy to leaf growth, boosting flavor and leaf production. Each plant regrows fast, allowing for 2–3 harvests per growing season.
Storing Mint for Later Use
Keep your mint fresh by storing it properly for future use. Preserve its flavor and aroma with simple methods that fit your needs.
Drying mint
Dry mint by tying small bunches and hanging them upside down in a well-ventilated area. Another option is to spread the leaves on screens or trays where air can move freely around them.
Avoid areas with high humidity, as this can slow down the drying process.
Once dried, store the mint in an airtight container, keeping it away from sunlight. Properly stored dried mint keeps its flavor for up to one year. It also offers more fiber and minerals compared to fresh leaves, making it both tasty and nutritious!
Freezing mint
Chop fresh mint leaves and place them in ice cube trays filled with water. Freeze the trays to create flavorful mint cubes. These cubes are handy for drinks like punch or iced tea, adding a burst of freshness.
You can also preserve mint in vinegar for cooking uses. Frozen mint retains its flavor well, making it ideal for year-round use in recipes. Mint stored this way stays vibrant and functional long after harvesting from your garden or container.
Storing fresh mint
Keep fresh mint in water to extend its life. Place the stems upright in a glass of water, like flowers in a vase. Loosely cover the leaves with plastic and refrigerate. This method keeps it fresh for up to a week.
Change the water daily. Fresh water helps maintain the mint’s aroma and flavor longer. Use this time to check for wilting or yellow leaves and remove them as needed. Always use your mint promptly for the best taste.
Propagating Mint for More Plants
Growing more mint is easy and fun. You can use simple methods, such as stem cuttings or dividing mature plants, to expand your garden.
Growing from stem cuttings
Take a 6-inch stem from a healthy mint plant. Pick one without flowers for better results. Strip the lower leaves, leaving just the top few. Place the cutting in water or plant it directly into moist soil.
Roots form quickly, often within a week in water. Once roots are strong enough, move it to a garden or container with good drainage. Keep the soil damp, not soggy, during this time.
This method works well for varieties like peppermint and spearmint. Use this approach to easily grow a plentiful supply of fresh mint!
Dividing mature plants
Divide mature mint plants in early spring before growth starts or in early fall. Use a shovel to dig up the plant, being careful not to damage the roots. Separate the root ball into smaller sections by hand or with a clean knife.
Each division needs strong roots and several stems for success. Replant divisions in fresh soil, leaving enough space between them to prevent overcrowding. This process, every 3–4 years, keeps your mint healthy and growing vigorously.
Propagation tips
To propagate mint, use stem cuttings or divide mature plants to create new ones. Take a 3-4-inch cutting from a healthy stem, remove the lower leaves, and place it in water. Roots will appear within a week.
Once the roots are strong, transfer them to soil.
Dividing mature plants is an effective way to propagate quickly. Uproot the plant carefully, then separate the root clusters with your hands or a small knife. Replant these divisions immediately into fresh soil or containers to ensure continued growth.
Creative Ways to Use Fresh Mint
Fresh mint can transform your dishes, drinks, and even homemade remedies—explore its endless uses!
Culinary uses
Mint adds fresh flavor to many dishes. Spearmint works great in savory meals, such as Middle Eastern salads like tabouli, or paired with lamb. It also complements summer vegetables, such as peas and corn.
Peppermint shines in desserts, smoothies, and baked goods thanks to its rich, sweet flavor.
For subtle hints of sweetness, use apple or orange mint in light recipes. Mint makes a perfect garnish for soups and fruit bowls, too. Try it with new potatoes for a refreshing twist or mix it into yogurt-based dips.
Chopped leaves blend well into herbal sauces served over meat or fish.
Beverages
Add fresh mint to drinks for a burst of flavor. A simple mint water recipe calls for 1 cup of bruised leaves and 1/2 gallon of water. Chill it, strain it, then serve over ice for a refreshing treat.
Make hot mint tea by cutting 3–4 stems. Steep them in boiling water for 10 minutes, and sweeten to taste if desired. Mint also shines in cocktails like mojitos or mint juleps, adding an herbal twist to your beverages.
Herbal remedies
Mint works wonders for health. It helps alleviate headaches, soothes stress, and promotes improved digestion. Its essential oils provide a cooling effect that calms the body. You can add mint to herbal teas for a natural boost of relief.
Use fresh or dried mint to treat nausea or stomach upset. Mint tea also helps relax after a long day. For colds, its soothing scent clears nasal passages. Keep some dried mint on hand; it’s easy to store and always helpful for quick remedies!
DIY home uses
Use dried mint in potpourri or sachets to add a fresh scent around your house. Place them in closets, shoes, or drawers for a natural air refresher. Fresh mint can also be mixed into homemade cleaning solutions.
Combine it with water and white vinegar for an eco-friendly cleaner.
Peppermint oil works well as a pest repellent. It can keep mice and insects away from corners and entry points in your home. For fresher indoor air, simmer mint leaves with citrus peels on the stove.
It creates a simple, chemical-free air freshener!
Final Tips
Growing mint is a simple, fun, and rewarding experience. This hardy herb thrives with minimal care and provides fresh leaves for various uses. Whether in a garden or a pot, mint grows fast and looks great.
Start small, follow these steps, and enjoy the fragrance and flavor of your very own mint plants!