Growing your own carrots is easy and a lot of fun! From backyard gardens to deep containers, carrots are an excellent choice for both beginners and experienced gardeners. They require minimal maintenance, don’t need much space, and there’s nothing quite like pulling up a fresh, crunchy carrot that you’ve grown yourself.
In this guide, we will walk you through everything you need to know to grow sweet, healthy carrots from seed to harvest.
Let’s dig in!
Jump to Section [Hide]
- Choosing the Right Carrot Variety
- When and Where to Grow Carrots
- Preparing the Soil for Carrots
- How to Plant Carrots
- Growing Carrots in Containers
- Watering and Moisture Management
- Fertilizing Carrots the Right Way
- Mulching and Weed Control
- Protecting Carrots from Pests and Diseases
- Caring for Carrots Through the Seasons
- Harvesting Carrots
- Storing Carrots After Harvest
- Can You Regrow Carrots from Tops?
- Troubleshooting Common Carrot Problems
Choosing the Right Carrot Variety
Pick carrot varieties based on your garden needs—some thrive in containers, while others prefer open soil. Consider color, size, and shape to match your personal preferences.
Popular types
Danvers carrots are well-suited to heavier soils. They grow 6–8 inches long and are ready in 65–75 days. Bolero, a sweet, disease-resistant variety, matures in 75 days and reaches a height of 7–8 inches.
Yaya is a fast-growing variety, perfect for quick harvests, and matures in just 60 days.
Dragon carrots have purple skin and orange flesh, are rich in lycopene, and take 70–90 days to grow. Nantes offers a sweet, crisp flavor and grows 6–7 inches with no taper. For small spaces, try Atlas.
These round carrots, which are 1–2 inches wide, perform well in poor soil.
Best varieties for containers
Choose small or round carrots for containers. Little Finger, a Nantes type, grows only 4 inches long and 1 inch thick. Thumbelina and Atlas are also great options, as they are both round and compact, measuring approximately 1-2 inches in width.
These varieties thrive in pots due to their compact size.
Adelaide and Bambino are miniature carrots that work well in smaller spaces. Romeo, a round variety, measures just 1-1.5 inches, making it perfect for tight containers. Touchon, an heirloom Nantes type, grows up to 6 inches and does well in pots with deeper soil.
These options support healthy growth without requiring large garden beds.
Color and shape considerations
Carrots come in a rainbow of colors. You can grow white, yellow, red, purple, black, and more. Solar Yellow and Yellow Moon offer sunny yellow shades. DRAGON carrots are purple with orange centers and are rich in lycopene.
Each color adds unique nutrients and flavors to your harvest.
Shapes also vary. Nantes types grow straight with no taper, perfect for slicing. Chantenay carrots have a broad, conical shape and thrive in heavier soils. Round varieties, such as Thumbelina, perform well in shallow soil or containers.
Longer Imperator and Danvers types need loose, deep soil to stretch fully. Choose based on your garden’s conditions and needs!
When and Where to Grow Carrots
Carrots need the right spot and timing to thrive. Select a sunny location with well-draining soil, and plant during the optimal season for your zone.
Ideal planting season
Plant carrot seeds 2–3 weeks before the last spring frost for an early summer crop. For a fall harvest, sow seeds 10 weeks before the first expected frost. Plant mid to late summer for sweet carrots after autumn frosts.
Soil temperatures between 45–85°F provide the best conditions for germination. Avoid planting when the soil temperature exceeds 75°F, as it reduces germination success. Carrots are hardy and can withstand cold down to 32°F when properly grown.
Sunlight needs and companion planting
Carrots thrive on 6–10 hours of sunlight per day. They grow best in full sun, although light shade can also work. Raised beds or deep containers ensure proper exposure and prevent shading from other plants.
Keep them away from tall crops that block sunlight.
Companion planting improves growth and protects your carrots. Marigolds reduce root-knot nematodes, while radishes help mark rows for easy care. Harvest radishes early to give carrot roots space to expand.
Rotate carrots with non-nightshade crops every 3–4 years to avoid harmful pests, such as nematodes, building up in the soil.
Indoor vs. outdoor growing
Growing outdoors works best for most carrot varieties. Direct sowing into the garden allows taproots to grow straight and strong. Outdoor soil, paired with natural sunlight, promotes healthy growth when your area receives 6-10 hours of sunlight daily.
Raised beds or deeply tilled gardens help prevent rocky or compacted soil that can damage root structure.
Indoor growing suits baby carrots or dwarf types in containers at least 6-8 inches deep. Use a loose, well-drained potting mix and maintain consistent moisture. Supplement light with grow lamps if needed.
For year-round options, keep pots near sunny windows or under LED lights to mimic outdoor conditions.
Preparing the Soil for Carrots
Start with loose, rock-free soil to give your carrots room to grow—prepping well can mean healthier, straighter roots!
Soil depth and texture
Carrots need soil at least 8 to 12 inches deep. This allows the roots to grow straight and long. Loose, sandy, or loamy soil works best for standard carrot varieties. Compact or clay soils should be improved with compost and sand.
Raised beds or containers can also provide the required depth.
Remove rocks and clumps to prevent misshapen or forked carrots. Shorter varieties, such as baby or round carrots, are better suited to shallow or rocky soil. Good drainage is essential, as soggy soil can lead to root rot or other diseases.
Removing rocks and clumps
Clear away all rocks, clumps, and debris from the top 10 inches of soil. These block roots cause carrots to fork or become misshapen during growth. Double-digging, tilling, or sifting through the dirt can help remove hidden obstructions.
If your soil feels too chunky, mix in fine sand to make it smoother. This reduces clumping and creates an even base for seed germination.
Raised beds simplify this process by giving you control over soil quality. Inspect your garden at the start of each planting season for any new debris. Avoid leaving undecomposed organic matter in the ground, as this can lead to side-rooting issues in your crop.
By prepping properly, you’ll grow healthier seedlings with longer roots!
Amending with compost or organic matter
Mix compost or well-rotted leaves into your soil before planting. This boosts fertility and helps with moisture retention. Organic matter also improves the texture, making it easier for carrot roots to grow straight and reach greater depths.
Avoid fresh manure or undecomposed materials, as they can cause carrot branching. Add a layer of sandy topsoil, up to 6 inches thick, if your soil is heavy clay. Work all amendments into the top 8–10 inches of soil thoroughly.
Always use fully decomposed compost to prevent pests from harming your crop.
Ideal pH and drainage
Carrots grow best in soil with a pH between 6.0 and 6.8. Test your soil with a simple test kit before planting to get it just right. If the pH is too low, you can add lime to raise it.
For high pH, use sulfur to lower it gradually.
Proper drainage is key to healthy carrots. Poorly draining soil causes root rot and stunted growth. Add compost or sand to improve both drainage and texture. Raised beds or containers help control water flow better than heavy clay ground does! Maintain consistent moisture levels, but avoid excessive moisture, which can harm roots over time.
How to Plant Carrots
Plant carrot seeds directly into loose and well-prepared soil. Space them out for even growth, then wait patiently as they begin to sprout!
- Sow carrot seeds directly into the soil. Place them about 0.25 inches deep in loose, well-prepared earth. Avoid transplanting carrots, as it disrupts their growth.
- Mix the tiny seeds with fine sand to spread them more evenly.
- Start planting 2–3 weeks before the last spring frost for early crops. For fall crops, sow seeds 10 weeks before the first autumn frost.
- Use pelletized seeds if you find handling regular seeds challenging.
- Cover the planted area with burlap or fabric to retain moisture and block sunlight while the seeds germinate, a process that can take 5–21 days, depending on the conditions.
- Keep your soil consistently moist during this time for optimal results.
Seed spacing and depth
- Plant seeds 1 inch apart in rows that are 12–18 inches apart. Use shallow furrows to maintain a planting depth of 0.25 inches (0.64 cm). If using containers, space seeds 0.5 inch apart and plant them 0.25 inch deep.
- Thin seedlings later to leave 1.5–3 inches between plants.
- Avoid planting seeds too deeply, as this may reduce germination. For steady harvests, sow seeds every four weeks from midsummer to late summer. You can add radishes to the rows to mark the spot and avoid disturbing carrot seedlings.
Tips for better germination
- Keep the soil moist but not soggy. Carrot seeds require consistent moisture to germinate, a process that can take 5 to 21 days. Use a thin layer of mulch or burlap to prevent the soil from drying out too quickly.
- Mix seeds with fine sand before planting for even spacing. Lightly water the soil often to prevent surface crusts, which can deter sprouts from breaking through. Select raised beds or containers for improved temperature and moisture control, if necessary.
Thinning seedlings
- Thin carrot seedlings to 2–4 inches apart once they reach 2 inches tall. This spacing reduces overcrowding and helps roots grow straight and strong. Snip the tops with scissors rather than pulling them to avoid damaging nearby roots.
- Do this after true leaves appear, while the soil is moist. Moist soil makes it easier to avoid root disturbance. Remove all thinned seedlings to prevent pests or diseases from spreading.
- Proper spacing improves airflow and lowers the risk of fungal diseases. Overcrowded carrots often grow small or twisted, so thinning enhances crop quality.
Growing Carrots in Containers
Growing carrots in containers is perfect if you have limited space or rocky soil. Choose deep pots with good drainage and watch your carrots thrive!
- Use a container at least 12 inches deep for standard carrots. Baby or dwarf varieties can grow in containers 6 to 8 inches deep. Round types, such as Thumbelina, Romeo, and Atlas, work well in shallow pots.
- Make sure the container has drainage holes to prevent waterlogging. A diameter of 1.5 to 3 inches is ideal, allowing 1.5 to 3 inches of space per carrot. Deep grow bags or raised beds (8 to 12 inches) are also great for long-rooted types.
- Shallow containers may cause stunted or forked roots, so avoid them unless you are growing short varieties.
Choosing the right potting mix
- Pick a loose, well-draining potting mix. Avoid heavy, clay-based soils, as they can compact and impede carrot growth. Add compost or organic matter to improve fertility and root development.
- Mix in bonemeal to boost phosphorus levels without adding excessive nitrogen.
- Ensure the mix is free of rocks, sticks, and clumps. Pre-moisten it before sowing seeds to make planting easier. Look for a mix that holds moisture but still drains well to prevent rot.
- Low-nitrogen fertilizers work best, allowing roots to grow properly rather than focusing on leaves.
Watering and care tips
- Water your carrots regularly to keep the soil evenly moist. Use drip irrigation for steady moisture without waterlogging. Dry soil can lead to cracked roots, while soggy soil can cause root decay.
- Monitor for signs of under- or overwatering, such as wilting foliage or yellowing leaves.
- Add mulch around the plants to retain moisture and control temperature. Rotate containers every few weeks for even sunlight if growing in pots. Ensure six to ten hours of full sun daily; insufficient light can stunt growth.
- Check the container’s drainage holes regularly to avoid root rot.
Watering and Moisture Management
Water your carrots regularly to keep the soil moist, but avoid overwatering to prevent waterlogging. Steady moisture helps them grow straight and sweet.
Watering frequency
- Give your carrots 1 inch of water each week as they mature. Increase to 2 inches per week as harvest time approaches. Check the soil often, especially during dry spells, and add water if needed.
- Raised beds and containers may dry out more quickly, so you may need to water them more frequently. Use mulch around your plants to retain soil moisture. Water early in the morning to allow leaves to dry during the day, which helps prevent diseases like carrot rust fly, which are caused by excess moisture or poor drainage.
- Avoid overwatering heavy clay soils to prevent root rot!
Signs of under- or overwatering
- Underwatering makes carrots tough, woody, or bitter. Dry soil slows their growth, resulting in small or stunted plants. Drooping leaves or wilted foliage may also hint at moisture stress.
- Check the soil by feeling it; if it’s dry below the surface, water your plants.
- Overwatering can lead to root rot and stunt growth. Yellowing or drooping leaves often indicate poor drainage or excessive water. Cracked roots and hollow centers come from inconsistent watering.
- Waterlogged soil invites fungal diseases, such as carrot rust. Keep soil evenly moist to avoid these problems.
Maintaining consistent moisture
- Keep soil evenly moist by watering deeply and regularly. Use mulch to retain soil moisture and prevent it from drying out too quickly. Drip irrigation or soaker hoses are best suited for steady, even watering.
- Check containers or raised beds daily during hot weather, as they dry out more quickly.
- Water seedlings more often, as their roots are shallow. Mature carrots need deeper watering to encourage strong root growth. Never let the soil completely dry out; this can cause carrots to become tough or cracked.
- Adjust your schedule based on weather changes to keep the ground consistently damp but not soggy.
Fertilizing Carrots the Right Way
Feed your carrots lightly to avoid stunted growth. Learn the best methods to help them thrive.
Avoiding excess nitrogen
Too much nitrogen causes leafy tops but weak roots. Carrots need a balanced diet of nutrients for strong growth. Use low-nitrogen fertilizers, or rely on composted soil instead. Avoid fresh manure, as it can add excess nitrogen and cause forked roots.
Apply moderate nitrogen only when the carrot greens reach approximately 4 inches in height. Pairing it with potassium promotes root development and helps prevent issues such as pale yellow skin or multiple roots.
Overfertilizing invites pests such as carrot weevils and diseases that can further harm your crop!
Timing and method
Fertilize carrots 5–6 weeks after sowing or when the greens reach approximately 4 inches in height. Apply fertilizer as a side-dress, keeping it away from the roots to avoid damage.
If growing in containers, use a diluted, low-nitrogen product every 3–4 weeks. Water immediately after fertilizing to allow nutrients to soak into the soil. Skip late-season fertilization; this can delay maturity and hurt your harvest.
Organic vs. synthetic options
Use well-rotted compost or bone meal for organic fertilization. These improve soil structure and support the growth of beneficial microbes. Composted leaves are another excellent option, as they keep the soil moist while boosting its nutrients.
Avoid using fresh manure to deter pests.
Synthetic fertilizers work faster, but choose low-nitrogen options. Too much nitrogen can lead to poor carrot growth. Follow the application rates on the label to prevent soil imbalances.
A soil test can help you determine whether to add organic matter or use synthetic fertilizers before planting.
Mulching and Weed Control
Mulching keeps the soil moist and stops weeds from growing. Use natural materials like straw or wood chips for better control and healthier plants.
Using mulch
Apply 1–2 inches of organic mulch, such as shredded leaves or straw, after sowing the seeds. This helps keep the soil moist and prevents surface crusting. It also maintains steady temperatures during germination, resulting in a faster start.
Make sure seedlings have emerged first so they don’t get smothered.
After frost, add 18 inches of shredded leaves to the ground to overwinter carrots. Mulching prevents sunscald on carrot shoulders and reduces weed competition for nutrients. Organic mulches slowly break down, returning nutrients to the soil while improving drainage.
Remove old mulch in spring to allow the soil to warm up quickly, promoting healthy growth.
Safe hand-weeding
Pull weeds by hand, gently to avoid disturbing your carrots’ shallow roots. Use small tools or fingers instead of hoes to protect the delicate taproots.
Weeding works best after rain or watering when the soil is soft. Remove weeds early, especially during the first month, before they flower and spread seeds. Adding mulch can help reduce weed growth and lower the frequency of manual weeding.
Protecting Carrots from Pests and Diseases
Carrots can face threats like carrot rust flies and flea beetles. Monitor for damage early to protect your crop.
Common pests
Carrot rust flies lay eggs in the soil. Their larvae tunnel through roots, causing damage. Carrot weevils attack carrots and related plants. They survive winter in garden debris, so cleaning up helps.
Flea beetles chew small holes in leaves. Plant radishes nearby to distract them as a trap crop.
Leafhoppers spread Aster Yellow Disease. They also cause stippling on leaves. Root-knot nematodes create galls on roots and stunt growth. Plant marigolds close by to repel them. Armyworms munch on carrot tops.
Handpick them or use BT (a natural pesticide). Wireworms, the larvae of click beetles, live in soil for up to six years. These pests make holes in roots and are tough to remove.
Disease prevention
Rotate crops every 3 to 4 years to avoid nematode and disease buildup. Avoid planting carrots after nightshades, such as tomatoes or potatoes, as this increases the risk of nematode infestation.
Use disease-resistant carrot varieties to combat black root rot and other root diseases. Keep your garden clean by removing weeds and crop debris after harvest. Well-draining soil helps prevent root rot diseases from taking hold.
Floating row covers also keep pests, such as carrot rust flies, away from plants.
Organic pest control
Floating row covers block pests, such as carrot flies, and prevent disease from reaching your plants. Early planting helps dodge the carrot rust fly’s egg-laying season, protecting young roots.
Clear any fallen plant debris to stop overwintering pests.
Use trap crops, such as radishes, to attract flea beetles away from carrots. Interplant with French marigolds to naturally repel root-knot nematodes. Organic mulch reduces weed pressure, keeps soil moist, and shields roots from sunlight.
Consider adding beneficial nematodes to effectively control carrot weevils.
Caring for Carrots Through the Seasons
Carrots require care as the weather changes to maintain their health. Protect them from frost or heat, and plan for steady growth throughout the year.
Growing in different seasons
Plant carrot seeds in spring for a summer harvest. For fall crops, sow seeds in late summer. Frost brings out natural sugars, making the fruit sweeter after harvest. Late-harvested carrots often taste better because of this.
Provide 1 inch of water weekly during the growing season to maintain soil moisture. Overwintering carrots can also work if mild frost occurs; they grow slowly but remain fresh underground.
Rotate your crop each season with legumes or onions to help prevent pests, such as carrot fly larvae, and soilborne diseases.
Frost and heat protection
Carrots taste sweeter after exposure to a light frost. Use floating row covers to shield young plants from early frost and insects. In cold weather, apply a thick layer of mulch to protect the roots from freezing.
During heatwaves, carrots may struggle. Provide shade during extreme sunlight, as they prefer cooler soil. Consistent moisture reduces stress and helps keep seedlings healthy in fluctuating temperatures.
Succession planting tips
Plant carrot seeds every three weeks. This gives you a steady harvest throughout the growing season. For fall crops, sow seeds about 10 weeks before your first frost date.
Try using different varieties for fun colors and sizes. Smaller carrots can be ready in as little as two months after sowing. If pests are not an issue and the ground won’t freeze, leave some carrots in the soil for later harvesting.
Harvesting Carrots
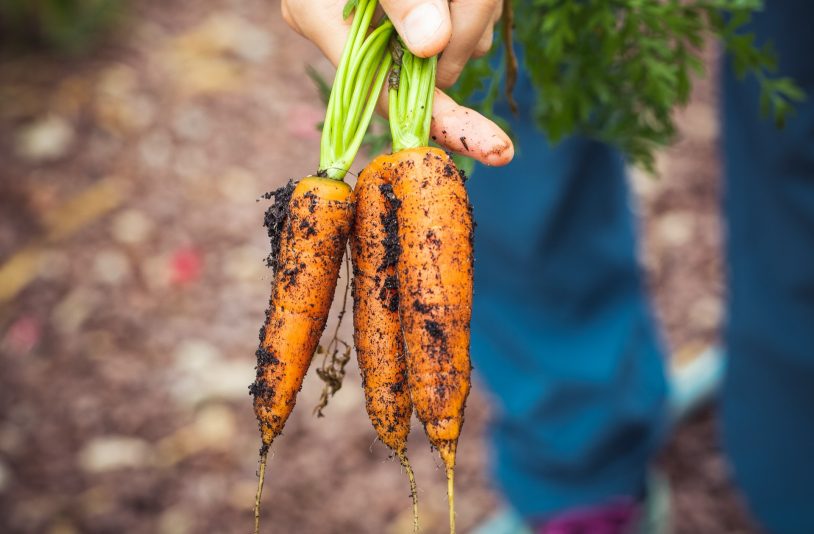
Pull your carrots when they are bright, firm, and the tops are just peeking out of the soil. It’s like finding treasure!
Signs of readiness
Carrots are ready to harvest once their root neck is about 1 inch wide. Check the tops peeking out of the soil, as they give clues about size and maturity. Smaller carrots, around 3 to 4 inches long, often taste sweeter and can be harvested for better flavor.
Some varieties mature in as little as 60 days, while others may take up to 90 days. Looser soil around the roots can also signal readiness. Harvest them within three weeks of reaching full growth for fresh texture and top-quality flavor.
Regularly monitor their progress to ensure you don’t miss the perfect harvesting window.
Harvesting technique
Gently pull the carrots by their tops once they are ready. If the tops break, loosen the soil first with a garden fork to avoid damaging the roots. Harvest smaller ones early, about the size of your thumb, for a sweeter taste.
Pick within three weeks of maturity for the best flavor. To maintain a steady supply, stagger your harvest over several weeks. After a frost, roots will taste sweeter because they store more sugar.
Tips for better texture and flavor
Harvest carrots within three weeks of reaching maturity. This helps keep their texture crisp and flavor sweet. Smaller carrots, around 1 inch in diameter, usually taste better than larger ones.
Ensure the soil is loose and well-draining to prevent misshapen roots. Consistent moisture during growth reduces plant stress, improving flavor. Mulching retains water and protects roots, resulting in a smoother texture.
Wait until after frost to harvest, as cold temperatures naturally boost sweetness.
Storing Carrots After Harvest
Keep your carrots fresh by choosing the correct storage method. Proper care prevents spoilage and keeps them tasty for weeks or even months!
Short-term storage
Trim carrot tops to about one inch above the root. Rinse them under cold water to remove dirt, then air-dry completely. Place cleaned carrots in airtight plastic bags before storing them in your refrigerator.
This keeps them fresh for one to two weeks.
For optimal results, store them in tubs of moist sand or dry sawdust in a superb, dry location. This method helps maintain moisture and prevents limpness caused by refrigeration. Do not wash carrots before storage if planning to use this approach.
If your soil is pest-free and not frozen, you can also leave carrots in the ground temporarily.
Long-term storage methods
Store carrots in moist sand or dry sawdust to keep them fresh for months. Cut the foliage to approximately 1/2 inch in length before storage to prevent moisture loss. Place the carrots in a cool, dark spot, such as a root cellar or basement.
Keep the temperature between 32°F and 40°F with high humidity.
Check your stored carrots regularly and remove any that start to rot. This helps stop spoilage from spreading to healthy ones. Do not wash the carrots before storing; dirt helps protect them during storage.
Moist sand storage is especially suitable for gardeners seeking to extend the shelf life of their harvest naturally.
Washing vs. storing dirty
Washing carrots before storage can shorten their life. Water can accumulate in the roots, leading to mold and rot. Instead, keep them dirty to avoid moisture problems. Trim the tops, leaving about 1/2 inch of foliage.
This helps reduce decay and keeps them fresh longer.
For more extended storage, place unwashed carrots in moist sand or dry sawdust. Keep them in a cool, dark place, such as a cellar. Scrub and dry only when ready to use. Gentle handling is crucial in preventing damage and maintaining your crop in optimal condition.
Can You Regrow Carrots from Tops?
You can regrow carrot greens from the tops. It’s a fun way to reuse scraps! While you won’t get new carrots, it’s perfect for small indoor projects or teaching kids about gardening.
Regrowing carrot greens
Cut the tops off the harvested carrots and place them in a shallow bowl. Add enough water to cover only half of the base. Position the bowl on a sunny windowsill. Change the water daily to keep it fresh.
New carrot greens will sprout in a few days. These greens won’t grow new taproots, but they can be used as herbs in soups or salads. Transplant the shoots into soil for longer growth.
Keep the tops uncovered during planting to prevent rot.
Expected results
You will see green leafy growth from carrot tops when they are placed in water. Although no new edible roots form, these greens are perfect for dishes such as pesto. Keep the tops partially covered with water and replace the water daily for best results.
With proper care, you can use this for indoor gardening. Place them in a sunny spot to get healthy foliage while learning about plant regrowth.
Indoor growing projects
Carrot tops can be regrown indoors to produce edible greens. Use a shallow tray or container filled with water. Place the cut tops of carrots in it, ensuring they get 6-8 hours of sunlight daily.
A sunny windowsill works well, but you can use grow lights for extra support.
Keep the water clean and change it regularly to prevent bacterial or mold growth. Greens will sprout within days, providing fresh additions to salads or as garnishes. This method is ideal for small spaces and allows you to enjoy results without needing soil or large containers.
Troubleshooting Common Carrot Problems
Troubleshoot carrot issues like poor growth, odd shapes, or flavor problems, and find simple fixes to keep your crop thriving!
Forked or misshapen carrots
Forked or misshapen carrots often come from heavy or compact soil. Carrots grow best in sandy or loamy soil that drains well. Rocks, clumps, and complex layers impede root growth, causing roots to split or bend.
Removing these before planting helps prevent this problem.
Overcrowding is another cause. If seedlings grow too close together, their roots compete for space and nutrients. Thin the plants early to give them enough room. Avoid using too much nitrogen fertilizer.
It promotes leafy growth instead of healthy roots. Pests like root-knot nematodes and wireworms also damage carrots, causing deformities. Check your soil and use organic pest control methods to keep them away.
Poor germination
Poor germination occurs when the soil temperature is too high. Maintain a temperature between 45°F and 75°F for optimal results. Temperatures above 75°F can stop seeds from sprouting. Use a soil thermometer to check this.
Moisture is key during the 5 to 21-day germination period. Water the soil regularly, but avoid overwatering, as this can cause the soil to become soggy. Loose, well-draining soil with a pH between 6.0 and 6.8 is ideal. Avoid heavy nitrogen fertilizers, as they harm root growth.
Thinning seedlings to about 2 to 4 inches apart reduces competition and improves success rates. Watch for pests such as carrot rust flies, which can damage early sprouts.
Unpleasant taste
Carrots can taste bitter or off if grown in compact, heavy soil. Loose, well-drained topsoil helps roots grow properly and improves flavor. Use a garden fork to remove rocks and clumps before planting.
Excessive nitrogen produces leafy tops but reduces root flavor. Stick to organic fertilizers with balanced nutrients rather than relying too heavily on synthetic options. Additionally, high heat during spring or summer can cause fibrous roots that lack sweetness.
Plant during cool seasons for the best results.
In Summary
Growing carrots can be fun and rewarding. With the right variety, soil, and care, you’ll enjoy fresh and tasty roots. Pay close attention to watering, sunlight, and pests for a healthy crop.
Try different colors or shapes to add a unique touch to your garden! Start planting your carrot seeds today!