Share
Share Facebook
  Twitter
  LinkedIn
  Pinterest
  Email
Email 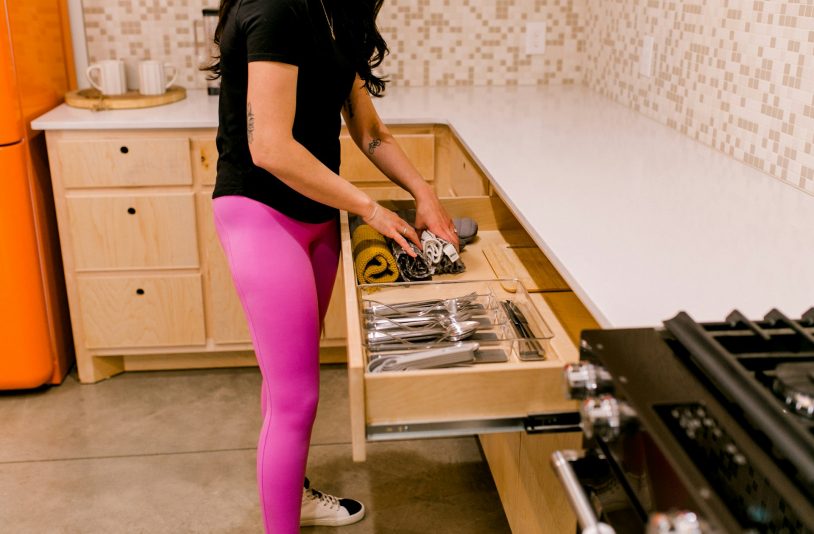
Packing up a kitchen can be one of the more frustrating parts of moving. There are dishes to wrap, appliances to pack, food to sort through, and lots of small items that somehow seem to be everywhere.
The best way is to pack one area at a time instead of trying to do the whole kitchen at once. This guide will give you simple tips to pack your kitchen without adding extra stress.
Get ready to make packing easier!
Jump to Section [Hide]
- Declutter Before You Start Packing
- Gather Kitchen Packing Supplies
- Set Aside Kitchen Essentials
- Organize Items Before Packing
- Pack Dishes and Glassware Safely
- Pack Pots, Pans, and Cookware
- Pack Utensils and Kitchen Tools
- Prepare Small Kitchen Appliances
- Prepare Large Kitchen Appliances
- Pack Pantry Food and Supplies
- Pack Cleaning Products Carefully
- Prepare Kitchen Furniture
- Label and Organize Kitchen Boxes
1. Declutter Before You Start Packing
Sort through every cabinet and drawer. Take out items you have not used in the past 12 months. Toss chipped crockery or recycle it. Donate unused appliances to lighten your load.
Check your pantry for canned goods and non-perishables. Plan meals to use them up before moving, saving space and money. Pack only fresh, useful kitchenware like tableware, cutlery, or cookware you’ll use daily.
2. Gather Kitchen Packing Supplies
Start with 15–20 boxes for a big kitchen or 10–15 for a small one. Use strong packing tape and double-tape box bottoms. Get at least 2–3 rolls of packing paper to protect items.
Avoid newspaper; it leaves stains.
Use cling wrap for sealing loose parts like lids or utensils together. Grab permanent markers to label everything clearly, especially fragile things. Specialty dividers help keep glasses safe but aren’t required.
Choose large boxes for light stuff and small ones for heavy food cans or pantry items.
3. Set Aside Kitchen Essentials
Pack the must-have kitchen gear you’ll need right away.
Keep daily cooking tools accessible
Set aside a frying pan, medium pot, wooden spoon, and bread knife. These cover basic cooking until the last day. Also, keep one plate, bowl, glass, and mug for each person.
Store these items in one cupboard or drawer. Use a medium box to pack them the night before moving. This keeps your kitchen functional without too much clutter. A kettle or toaster can also be handy if you use them daily.
Pack a moving day essentials box
Pack two essentials boxes for moving day. The morning box should hold coffee or tea supplies, two mugs, a pot, a cutting board, and a sharp knife. Also add dish soap, paper towels, and trash bags.
For the evening box, pack comfort food, spices like salt and pepper, reusable water bottles, vitamins, and dessert. Include foil or parchment paper.
Label these boxes “Kitchen Priority” with “Morning” or “Evening” notes. Keep them open until the last hour to add chargers or other items you might need last minute. Store cold foods in a cooler with ice packs to keep them safe during travel.
Separate important medications and supplies
Keep medications and critical supplies apart from other kitchen items. Use a clearly labeled container marked “Medications & Critical Supplies” for easy access. Double-check medication expiration dates and throw away any that are expired.
Carry essential medications with you, not in the moving truck. If you have kids or pets, pack their daily needs like food, medicine, or supplies separately too. Include a small first-aid kit and emergency contacts list in this bag for safety.
4. Organize Items Before Packing
Sort your kitchen gear early—it’ll save you time and stress. Keep things tidy to make packing smoother!
Group similar kitchen items together
Pack similar items in the same boxes. Keep pots and pans together, bundle utensils by type, and store pantry goods separately from fragile dishes. This method reduces breakage and keeps things organized.
Place heavy items like cast iron cookware on the bottom of boxes. Stack lighter items on top to avoid damage. Label boxes clearly for easy unpacking later!
Create an inventory of valuables
Check every cabinet and drawer. Say the items out loud as you go. Write down each item on a list for tracking later. This helps manage your boxes better during unpacking.
Make a special list for high-value kitchen gear, like knives or stand mixers. Take photos of these items. Save them online for safety or insurance claims.
Pack rarely used items first
Start packing appliances, tools, and dishes you don’t use often. Focus on baking supplies, holiday plates, or food processors. These items can stay packed for weeks without affecting daily cooking.
Packing these early frees up cupboard space. You’ll have room to sort kitchen gear like pantry goods and furniture later. Label boxes clearly with painter’s tape to keep things organized.
5. Pack Dishes and Glassware Safely
Fragile kitchen items need extra care to avoid breakage. Use smart packing tricks to keep your dishes and glassware safe during the move.
Wrap each item individually
Wrap each dish and bowl in packing paper. Use enough to cover every part. Avoid newspaper, as the ink can stain your kitchen gear. Protect fragile items like glasses or china with bubble wrap or thick padding.
For irregular shapes, add extra cushioning using towels or clothes. This prevents breakage during transport. Fill empty spaces in boxes to keep everything snug and safe during the move.
Pack plates vertically inside boxes
Place plates on their edges inside medium boxes. This way, they are stronger and less likely to break under pressure.
Wrap four plates together using bubble wrap or cling wrap for extra safety. Line the box with packing paper and add crumpled paper at the bottom for cushioning. If possible, use dividers between groups of plates for added protection.
Avoid stacking them flat, as this increases the risk of cracks.
Use dividers for glasses and stemware
Use cardboard dividers to separate fragile glasses. Wrap each glass or piece of stemware with packing paper first. This stops them from touching and breaking. Pick small boxes to limit weight and reduce the risk of crushing.
Stand stemware upright inside the box, not on their sides. Fill empty gaps with crumpled paper for extra support. Avoid stacking heavy items on top of these boxes. Mark them as “fragile” so movers handle them carefully!
Fill empty spaces inside boxes
Fill all gaps inside boxes to stop items from shifting. Use packing paper, bubble wrap, or even towels. This helps keep your kitchen gear safe during the move. Place lighter things on top of heavier ones to avoid crushing.
Before sealing a box, pack it firmly with paper to add stability. Avoid overfilling so boxes don’t tip or tear. A well-packed box stays intact and protects its contents better in transit.
Prevent movement inside for extra safety while moving!
6. Pack Pots, Pans, and Cookware
Start with the heavy stuff—pans and cast iron. Stack wisely to save space and keep things safe.
Nest pots and pans together
Stack pots and pans inside each other to save space. Wrap each item separately with paper or bubble wrap before stacking.
Place heavier cookware at the bottom of medium boxes, lighter items on top. Add packing paper between nested pieces for cushioning. Use lidded pots to store utensils or silverware, but tape the lids shut first.
Don’t overfill the box to keep it manageable for moving day!
Wrap lids and sharp edges
Wrap each lid in paper or bubble wrap to avoid scratches. Use tape to secure the wrapping so it stays in place during the move.
Cover sharp edges with towels, packing paper, or bubble wrap for safety. Secure them tightly using rubber bands or ties. Label boxes with sharp items clearly to prevent accidents while unpacking.
Keep these separate from soft kitchen gear like napkins or cloths for better protection.
Protect cast iron cookware carefully
Pack cast iron cookware in small, sturdy boxes with double layers of cardboard. Use reinforced boxes to handle the heavy weight safely. Line the box with towels or folded paper to absorb shock.
Separate each piece with cardboard or kitchen towels to avoid scratches. Apply a thin coat of oil on the surface to prevent rusting, then wrap it in paper. Mark these boxes as “heavy” and keep them low in stacks away from fragile items like glassware.
7. Pack Utensils and Kitchen Tools
Group your tools by type to make unpacking simpler. Keep sharp items secure to avoid accidents.
Bundle similar utensils together
Wrap spoons, forks, and knives into small bundles of 4–6. Use rubber bands or ties to hold them tight. This helps keep things organized and easy to unpack later.
Place heavier utensils at the bottom of each bundle for balance. Wrap bundles in cling wrap to prevent movement during transport. For quick packing, secure your whole cutlery tray with plastic wrap instead of removing each piece.
Secure knives and sharp tools
Place knives and sharp tools in a strong container. Wrap each knife in a towel and secure it with rubber bands to cover the blade. Use bubble wrap if towels aren’t enough.
Pack them in a cutlery box for safety. Keep sharp items near the top of the box for easy access when unpacking. Label these boxes clearly as “sharp tools” or “fragile.” This will help prevent injuries during moving-day chaos.
Organize small gadgets in containers
Use small containers or zip-top freezer bags to store gadgets. Group similar items together, like timers and peelers, for better organization. Label each container clearly with its contents.
This helps you find things quickly after the move.
Keep these containers away from heavy pots or sharp tools. Add soft padding inside to protect fragile pieces from breaking. Pack gadgets in the same box as utensils to save space. Do not overfill the containers; too much weight can damage the items inside.
Always pack daily-use tools where you can find them easily later!
8. Prepare Small Kitchen Appliances
Clean each appliance well—then take steps to keep cords, parts, and accessories secure during the move.
Clean and dry appliances completely
Wipe all appliances, cords, and attachments with a damp cloth. Remove crumbs and food residue to prevent pests during the move. Disassemble removable parts like blades or trays and wash them separately.
Make sure every appliance is fully dry before packing. Moisture inside can cause mold or bad smells later. Dry each part well, including hidden corners and crevices. This step keeps your kitchen gear ready for use after unpacking!
Remove detachable appliance parts
Remove any detachable parts from your appliances. This includes blades, attachments, or trays. Put these small items in labeled zip bags. Tape the bags to their matching appliance or place them inside your moving day essentials box.
Use bubble wrap for fragile pieces like glass blender jars or stand mixer attachments. Keep all parts together so reassembling is easy later. Store everything in clear bags or folders for quick access at your new home!
Secure cords and loose accessories
Wrap cords neatly and secure them with twist ties or Velcro straps. Tape the cords to the appliance to stop tangling during the move.
Store loose accessories in labeled bags or small containers. Keep all parts, like blender blades or attachments, in one box with the main appliance. Use original packing materials if you have them for added safety.
Bundle smaller items together to avoid losing them while unpacking later.
Use original boxes when available
Use original boxes for appliances if you have them. They fit perfectly and protect items better during the move. The foam inserts also keep everything secure. This reduces damage risks.
If you don’t have the original packaging, use strong padded boxes instead. Double-tape the bottoms to handle heavy loads. Place heavier gear at the bottom of stacks for safety.
9. Prepare Large Kitchen Appliances
Get your big appliances ready early. Make sure they are safe and clean for the move!
Empty refrigerators and freezers
Empty your fridge and freezer completely before moving. Remove all food, shelves, and drawers to prevent spills or odors. Movers won’t take perishable food like milk, eggs, or frozen meat.
Store any needed items in a cooler with ice packs for the move. Reduce grocery shopping the week before leaving to avoid extra leftovers. This prevents mold and keeps appliances fresh during transit!
Defrost appliances before moving
Defrost large appliances like refrigerators and freezers at least 24 hours before your move. This prevents water leaks during transit. Remove ice trays, water trays, and any perishable items first.
Clean the inside thoroughly to avoid odors.
Leave appliance doors open after defrosting to let them air out completely. Make sure all compartments are dry to prevent mold or mildew. Movers can help disconnect and safely transport these heavy kitchen items.
Plan ahead for a smoother move!
Disconnect appliances safely
Turn off all power sources. Unplug electrical appliances to avoid shocks. For gas lines, only qualified professionals should disconnect them for safety. Shut off water and gas supply valves before removing hoses.
Carefully detach hoses and place them in labeled bags. Cap any open water or gas lines to prevent leaks during moving. Secure appliance cords with ties and keep them with the machine for easy setup later.
Label each part clearly for quick reassembly at your new home.
Secure doors and removable parts
Use painter’s tape to keep appliance doors shut during transport. This stops them from swinging open and causing damage.
Pack all removable parts, like knobs or handles, in labeled bags. Wrap edges with moving blankets for extra safety. Secure drawers with soft straps or bands to prevent sliding. Protect corners using pieces of cardboard to avoid scratches.
10. Pack Pantry Food and Supplies
Sort through your pantry and check for anything expired. Pack only what you’ll use or need—leave the rest behind!
Donate unwanted unopened food
Donate unopened, unwanted food to help others and lighten your load. Check your pantry for non-perishable items like canned goods or pasta that you won’t use soon. These are perfect for donation.
Place food in labeled boxes for easy separation. Contact local charities or arrange a pickup with organizations like Gentle Giant or similar services. This saves time while reducing waste during your move!
Pack canned goods in small boxes
Use small boxes to pack your canned goods. This keeps the weight manageable and helps prevent strain or breakage during the move. Place heavier cans at the bottom for balance, and line each box with packing paper for extra cushioning.
Do not overfill these boxes, as this increases tipping risks. Keep canned items separate from fragile or perishable foods to avoid damage. Clearly label the boxes as “canned goods,” so they stay organized during transport.
Seal opened packages securely
Seal opened bags or boxes with tape to prevent spills. Use zip-top bags or airtight containers for items like flour, sugar, or snacks. This keeps the food fresh and avoids a messy box.
Place liquids in plastic bags to stop leaks. Label all packages as “opened” so you know what to use first later. Fill empty box spaces with paper or towels to keep things steady during the move.
Avoid packing moving-restricted food items
Movers will not take perishables like milk, eggs, frozen goods, or meat. These items can spoil during transit. Dispose of them before moving day or donate usable ones to local charities.
Pack only non-perishables that won’t go bad. Use insulated bags or coolers if transporting food in your car. Check with your movers for specific restrictions on what you can bring.
This saves time and avoids issues later.
11. Pack Cleaning Products Carefully
Keep cleaning products separate to avoid spills.
Separate liquids from food items
Seal liquids like oils and vinegars in plastic wrap. This stops spills from ruining other items. Wrap liquid containers in plastic bags for extra safety.
Pack liquids upright in sturdy boxes to avoid leaks during the move. Do not pack them with food to prevent contamination if they spill. Discard perishable items to reduce waste.
Tighten lids and seal containers
Close lids tightly on all cleaning products. Check each container for leaks or loose caps. Use tape to secure lids if needed. This stops spills during the move.
Place sealed containers upright in boxes. Wrap them with bubble wrap or towels for safety. Keep these items away from food supplies to prevent contamination. Label the box clearly as “Cleaning Products.”
Check mover restrictions on chemicals
Some moving companies won’t take hazardous cleaning products. They have safety rules to protect the workers and your belongings. Check which items are restricted before packing them.
This can include bleach, ammonia, or pesticides.
Call your mover for a list of banned chemicals. Even unopened bottles may not be allowed. If in doubt, use up these items or give them away before the move. It’s better than packing something only to have it rejected later!
12. Prepare Kitchen Furniture
Take apart furniture to make it easier to move. Protect every piece from scratches and damage during the process.
Disassemble tables and chairs
Take apart tables and chairs to save space. Remove legs from tables first. Store screws, bolts, and small parts in labeled plastic bags. Tape these bags to the furniture for easy access later.
Wrap wooden pieces with blankets or packing paper. Pack table leaves separately, and label them clearly. Group similar parts together to make reassembly easier. Take photos or keep instructions handy if needed.
Keep hardware in labeled bags
Store all screws, bolts, and small parts in zip bags. Label each bag clearly with the furniture name or part it goes with.
Make an inventory list to track every bag. This prevents loss and speeds up unpacking. Labeled bags save time by helping you find what you need right away.
Protect surfaces from scratches
Use felt pads on chair feet to stop floor scratches during moving. Wrap dining chairs in moving blankets for extra protection. Secure the blankets with tape or straps.
For tables, add edge protectors and soft wraps to avoid damage. Use packing paper instead of newspapers when wrapping cookware or utensils to keep surfaces safe from scratches. Avoid stacking items without cushioning between them.
13. Label and Organize Kitchen Boxes
Labeling keeps your move smooth and stress-free. Write clear labels so you can find things quickly in your new home.
Label boxes by contents
Write the room name and zone on the top and side of each box. Use a marker for clear labeling. Place a notecard inside with the first five items listed to help you find things fast.
Mark fragile boxes on two sides, adding “top” so movers handle them right.
Highlight priority boxes as “Kitchen Priority” for morning or evening use in the first 48 hours. Keep an inventory list to track everything during the move. This keeps packing smooth and unpacking even easier!
Mark fragile boxes clearly
Label fragile boxes on at least two sides. Use bold markers to write “Fragile” and add arrows showing the top of the box.
Add a note card inside listing five key items for quick access. Write “Kitchen Priority” on essential boxes to make unpacking easier later.
Note boxes needed immediately
Mark boxes for immediate use with bold labels. Write “Essentials” or “Use First” on these. Keep daily cooking items, medications, and cleaning tools in these boxes.
Create a list of what’s inside each one. Number the boxes to match your inventory sheet. This helps you find kitchen gear fast when unpacking begins.
Keep heavy boxes manageable
Pack heavy kitchen items in small, strong boxes. Use double-layered cardboard for better durability. This helps prevent the box from tearing or breaking during the move.
Label these boxes as “heavy.” Stack them at the bottom to avoid crushing lighter items. Avoid overpacking. Too much weight can make a box hard to lift and risky to handle. Keep each box easy to carry for safety and comfort on moving day.
14. Prepare the Kitchen Before Leaving
Check every corner to make sure you don’t leave anything behind. Clear out and clean appliances for a fresh start in your new home.
Check cabinets and drawers
Inspect every cabinet and drawer thoroughly. Make a list of what you find to track items as you pack. Remove any loose knobs or handles from drawers. Put them in labeled bags for easy reassembly later.
Use painter’s tape to secure cabinet and drawer doors shut. This keeps them from swinging open during transport. Double-check each corner so you don’t leave anything behind!
Empty and clean appliances
Empty all appliances before packing. Remove crumbs, spills, and leftover food. This keeps pests away during the move. Wipe down each appliance with a damp cloth to remove grease or dust.
Refrigerators and freezers need extra care. Empty them completely and defrost at least 24 hours before moving day. Dry the inside thoroughly to avoid leaks in transit.
Dispose of remaining perishables
Use up as much perishable food as you can before the move. Toss any unfinished items like dairy, meat, and leftovers to avoid messes or bad odors.
Movers do not take perishables for safety reasons. Pack remaining essentials like butter or drinks in a cooler in your car. Get rid of old oils and spices you haven’t used in a year.
Complete a final kitchen walkthrough
Check every cabinet and drawer. Make sure nothing is left behind. Say items out loud as you inspect, like “plates” or “spices,” to stay focused. Sort what hasn’t been used in a year for donation or disposal.
Create staging spaces for different things. Place daily dishes in one spot, fragile items in another, and heavy appliances somewhere safe. Clean everything before packing to avoid crumbs and messes later on.
Label boxes clearly with room names and details for easy unpacking later!